filmov
tv
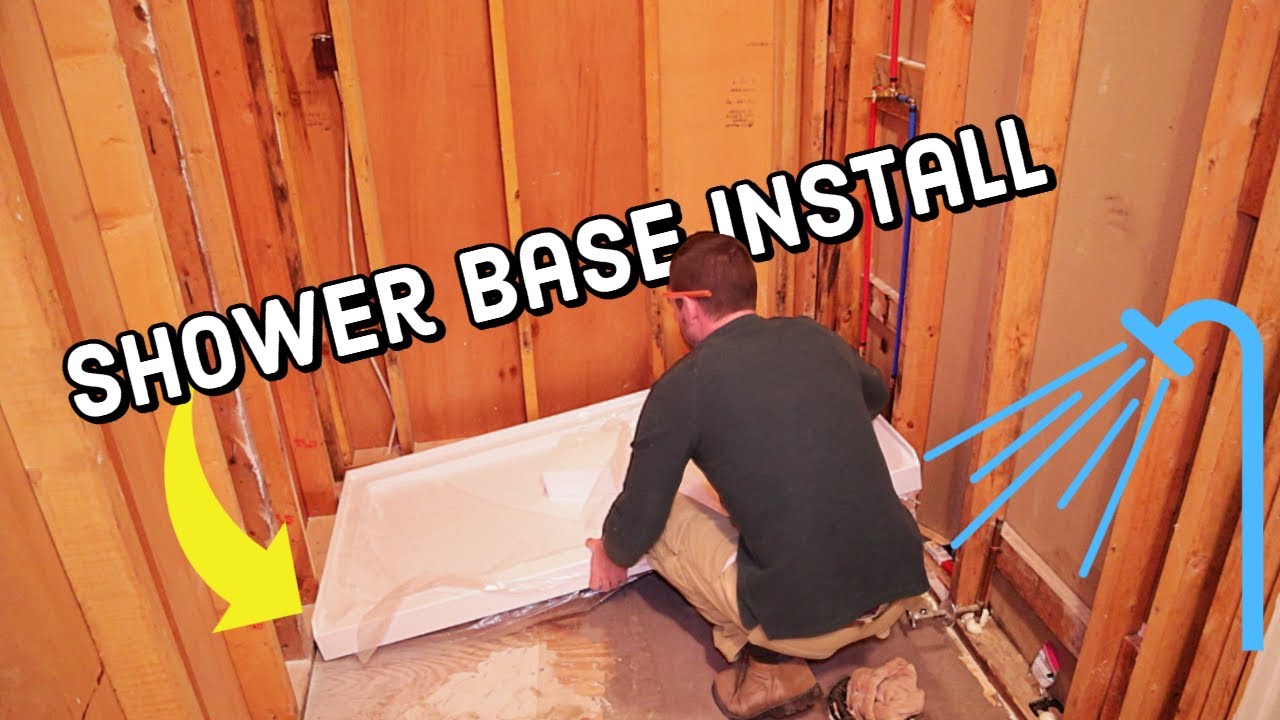
How to Install a DreamLine Shower Base With Oatey Drain
Показать описание
This is how to install a DreamLine shower base with an Oatey drain video and is exactly what the title says it is. I'll go step by step on how to install this shower pan and include some of my tips for a leak-proof system you probably haven't seen yet.
Additionally, I'll go through the Oatey 2" Shower Drain installation as well - I mean, it is part of the shower base install after all, but it's really hard to find information on this online so I thought I'd provide it for you.
This whole process is actually quite simple:
1) dry fit the pan and level it with some wooden shims
2) mark on the studs the height of the tub around all 3 sides
3) remove pan and lay down some mortar
4) add pan back on and level it with your stud markings on the wall
5) set something heavy on it and let it sit several hours
6) watch the video for the in between details!
Thank you so much for watching. If you have any cool tips, tricks, or concerns, place them in the comments below and let us know how you install a shower base.
-----------------------------------------
Tools Used:
⚒️⚙️🗜️🔦📐🔧🔨
Mortar Mixer: Home Improvement Store. Just regular concrete mix.
Stainless Steel Screws: Home Improvement Store.
#DreamLine #ShowerPan #HowTo
***********************************
DON'T CLICK THIS:
 0:09:50
How To Install a DreamLine Infinity-Z Shower Door | DreamLine Shower Door Installation Tutorial
 0:20:11
How to Install a DreamLine Shower
 0:12:16
How To Install a DreamLine Unidoor Plus Swing Shower Door | DreamLine Installation Tutorial
 0:08:29
How to Install a Dreamline Sliding Glass Shower Door | DIY | Tutorial
 0:08:35
How To Install A Dreamline Shower Base With A Brass Drain! 3 Key Steps You Cannot Overlook!
 0:08:58
How to Install a Fixed Glass Shower Panel | DreamLine
 0:11:57
How to Install a DreamLine Shower Base With Oatey Drain
 0:21:07
How To Install A Shower Door - FRAMELESS Glass DreamLine (MODERN LOOK)
 0:13:09
How To Install a DreamLine Unidoor Shower Door with Glass Shelves | DreamLine Installation Tutorial
 0:03:12
HOW TO INSTALL A SHOWER BASE (DREAMLINE)
![[Sponsored] Mr. Handyman:](https://i.ytimg.com/vi/zN86SMfuqZE/hqdefault.jpg) 0:01:33
0:01:33
[Sponsored] Mr. Handyman: Installing a Dream Line Shower Door
 0:22:04
How to install glass shower doors on porcelain tile with tips , Dreamline Encore
 0:12:32
How To Install a DreamLine Unidoor Toulon Swing Shower Door | DreamLine Installation Tutorial
 0:10:12
How to Install: DreamLine Mirage-X Sliding Glass Shower Door
 0:12:53
How To Install a DreamLine Unidoor Shower Door with Support Arm | DreamLine Installation Tutorial
 0:01:01
Part 12 Condo Reno Installing a Dreamline Enigma XO shower door! DIY shower door! Dreamlineshower
 0:14:46
How To Install a Sliding Glass Shower Door Tutorial | DreamLine Enigma-XO Shower Door
 0:14:08
How To Install a DreamLine Unidoor-LS Frameless Swing Shower Door | DreamLine Installation Tutorial
 0:19:22
Dreamline Essence Double Sliding Glass Shower Doors
 0:15:17
How to Install: DreamLine Unidoor-X Swing Shower Door (with 6-inch Hinge Panel)
 0:01:00
Dreamline Shower Door Time-lapse install! Victorias bathroom makeover! Small bathroom reno!
 0:15:43
How to Install a Semi Frameless Glass Shower Door
 0:14:54
How to install a glass shower door Dream line enigma x sparkle
 0:17:10
DREAMLINE SHOWER DOORS PRISM 36” frameless shower doors
Комментарии