How-To Tuesday: Arduino 101 potentiometers and servos

preview_player
Показать описание

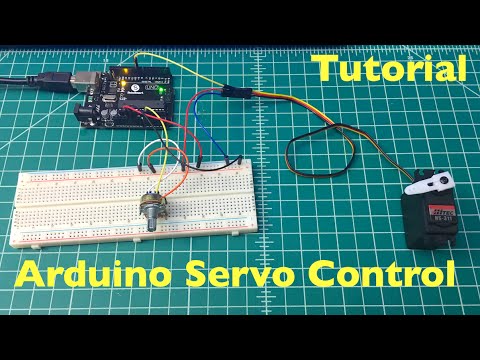
This is the 3rd installment of my Aduino How-To Tuesdays. This week I am going to cover using another basic part, the potentiometer. I will also cover connecting a servo to the Arduino. Servos can be hard to control, but not with the Arduino! That's just another reason why I love this little micro-controller.
Рекомендации по теме
Комментарии
Автор

i would just like to say, you have made my life so much easier. im a visual learner, and reading about this stuff was twice as difficult for me. thanks for doing stuff like this. it makes a world of a difference

lindseyj
Автор

I like how this guy explains stuff really well, this video helped me understand the Arduino a little better

ScarredToons
Автор

Why has this received too many negative votes? as a 4th year engineering student I can tell you that this guys a legend and quite clearly knows what he's talking about.

Grow up people

newberrys
Автор

This video is in such incredibly HD that it looks better than my cable TV. Keep it up guys :-D

HLSDK
Автор

I just got my duemillanova :) it should come in the mail soon, but I couldn't afford stepper motors or drivers :( that's why I wanted it in the first place.

ossumguywill
Автор

You can use an XBee too. They are great! I will have a How-To XBee communications in the near future.

MAKE
Автор

this demonstration inspired me for my senior design!!

electrichotmatt
Автор

Very good video demonstration. At least you have great quality camera and shooting skills with good editing.

SeattleRingHunter
Автор

Please note:
Reversing the "map" entries will reverse the directions the servo moves
The way it is above turning the pot right turns the servo right
Rewriting it as "map(val, 0, 1023, 179, 0);"  will cause the servo to turn left when you move the pot to the right

loganv
Автор

Thanks, there will be more in the future.

MAKE
Автор

Dude your videos are juste great!! I didn't knew anything about Arduino and now I can control a motor and do many cool things with LEDS... Thank you! :D

DrDiablo
Автор

Thanks for this video.I recieved my Duemillanova last week and started with the blinking led. (haha, build in) Just to be sure i connected a external led. OK.
This was my next 'project' and all went more-or-less ok. Thumbs up!!
I'm slowly working my way to a airial camera with remote pan/tilt head etc. !!

RadioRon
Автор

in a sense the potentiometer does generate "varying signals"
depending on output voltage.

hopefully that answered some of your questions.

TheNinjutsu
Автор

The regulator on the Arduino board is rated at 250mA I believe...the actual atmega is rated at 40mA max. With that said the servo receives power from the 5V bus which has a max of 250mA, this means that the current used to power the servo is limited to 250mA. If you plan on using more than two servo's it would be best to probably supply 5V (or lower) from a seperate supply and the not from the board, because I think typical servo draw when rotating is about 100mA and like 5mA in standby.

CharedCollectorKid
Автор

Hey Minh Tran ill answer your questions for you.

Like he said in the video a potentiometer is a "variable resistor" you turn the knob and ohms are increased or decreased which then obviously changes the voltage. That being said the arduino picks up on what voltage passes though the specific pin. kinda like a multimeter. Using programming you can then manipulate what the arduino does with the information its collecting. You can then control output voltage to manipulate other components/motors.

TheNinjutsu
Автор

Yes, each potentiometer needs to be on a different analog input and each servo on a different output. You can then just have an array of input values and an array of servos all bound to the respective legs, the loop function then becomes a for loop, with the code in the original loop replaced with indices anytime you reference a servo or a value. You could also extend the servo class and add the value property and then get each object to update the servo by calling like servo.checkValue().

mbdxgdb
Автор

replace pot with a digi pot that constantly changes voltage (I'm thinking sine wave, but triangles could work too) and mount a laser on the servo to create a swirling laser display. Use multiple servos to do it in 2 dimensions

NikySportsPromotion
Автор

amazing. Still looks very complicated but really awesome

tuberoako
Автор

@mtdeezy Could be that you have them on input mode. Or that at some point they got shorted out and are now broken. But make sure that pinmode is set to OUTPUT.

Bizorke
Автор

you should look into "stepper motors"... You can salvage them out of old printers fairly easy for small projects. For anyhting with mass start looking into Nema 17, 23, 34. I use the nema 23 425oz to run my cnc machine so that is a lot of force. Hope that helps...

koncertLive