filmov
tv
How to Use a Biscuit Joiner | Woodworking
Показать описание
-
-
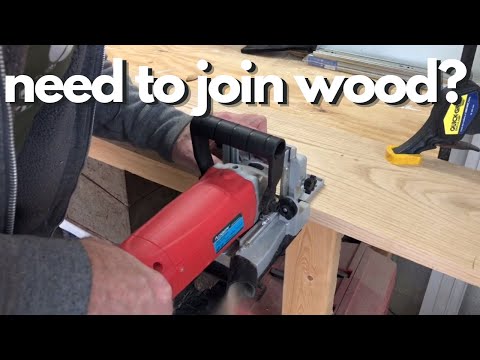
When you need to joint two pieces of wood end-to-face like this, there are not a lot of options for joinery if you don't want to see the joinery on the edge. You could do box joints or dovetails, any number of things, but you see all those joinery options. If you want the joinery to be totally hidden and only see the wood, a really good option is to use a biscuit joiner.
A biscuit joiner, the way it works is it makes slots in your wood where these biscuits get inserted. When glue gets on the biscuits, they expand and fill the slot that has been made for them, and they create a very tight joint and also reinforce the connection between the two pieces of wood. Now, one big advantage of this is when you're joining end grain to face grain.
End grain is a very weak part of the wood in terms of joinery, and putting a biscuit in there helps bump up the strength a little bit. So we're going to do these along the edge just to show an example. The way you lay out this kind of joinery is very simple. You're simply making two sets of lines where the biscuits are going to be in both pieces of wood.
Now, usually with biscuits, you put them every six inches or so if you're doing panels like this. So that's plenty. You can totally eyeball it. What's going to happen here now is we're going to make a slot in each one of these pieces of wood. In one piece, the slots will be in the face of the wood. In the other piece, they're going to be in the edge of the wood so that the slots match up and when they go together they'll be on top of each other like that.
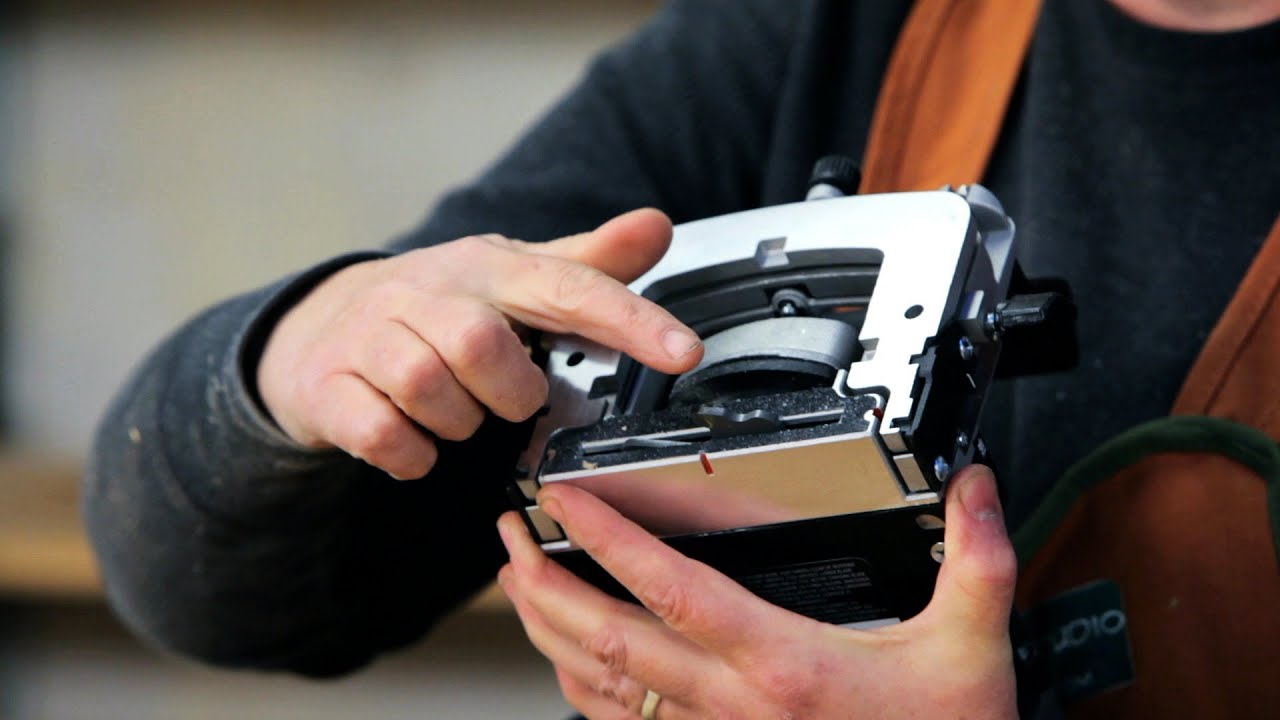
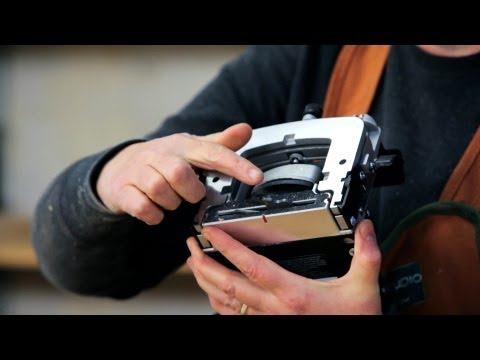
So the biscuit joiner itself, like I was saying, is a tool that just has a cutting edge inside of it. It's like a small circular saw. The blade spins around and you push it into the wood while it's running and it makes that slot. Pretty simple design, but it's more flexible than that. It can make slots of all different sizes. There's a number of different sizes of these biscuits available.
These are the biggest ones, size 20s. There are tens. There are zeros. There are FFs which are the very tiny ones. In order to set up the biscuit joiner properly you have to tell it which size biscuit you're using, and there's a dial on the side of this one that lets you dial in the biscuit size. Now all this is doing is basically modifying the biscuit joiner to expose more or less of the blade. So it just makes a deeper slot or a smaller slot depending on where it's being set here.
The next set of adjustments you're going to do is with this fence. Now, this biscuit joiner has a fence that can be set at 90 degrees like this, and anywhere in between zero and 90. So if you have biscuits that you need to do inside of a miter, you can set this at 45 degrees and drive those right in.
We're doing the simplest example, which is two flat pieces of wood going at 90 degrees, so we're just going to set this straight down at 90 and be done with that. The only other adjustment you need to do is adjust for the height of your material. The default height for these machines is usually three-quarters of an inch. They're usually being used with three-quarter-inch plywood.
This is a little bit thinner so we're going to have to lower this down. Now each one of these tools has a different method of doing this. This has a little dial on top that lowers the fence down. When we index off of this fence, what we're doing is re-centering the blade at a different place. So if I move the fence up, the blade is going to be effectively lower down in the wood.
So we're centering the blade in the wood by changing the height of this fence. Okay, now that we've got the height set, we're going to lock all this in place so it doesn't move, and we're ready to do our first biscuits in the edge of the wood. Now, if you're working with big pieces of wood, it's advisable to clamp them down. You don't want to actually, usually just hold this down with your hand. But we're working with such small pieces that I think I can manage it.
The way you do this is there are some marks on the machine that show you the center line of where the blade is. So those red marks are the index, and I'm lining those up with my pencil marks that I've made on the wood. One thing you should be aware of with this tool is when you turn it on, you don't want it to be making contact with the wood before it's on. It will grab the wood and flip it out of your hand.
So always turn the machine on fully, let it get up to speed, and then push it into the wood. Okay, so there's one slot. Okay, now the other one. Okay, there are our side slots, easy enough. Bring the fence back up and for safety purposes you always want to use the bisc
-
When you need to joint two pieces of wood end-to-face like this, there are not a lot of options for joinery if you don't want to see the joinery on the edge. You could do box joints or dovetails, any number of things, but you see all those joinery options. If you want the joinery to be totally hidden and only see the wood, a really good option is to use a biscuit joiner.
A biscuit joiner, the way it works is it makes slots in your wood where these biscuits get inserted. When glue gets on the biscuits, they expand and fill the slot that has been made for them, and they create a very tight joint and also reinforce the connection between the two pieces of wood. Now, one big advantage of this is when you're joining end grain to face grain.
End grain is a very weak part of the wood in terms of joinery, and putting a biscuit in there helps bump up the strength a little bit. So we're going to do these along the edge just to show an example. The way you lay out this kind of joinery is very simple. You're simply making two sets of lines where the biscuits are going to be in both pieces of wood.
Now, usually with biscuits, you put them every six inches or so if you're doing panels like this. So that's plenty. You can totally eyeball it. What's going to happen here now is we're going to make a slot in each one of these pieces of wood. In one piece, the slots will be in the face of the wood. In the other piece, they're going to be in the edge of the wood so that the slots match up and when they go together they'll be on top of each other like that.
So the biscuit joiner itself, like I was saying, is a tool that just has a cutting edge inside of it. It's like a small circular saw. The blade spins around and you push it into the wood while it's running and it makes that slot. Pretty simple design, but it's more flexible than that. It can make slots of all different sizes. There's a number of different sizes of these biscuits available.
These are the biggest ones, size 20s. There are tens. There are zeros. There are FFs which are the very tiny ones. In order to set up the biscuit joiner properly you have to tell it which size biscuit you're using, and there's a dial on the side of this one that lets you dial in the biscuit size. Now all this is doing is basically modifying the biscuit joiner to expose more or less of the blade. So it just makes a deeper slot or a smaller slot depending on where it's being set here.
The next set of adjustments you're going to do is with this fence. Now, this biscuit joiner has a fence that can be set at 90 degrees like this, and anywhere in between zero and 90. So if you have biscuits that you need to do inside of a miter, you can set this at 45 degrees and drive those right in.
We're doing the simplest example, which is two flat pieces of wood going at 90 degrees, so we're just going to set this straight down at 90 and be done with that. The only other adjustment you need to do is adjust for the height of your material. The default height for these machines is usually three-quarters of an inch. They're usually being used with three-quarter-inch plywood.
This is a little bit thinner so we're going to have to lower this down. Now each one of these tools has a different method of doing this. This has a little dial on top that lowers the fence down. When we index off of this fence, what we're doing is re-centering the blade at a different place. So if I move the fence up, the blade is going to be effectively lower down in the wood.
So we're centering the blade in the wood by changing the height of this fence. Okay, now that we've got the height set, we're going to lock all this in place so it doesn't move, and we're ready to do our first biscuits in the edge of the wood. Now, if you're working with big pieces of wood, it's advisable to clamp them down. You don't want to actually, usually just hold this down with your hand. But we're working with such small pieces that I think I can manage it.
The way you do this is there are some marks on the machine that show you the center line of where the blade is. So those red marks are the index, and I'm lining those up with my pencil marks that I've made on the wood. One thing you should be aware of with this tool is when you turn it on, you don't want it to be making contact with the wood before it's on. It will grab the wood and flip it out of your hand.
So always turn the machine on fully, let it get up to speed, and then push it into the wood. Okay, so there's one slot. Okay, now the other one. Okay, there are our side slots, easy enough. Bring the fence back up and for safety purposes you always want to use the bisc
 0:07:01
How to Use a Biscuit Joiner for Beginners
 0:04:11
How to use a biscuit joiner - so easy!
 0:05:00
Biscuit Joiner - It’s a MUST HAVE TOOL!
 0:03:15
How to Use a Biscuit Joiner | Joining Boards on a Table Top
 0:01:01
How to use biscuit maker / cookie press
 0:00:17
How biscuit joiner works. #shorts
 0:11:02
Biscuit Joinery Tips and Tricks
 0:17:21
My Top 10 Biscuit Joiner Tips!
 0:25:15
RECICLE VIDROS DE PAPINHA TRANSFORMANDO EM LINDOS POTES DE ABÓBORAS EM BISCUIT
 0:13:40
How To Use A Biscuit Joiner
 0:11:16
5 Cool Things You Can Do With Your Biscuit Joiner // Tips and Tricks
 0:07:23
So, is a biscuit joiner completely useless?
 0:04:12
Biscuit Joiner, Why Biscuits Telegraph & How to Avoid Biscuit Telegraphing
 0:06:59
How to Use a Biscuit Joiner | Woodworking
 0:10:53
I might have been wrong: A closer look at the biscuit joiner. Is it more useful than I thought?
 0:05:21
Should you buy a biscuit joiner?
 0:01:44
How to Biscuit Joint Using the Makita PJ7000 Biscuit Jointer #DIYTradetips
 0:00:46
Why use a Biscuit Joiner? 🖐️👀
 0:07:18
Splines Using a Biscuit Joiner I Bents Woodworking
 0:00:10
Marcato Biscuit Press
 0:12:12
How To Use A Biscuit Joiner— Power Tools Made Easy #1, For Beginners
 0:14:50
Biscuit Joiner Basics | Woodworking Basics
 0:07:24
#46 How I Use A Biscuit Joiner - The Basics
 0:02:43
DeWalt DW682K Biscuit Jointer - a Toolstop USER GUIDE
Комментарии