filmov
tv
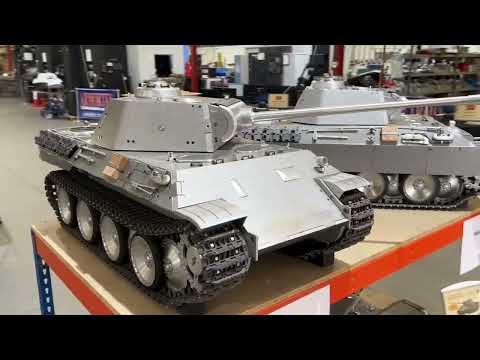
1/6 scale Armortek M26 Pershing RC Tank build. Assembly of the suspension and torsion bars (Vid 04)

Показать описание
Please continue to follow my journey on another epic tank build. This time the incredible 1/6 scale M26 Pershing tank by Armortek.
In this video - I assemble all twelve of the suspension arms and torsion bars.
#tank
#bogie
#armortek
#tankbuild
#rc
Stay tuned for more videos
Please like and Subscribe
In this video - I assemble all twelve of the suspension arms and torsion bars.
#tank
#bogie
#armortek
#tankbuild
#rc
Stay tuned for more videos
Please like and Subscribe
 0:00:51
Walkaround an Armortek 1:6 scale M26 Pershing Tank
 0:03:02
Test run of a large scale all metal M26 Pershing tank by ARMORTEK
 0:00:17
Start up of an Armortek 1:6 scale all metal RC M26 Pershing Tank
 0:03:32
MASSIVE RC M26 Pershing tank - custom build for a customer
 0:41:07
Unboxing 1/6 scale Armortek M26 Pershing RC Tank build. (Vid 01) The unboxing Video
 1:01:12
1/6 scale Armortek M26 Pershing RC Tank build. Building the main hull and bogies (Vid 03)
 1:00:03
1/6 scale Armortek M26 Pershing RC Tank build. (Vid 16) Top hull deck turret mount and mid section.
 0:11:42
1/6 scale Armortek M26 Pershing RC Tank build. (Vid 09) Painting the lower hull and wheels
 0:27:04
1/6 scale Armortek US M26 Pershing RC Tank build.Rear Armour plate and double bogies install(Vid 02)
 0:29:42
1/6 scale Armortek M26 Pershing RC Tank build. (Vid 18) installing the main drive motors and more.
 0:35:22
1/6 scale Armortek M26 Pershing RC Tank build. (Vid 19) Tank Turret detailing and test fitting.
 0:32:30
1/6 scale Armortek M26 Pershing RC Tank build. Drive case and Sprocket assembly. (Vid 06)
 0:00:13
T81 M26 PERSHING TRACKS
 0:34:26
1/6 scale Armortek M26 Pershing RC Tank build. (Vid 17) Assembly and install of the rear grilles.
 0:33:57
1/6 scale Armortek M26 Pershing RC Tank build. (Vid 12) Assembly and Installation of main tracks
 0:06:24
Massive tanks (1:6 scale)at the Armortek factory open day
 0:41:34
1/6 scale Armortek M26 Pershing RC Tank build. (Vid 11) Installation of Sprocket and suspension arms
 0:49:58
1/6 scale Armortek M26 Pershing RC Tank build. (Vid 15) Unboxing motion pack & detailing the hul...
 0:38:15
1/6 scale Armortek M26 Pershing RC Tank build. (Vid 10) Installing the tyres and Torsion Bars
 0:45:44
1/6 scale Armortek M26 Pershing RC Tank build. (Vid 07) Track rollers and main wheels assembly
 0:38:35
1/6 scale Armortek M26 Pershing RC Tank build. Assembly of the suspension and torsion bars (Vid 04)
 0:18:25
1/6 scale Armortek M26 Pershing RC Tank build. (Vid 21) Assembly of the 50 Cal MG & install
 0:42:12
1/6 scale Armortek M26 Pershing RC Tank build. (Vid 24)I complete the electronics and do a test run
 0:06:09
PART 1/2- Machining a 1:6 scale tank suspension bogie from a LARGE Aluminium block
Комментарии