filmov
tv
pip install flask cmd

Показать описание
Title: Getting Started with Flask Command-Line Interface (CLI) using pip install flask
Introduction:
Flask is a popular web framework for building web applications in Python. One of its powerful features is the Command-Line Interface (CLI), which allows developers to perform various tasks such as running the development server, initializing a new project, and managing database migrations. In this tutorial, we will guide you through the process of installing Flask using pip and exploring the Flask CLI.
Prerequisites:
Before you begin, make sure you have Python and pip installed on your system. You can download Python from the official Python website. The following steps assume that you are using a Unix-based system (Linux or macOS), but the commands are similar for Windows.
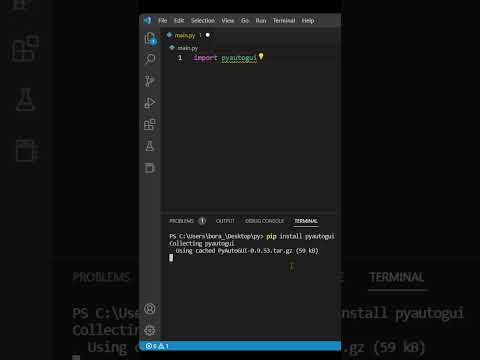
Step 1: Install Flask using pip:
Open your terminal or command prompt and run the following command to install Flask:
This command will download and install Flask and its dependencies.
Step 2: Verify the Installation:
To ensure Flask is installed correctly, run the following command:
This should display the installed Flask version, indicating a successful installation.
Step 3: Create a Simple Flask App:
Step 4: Run the Flask App:
In the same terminal, set the FLASK_APP environment variable to your app's filename (without the extension) and run the development server:
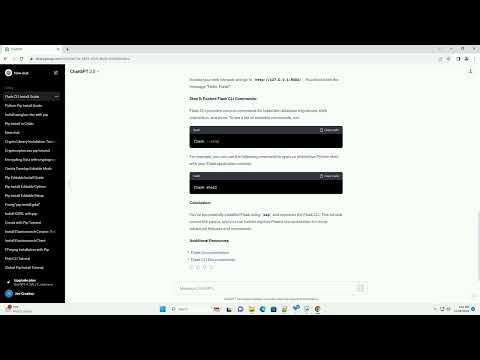
Step 5: Explore Flask CLI Commands:
Flask CLI provides various commands for tasks like database migrations, shell interaction, and more. To see a list of available commands, run:
For example, you can use the following command to open an interactive Python shell with your Flask application context:
Conclusion:
You've successfully installed Flask using pip and explored the Flask CLI. This tutorial covers the basics, and you can further explore Flask's documentation for more advanced features and commands.
Additional Resources:
ChatGPT
Introduction:
Flask is a popular web framework for building web applications in Python. One of its powerful features is the Command-Line Interface (CLI), which allows developers to perform various tasks such as running the development server, initializing a new project, and managing database migrations. In this tutorial, we will guide you through the process of installing Flask using pip and exploring the Flask CLI.
Prerequisites:
Before you begin, make sure you have Python and pip installed on your system. You can download Python from the official Python website. The following steps assume that you are using a Unix-based system (Linux or macOS), but the commands are similar for Windows.
Step 1: Install Flask using pip:
Open your terminal or command prompt and run the following command to install Flask:
This command will download and install Flask and its dependencies.
Step 2: Verify the Installation:
To ensure Flask is installed correctly, run the following command:
This should display the installed Flask version, indicating a successful installation.
Step 3: Create a Simple Flask App:
Step 4: Run the Flask App:
In the same terminal, set the FLASK_APP environment variable to your app's filename (without the extension) and run the development server:
Step 5: Explore Flask CLI Commands:
Flask CLI provides various commands for tasks like database migrations, shell interaction, and more. To see a list of available commands, run:
For example, you can use the following command to open an interactive Python shell with your Flask application context:
Conclusion:
You've successfully installed Flask using pip and explored the Flask CLI. This tutorial covers the basics, and you can further explore Flask's documentation for more advanced features and commands.
Additional Resources:
ChatGPT
 0:01:57
 0:03:08
 0:03:34
 0:03:16
 0:06:02
 0:02:45
 0:00:30
 0:01:53
 0:03:02
 0:01:30
 0:03:23
 0:02:53
 0:02:08
 0:05:38
 0:04:39
 0:06:43
 0:02:58
 0:08:07
 0:03:15
 0:01:07
 0:05:40
 0:01:35
 0:01:07
 0:02:23