filmov
tv
Get Started With OLED Displays with Arduino | Arduino TFT LCD Touch Screen Tutorial LCD1602

Показать описание
In this video, I want to show you how to use the Get Started With OLED Displays with Arduino | Arduino TFT LCD Touch Screen Tutorial LCD1602
Arduino TFT LCD Touch Screen Tutorial | 3.5 Inch 480x320 TFT LCD SD card and touch
Components required:
1. Arduino UNO
2. 3.5" TFT LCD Shield
3. SD card
How to use LCD1602 with I2C module for Arduino - LCD16*2 character -I2C - volume
Components required:
1. Arduino UNO
2. breadboard
3. LCD16*2 character
4. ic2 display
5. resistor volume
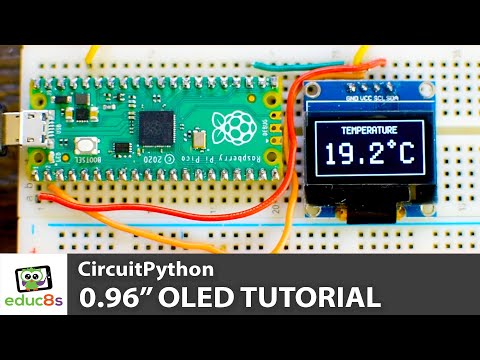
Get Started With OLED Displays with Arduino - I2C & SPI OLEDs | 0.96 inch OLED Getting
Components required:
1. NodeMcu ESP8622
2. breadboard
3. OLED Displays
0:00 - Introduction & Review
2:05 - Arduino TFT LCD Touch Screen Tutorial | 3.5 Inch 480x320 TFT LCD SD card and touch
8:30 - How to use LCD1602 with I2C module for Arduino - LCD16*2 character -I2C - volume
11:54 - Get Started With OLED Displays with Arduino - I2C & SPI OLEDs | 0.96 inch OLED Getting
Please do not forget to subscribe and like
Follow us on other social media
Using Servo Motors with Arduino | servo motor | joystick | Rotary Encoder
How PIR Sensor Works and How To Use It with Arduino - HC-SR501 PIR Motion Sensor Module
Arduino RFID sensor - read and write RFID RC522 - LCD16*2 character - rfid-rc522
Keypads with Arduino - programming keypad by Arduino - keypad 4X3 and LCD16*2 character
How to use gas sensors with Arduino - Arduino tutorial - MQ2 gas sensor
Simple Arduino programming (Turn the LED on and off -Delay in the program)
Ultrasonic sensor by Arduino - HC-SR04 - Ultrasonic - alarm obstacles - alarm buzzer
Arduino programming using the for loop and if else if loop and while loop (LED Flasher)
How to make handmade LED (Low consumption, low cost)
Single Key light (on/off)
DIY Short Circuit (Overcurrent) Protection (Save your battery/power supply)
Voltage regulator, adjustable with push buttons, MOSFET
Mini Amplifier Circuit- Powerful 100 Watt DC 12v
top 3 amazing relays project
Note: Some People copy my content as well as the thumbnail. I have no issues with content as long they make it themselves. But for the thumbnail, It belongs to respective owners (Some also created by myself). If you get a copyright strike without any notice by copying my thumbnail, it is not my fault. Happy Creating :)
WARNING:
This video is for demonstration and education purposes only
Each demonstration presents risks and hazards that must be fully understood before attempting and should be performed only by professional
#oled
#oleddisplay
##touch_screen
#tftlcd
#zintechideaS
Arduino TFT LCD Touch Screen Tutorial | 3.5 Inch 480x320 TFT LCD SD card and touch
Components required:
1. Arduino UNO
2. 3.5" TFT LCD Shield
3. SD card
How to use LCD1602 with I2C module for Arduino - LCD16*2 character -I2C - volume
Components required:
1. Arduino UNO
2. breadboard
3. LCD16*2 character
4. ic2 display
5. resistor volume
Get Started With OLED Displays with Arduino - I2C & SPI OLEDs | 0.96 inch OLED Getting
Components required:
1. NodeMcu ESP8622
2. breadboard
3. OLED Displays
0:00 - Introduction & Review
2:05 - Arduino TFT LCD Touch Screen Tutorial | 3.5 Inch 480x320 TFT LCD SD card and touch
8:30 - How to use LCD1602 with I2C module for Arduino - LCD16*2 character -I2C - volume
11:54 - Get Started With OLED Displays with Arduino - I2C & SPI OLEDs | 0.96 inch OLED Getting
Please do not forget to subscribe and like
Follow us on other social media
Using Servo Motors with Arduino | servo motor | joystick | Rotary Encoder
How PIR Sensor Works and How To Use It with Arduino - HC-SR501 PIR Motion Sensor Module
Arduino RFID sensor - read and write RFID RC522 - LCD16*2 character - rfid-rc522
Keypads with Arduino - programming keypad by Arduino - keypad 4X3 and LCD16*2 character
How to use gas sensors with Arduino - Arduino tutorial - MQ2 gas sensor
Simple Arduino programming (Turn the LED on and off -Delay in the program)
Ultrasonic sensor by Arduino - HC-SR04 - Ultrasonic - alarm obstacles - alarm buzzer
Arduino programming using the for loop and if else if loop and while loop (LED Flasher)
How to make handmade LED (Low consumption, low cost)
Single Key light (on/off)
DIY Short Circuit (Overcurrent) Protection (Save your battery/power supply)
Voltage regulator, adjustable with push buttons, MOSFET
Mini Amplifier Circuit- Powerful 100 Watt DC 12v
top 3 amazing relays project
Note: Some People copy my content as well as the thumbnail. I have no issues with content as long they make it themselves. But for the thumbnail, It belongs to respective owners (Some also created by myself). If you get a copyright strike without any notice by copying my thumbnail, it is not my fault. Happy Creating :)
WARNING:
This video is for demonstration and education purposes only
Each demonstration presents risks and hazards that must be fully understood before attempting and should be performed only by professional
#oled
#oleddisplay
##touch_screen
#tftlcd
#zintechideaS
 0:41:41
 0:02:48
 0:03:52
 0:05:32
 0:12:20
 0:04:19
 0:05:25
 0:01:01
 0:26:58
 0:07:31
 0:07:25
 0:16:47
 0:08:45
 0:03:26
 0:00:17
 0:13:13
 0:27:57
 0:01:00
 0:02:40
 0:08:25
 0:00:44
 0:00:22
 0:00:27
 0:00:18