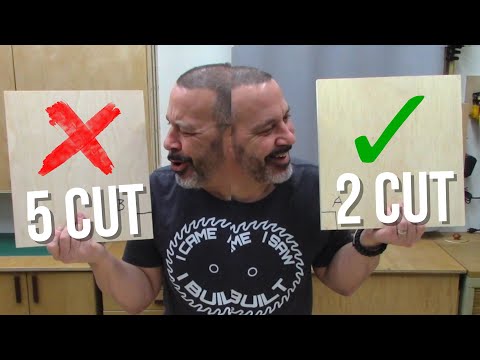
the FLAW with Ultimate crosscut sleds

preview_player
Показать описание
PANEL SLED PLANS:

FULL ARTICLE:

To be a little more exact with the five-cut method simplification:
1. The test board needs to be square.
2. The size of the test board needs to be the same as the distance between the two screws (one screw is the pivot, one screw is likely near the end of the fence)
3. The pivot point needs to be as close to the blade as possible (1" should do).

US & CANADIAN AFFILIATE LINKS

PROJECT PARTS:

DOWELMAX:

DOWELMAX 3/8" Kit:
DOWELMAX 1/2" Expansion:

BLADES:

TOOLS:

BITS:

SUPPLIES

INSTAGRAM:

MUSIC:
Epidemic Sound
Use my referral link and start your free 30-day trial:
Рекомендации по теме
Комментарии
Автор

Welp I am new to wood working and bought myself a nice but smaller tablel saw yesterday and I have been watching video's to educate myself on how to make a sled. after watching three other video's my heart sank becauseeee my table saw only has one track. I understand the five cut method and was trying to write down the math form for adjusting the cuts. LET ME TELL YOU, your video replenished my heart and your sled is exactly what I need to make for my table. Now I just have to buy me a router and a band saw and that should be good to last me a lifetime since I will be 66 next month. Thanks for giving this old lady hope!

momnwife
Автор

I demo-ed a 1950's kitchen for a remodel and found that the old cabinet doors are perfect for saw sleds. High quality 3/4 birch veneer plywood and very dimensionally stable after all this time. Best of all, they were free! I've also cut up the smaller doors for a number of one time and multi-use jigs.

mlpabq
Автор

Totally feel your 95% vs 100% issue. I think this happens in a lot of creative/maker things. I'm a professional software developer for decades, and this happens ALL THE TIME. Just remember, "Don't let the perfect be the enemy of the good". Great vid Scott.

MichaelCampbell
Автор

15:04 My method to attach the fence:
1) Drill two holes to attach the fence. The hole nearest the blade is permanent. With a small round file elongate the hole closest to the outer edge so that the fence can pivot about a mm forward and back.
2) Use a good square to attach the fence as close to 90° as possible.📐
3) Make your cuts to find square.
4) When you're ready to permanently secure the fence, loosen the outer screw slightly to move the fence forward or backward as required, then tighten it down.
6) Install your remaining screws.

bigredracingdog
Автор

1. While the 5-cut method is really interesting and brilliant it's unwarranted. Just did it once it works but never used it again. I've been making cross cut sled just using a carpenter's square and never failed me. I just verify by simply flipping the sample piece and see if the cut still aligns.
2. Your take on the "Ultimate" cross cut sled - full of features and heavy - is spot on. My go to sled is now a very simple light one. My previous "ultimate and universal" sled is still there in a remote, less premium spot of my shop, waiting for the rare special-task moment when it would be called upon again.
3. One sided/one-runner sled is also what I prefer. However, if I were you I would have just use 1/2 ply for the base - a lot lighter yet does the job as well. Also, I would stick to the tried and tested back, rather than front, fence. Front fence would require more user effort to balance and secure the piece.

MrKockabilly
Автор

You look like a pretty tall guy. I'm 5'5". Don't feel comfortable reaching over the blade all the time. But, lots of good ideas I can adapt to a near-side fence version. Thanks.

jhersk
Автор

I was a big fan of the New Yankee Workshop, watched with my grandson every week. Missed or don't remember the panel sled. Thanks for bringing it back to all of us who have been struggling with wide panels and narrow "ultimate sleds" or miter gauges with the miter bar being far too short to set up an accurate cut. I just relied on my table saw fence, but knew there was a better way. This is another jig in my future projects.

jimpalmer
Автор

I made Norm's panel sled about 15 years ago and have used it countless times since. Glad you borrowed from his simple yet effective design. Yours came out great and I hope it lasts you many years too.

tomferrin
Автор

I used a piece of 1/4 mdf for the base of my sled. All the strength comes from the front and back pieces which I connected with a couple longitudinal bars which make for nice handles. Whole thing is light and sits nice and flat. I like your detail with the chamfer for the sawdust.

SnootchieBootchies
Автор

Drill a bunch of holes with a hole saw in your massive sled and it will be much lighter without loosing much rigidity.

davidm
Автор

The sled doesn't reference the fence, it references the miter slots. So the reality is, the method of putting the piece against the fence doesn't actually do anything to make your sled square at all. You can set the base panel at any angle on the bar as long as there is material past the blade to be cut off. It really doesn't matter because once you run the piece through the saw, you have one edge that is parallel with the miter slot. From there its easy to square a fence anywhere you want to on the base. The 5 cut method is actually really brilliant, because you could, in fact square up a fence that is up to 11.25 degrees off.

Adventures_of_Marshmallow
Автор

As a woodworker by trade (chair-maker) and for 35 years now (and with all my digits), I simply can't wrap my head around the fact that a whole nation/continent (USA/North America) is obsessed with those crosscut sleds... while in other parts of the world sliding-table saws / sliders are a standard. No need to build and store half a dozen sleds that are then collecting dust in the shop. *Get fewer machines but full-size ones that are safe & precise and stop wasting time building jigs all the time!*

f.d.
Автор

It would be nice if you would use a riving knife in your table saw. It is of course your decision what safety measures you use while working and how close you come with your hands to the blade, but as a youtuber you are a role model and encourage others to work the same way.
Personally I never had to remove mine for any cut, especially if the knife is not higher than the blade.

drstefankrank
Автор

I didn't see this comment posted but forgive me if it is a repeat. I think it is important to know before going to build this, the woodworker really needs to consider their height and reach. Your arms may be weak (😊) but what I would do to have your height and reach! Having the fence on the back side of the sled would not work for my 5'3" frame. Unless I stood on a stool which I have had to do in a pinch but not really that safe. 
All that said..I completely agree with the no need for massive jigs! And really enjoy your Videos!!

TW-fste
Автор

I like the mentality of creating a few smaller, more purpose driven sleds, then one "ultimate all in one" sled. Aside from being more manageable it's also much easier to iterate on them based on how you ACTUALLY use them :)

DavebotBeepBoop
Автор

Wow! I finally got around to watching this video! I love your take on the "one size fits all" issue! NOTHING needs to do EVERYTHING! That's why you don't frame with a finish nailer or cope with a circular saw. That's why people like us have so many tools!😅 This is a great sled! Thanks for the video and the idea!

chiefofcontrol
Автор

Love this video. Many woodworking channels don't analyze the needs versus end results. This video is perfect for all weekend woodworking enthusiasts.

jipptou
Автор

I was just getting ready to make a table saw sled for squaring larger panels when I randomly came across your design. I have to say I like it because its light, easy to make and very functional for panel squaring, I'll will probably use this design. Thank you for sharing! Oh and the most common reason why most sleds should be on the left side of the blade is because most table saws are right tilting, which means the blade mounts against the arbor on the left and if the sled were on the right of the blade then the cut line will be off if you ever change blades that have a different kerf thickness.

dannyh.
Автор

Nice design, Scott. You'll probably want to add a support to the other side of the blade. It can be stationary and could be locked into the t-slot during use, but without it your cut-offs will want to pinch the blade and you'll also get tear-out as the blade exits. Scott

MyGrowthRings
Автор

6:11 sled’s on the left, because (1) of how the arbor sticks out to the right, the kerf will be flush with the sled even if the blade changes; (2) right (dominant) hand closer to the middle of the sled; and (3) long boards don’t hit the fence.

spencerjoplin
visit shbcf.ru