filmov
tv
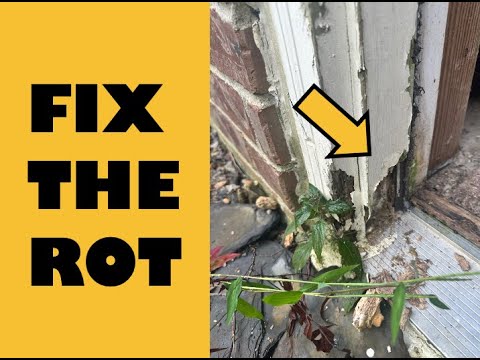
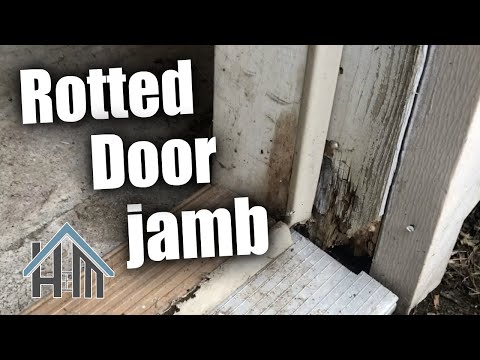
How To Repair Rotted Door Jambs

Показать описание
Check Out Our FREE GUIDE: *25 Must-Have Carpentry Tools...Under $25 Each!*
AFFILIATE TOOL LINKS FOR THIS VIDEO:
Dewalt 20V Oscillating Multitool (My new one!):
Porter Cable Multitool:
Replacement Oscillating Blades (Great Price!):
Dewalt 32" Table Saw w/ Rolling Stand:
Dewalt 18ga Pneumatic Brad Nailer:
TOOL BELT:
Occidental Fat Lip Tool Belt:
Occidental Tool Belt Harness:
(These are affiliate links. When you shop through these links, we receive a small commission at NO EXTRA CHARGE TO YOU. We greatly appreciate the support!)
FOLLOW US ON INSTAGRAM:
FOLLOW US ON LINKEDIN:
Check out our other ROT-RELATED VIDEOS linked below!
Repair Rotted Trim (Skirtboard):
Fix Rotted Brickmold:
Fix Rotted Sink Cabinets:
Replace Deck Handrails:
Fix Rotted Basement Stairs:
Repair Leaning Fences:
Replace Deck Boards:
This video from The Honest Carpenter will show you a COST-SAVING door jamb repair. There are about $10 of materials in this repair, and it can be carried out in 1-2 hours by anybody with reasonable tool experience.
Tools:
Oscillating Multi-Tool
Table Saw
Miter Saw
Chisel:
16 Oz Hammer
Large screwdriver
Combination Square
Brad Nailer/Compressor
Tape Measure
Utility Knife
Caulking Gun
Materials:
Construction Adhesive
Galvanized Brad Nails
Elastomeric Sealant
Treated 5/4 pine
PVC Trim
How-To:
1) Mark lower 12-16" on door jamb with straight line using combination square and pencil.
2) Cut through marked line with oscillating multi-tool.
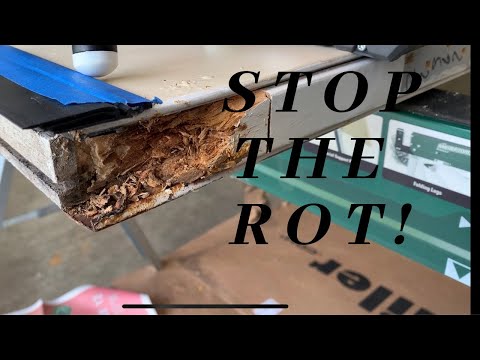
3) Carefully chisel and break out lower portion of door jamb
4) Measure up from threshold to cut line
5) Rip 5/4 pine to door jamb width
6) Cut new door jamb piece to length, remembering to add 5 degree miter to bottom
7) Install shims to bring door jamb piece out flush
8) Install door jamb piece with construction adhesive and brad nails
9) Caulk new door jamb assembly
For a detailed article on the OSCILLATING MULTI-TOOL used in this video, just click here:
For more tips and articles, visit us at The Honest Carpenter website!
AFFILIATE TOOL LINKS FOR THIS VIDEO:
Dewalt 20V Oscillating Multitool (My new one!):
Porter Cable Multitool:
Replacement Oscillating Blades (Great Price!):
Dewalt 32" Table Saw w/ Rolling Stand:
Dewalt 18ga Pneumatic Brad Nailer:
TOOL BELT:
Occidental Fat Lip Tool Belt:
Occidental Tool Belt Harness:
(These are affiliate links. When you shop through these links, we receive a small commission at NO EXTRA CHARGE TO YOU. We greatly appreciate the support!)
FOLLOW US ON INSTAGRAM:
FOLLOW US ON LINKEDIN:
Check out our other ROT-RELATED VIDEOS linked below!
Repair Rotted Trim (Skirtboard):
Fix Rotted Brickmold:
Fix Rotted Sink Cabinets:
Replace Deck Handrails:
Fix Rotted Basement Stairs:
Repair Leaning Fences:
Replace Deck Boards:
This video from The Honest Carpenter will show you a COST-SAVING door jamb repair. There are about $10 of materials in this repair, and it can be carried out in 1-2 hours by anybody with reasonable tool experience.
Tools:
Oscillating Multi-Tool
Table Saw
Miter Saw
Chisel:
16 Oz Hammer
Large screwdriver
Combination Square
Brad Nailer/Compressor
Tape Measure
Utility Knife
Caulking Gun
Materials:
Construction Adhesive
Galvanized Brad Nails
Elastomeric Sealant
Treated 5/4 pine
PVC Trim
How-To:
1) Mark lower 12-16" on door jamb with straight line using combination square and pencil.
2) Cut through marked line with oscillating multi-tool.
3) Carefully chisel and break out lower portion of door jamb
4) Measure up from threshold to cut line
5) Rip 5/4 pine to door jamb width
6) Cut new door jamb piece to length, remembering to add 5 degree miter to bottom
7) Install shims to bring door jamb piece out flush
8) Install door jamb piece with construction adhesive and brad nails
9) Caulk new door jamb assembly
For a detailed article on the OSCILLATING MULTI-TOOL used in this video, just click here:
For more tips and articles, visit us at The Honest Carpenter website!
 0:04:26
HOW TO REPAIR ROTTED DOOR JAMB
 0:34:32
How To Repair Rotted Wood Door with Bondo Wood Filler
 0:11:32
How To Repair Rotted Door Jambs
 0:05:37
Repairing Rot on an Exterior Door
 0:34:58
How to Repair Rotted Door Frame and Trim on Exterior Door
 0:05:26
Easy DIY: How to Repair a Rotted Exterior Door Jamb in Minutes!
 0:09:10
How To Repair Rotted Door Frame #whojoedaddy
 0:14:20
Door Rot Repair!
 0:15:13
How to Repair Rotted Door Frame
 0:09:51
Fix Rotted Door Frame (Brickmold)
 0:11:37
Repairing Rotten Doors - Wood Rot Everywhere
 0:10:36
THE TRUTH ABOUT WOOD ROT (You need to watch this!!)
 0:07:15
How to Repair Door Frame Rot / Rotted Door Frame with FrameSaver Jamb Rot Repair Kit
 0:05:26
How to fix, repair replace rotted exterior door jamb, Easy!
 0:11:48
How to Repair a Garage Door Jamb / Trim - Replace Rotted Wood.
 0:06:25
How to make a rotted exterior door jamb and trim like new. Easy door rot repair.
 0:09:42
How to rot repair, How to use Bondo and How-to Dustin...Bonus!
 0:03:31
How to Fix Rotted Wood with Epoxy | This Old House
 0:07:44
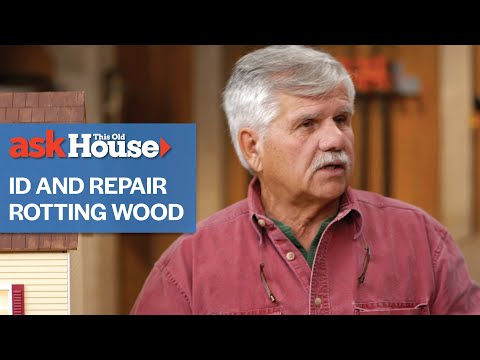
How to Identify and Repair Rotting Wood | Ask This Old House
 0:06:20
How To Repair Rotted Door Jambs
 0:14:30
How to repair ROTTED DOOR JAMS!🚪🔨
 0:51:20
Rotten Door, Full Repair. Here's How I Did It.
 0:05:46
Repair Rotten Door Frame and Corroded Metal Post
 0:25:05
How To Repair Rotted Subfloor Under An Exterior Door
Комментарии