filmov
tv
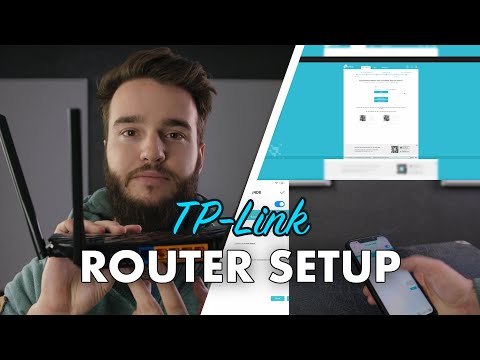
TP-Link Archer C6 Setup and Full Configuration

Показать описание
TP-Link Archer C6 Setup Step by Step Tutorial. TP-Link Archer C6 Setup and Full Configuration Easy Method. TP-Link Archer C6 AC1200 1200mbps MU-MIMO Gigabit Router Setup.
TP-Link Router Setup Archer C6 AC1200 Wireless Dual Band Router. TP-Link Archer C6 Configuration Easy Method. How to Setup your TP-Link Archer C6 Wireless Router Step by Step Tutorial. If you want to Setup your TP-Link Archer C6 wifi router, this video is for you.
***How to Setup TP-Link Archer C6***
01. Connect the Ethernet cable from your internet service provider to the "WAN" or "Internet" port on the back of the TP-Link Archer c6 Router.
02. Connect one end of the included power adapter to the device and plug the other end into a wall outlet nearby. Then power on your TP-Link Archer C6 Router.
03. If you want to reset and Setup your TP-Link Archer C6 Router. When your TP-Link Archer C6 Router is powered on. Press and hold the WPS/RESET button (more than 10 seconds) until the System LED becomes quick-flash from slow-flash. Then release the button and wait for the Router to reboot to its factory default settings.
04. Connect your phone or computer to the TP-Link Archer C6 Router using an Ethernet cable or Wi-Fi. The default network name and password are usually on a sticker at the bottom of the TP-Link Archer C6 Router.
06. Create an administrator password to manage your TP-Link Archer C6 MU-MIMO Wi-Fi Router. First, type your new login Password. Then confirm your login password.
07. Then, click on Let’s Get Started to continue your TP-Link Archer C6 Setup.
08. Log in to your TP-Link Archer C6 router panel. Type the administrator password you have previously set.
09. Then click on Log in to continue your TP-Link Archer C6 Setup.
10. Select your local time zone from this pull-down list. Then click the Next Button to continue your TP-Link Archer C6 Setup.
11. Select your Connection Type: Dynamic IP, Static IP, PPPoE, L2TP, PPTP (You can ask your Internet Service Provider about your internet connection and the required details). I am choosing PPPoE. Then click the Next Button to continue your TP-Link Archer C6 Setup.
12. Enter your PPPoE username and password given by your internet service provider. First, type your PPPoE Username. Then, type your PPPoE Password. Then click the Next Button to continue your TP-Link Archer C6 Router Setup.
13. When Smart Connect is enabled, the router’s 2.4GHz and 5GHz networks share the same SSID (network name) and password. Without Smart Connect, a typical dual-band TP-Link Archer C6 router broadcasts two SSID: a 2.4GHz band SSID and a 5 GHz band SSID.
14. Confirm or change the wireless network name SSID. Type the wireless network name SSID for your 2.4G band wireless network. Type the password you have chosen in the box next to the password for the 2.4G band. Wi-Fi password must contain at least 8 characters.
15. Enter your wireless network name SSID for the 5G band wireless network. Type the password you have chosen in the box next to the password for the 5G band. Wi-Fi password must contain at least 8 characters.
16. Then click on Next to continue your TP-Link Archer C6 Setup.
17. Scroll down for the Save options. Then, click on Save to continue your TP-Link Archer C6 Setup.
18. You need to reconnect your wireless devices to the new wireless network before clicking the Next button. To complete the installation process, connect your mobile or computer to the TP-Link Archer C6 Router. Type the wireless network password you have previously set. Once your mobile phone or computer is connected to the TP-Link Archer C6 Wi-Fi router.
19. Click Next to finish the TP-Link Archer C6 router setup and configuration.
TP-Link Router-Related Videos:
SOCIAL
===============================
#tplink
#tplinkrouter
#tplinkarcherc6
#tplinkarcherc6setup
#tplinkroutersetup
#wifiremon
 0:03:59
TP-Link Archer C6 Setup and Full Configuration
 0:06:29
How To Configure TP-Link AC1200 Archer C6 Router | TP-Link Archer C6 Setup
 0:02:53
How to Set up Your TP-Link WiFi Router (Use Archer A6)
 0:11:41
TP-Link Archer C6 AC1200 Wireless Router Unboxing & Setup
 0:03:57
tp link ac1200 Mesh Wifi router setup
 0:03:03
How to set up TP-Link Archer C6U via Tether app
 0:12:35
TPLink Archer C6 V3.20 WiFi Router | Firmware and Setup | Best Budget Gigabit Router
 0:10:17
TP-Link Archer C6 für 38 Euro: Budget-Router im Unboxing und Setup!
 0:15:06
TP-Link Archer C6U Unboxing and step by step setup | Speed Test |
 0:08:23
How to setup TP Link Archer C6 Best Dual Band Wi Fi Mesh Router | Setup Tp link 1200 Mesh router
 0:04:30
TP-Link | Archer C6 V3.2 | Setup with BSNL Fiber | LAN Cable | Easy Way | May 2021 |
 0:04:02
Tp Link Archer C6 | How To Use Tp Link Router As A Wireless Repeater
 0:13:08
TP-LINK AC1200 Wireless MU-MIMO Gigabit Router Archer C6 Setup
 0:13:40
TP-Link Archer C6 Unboxing & TP Link Archer c6 Setup
 0:04:32
Setup TP-Link Router as a Wireless Access Point [2 Methods]
 0:05:42
TP LINK Archer C6 / A6 AC1200 Review: ULTIMATE Budget Gigabit MU-MIMO Router!
 0:15:57
TP-Link Archer C6/C7 Router Einrichten und Setup am PC und Handy | Deutsch
 0:13:06
Setup access point Mode TPLINK WIFI Router | TP link AC1200 Archer A6 | ConsumerZilla
 0:13:12
TP-Link Archer C6 WLAN Router als Access Point einrichten
 0:06:24
Tp link C6 Router Setup pppoe diye
 0:09:19
TP LINK ARCHER C6 Unboxing, Review, Setup & Speed Test
 0:02:37
tp link archer c6 wireless repeater mode
 0:03:57
TP-Link #UNBOXING & Quick Set-up | Archer C6
 0:11:03
TP Link Archer C6 Gigabit MU-MIMO Wireless Router Unboxing & Full Setup in Telugu | AC - 1200 | ...
Комментарии