filmov
tv
How to Reduce Noise in Photoshop

Показать описание
How to Reduce Noise in Photoshop
The best way to reduce noise in an image is to shoot with a low ISO in camera. The camera creates an exposure based on three values - ISO, Aperture, and Shutter Speed. ISO is the only variable that will result in noise. Ideally, one would adjust the shutter speed and aperture (to let in enough light to create an exposure) at a low ISO to prevent image noise.
The best ISO settings to use for lower noise levels are 100, 200, 400 and 800. Anything above that is likely to create noise on the image. Cameras are getting better all the time, and there will come a day when ISO 6400 looks perfectly clean, but until then, keep ISO as low as possible!
Reduce Noise Filter
The first step in removing noise in your image is to use the 'Reduce Noise Filter'. In the 'Reduce Noise Dialog' one can control strength, preserve details, reduce color noise, and sharpen details. The strength of the filter determines how much it reduces noise - go as high as you need to remove noise, but don't over-do it. Bringing the 'Reduce Noise' lower will make the filter more effective, but will also reduce detail in the image - find the balance that works best.
If there is a lot of color noise, use the 'Reduce Color' noise option to remove it. Also, there is an option in 'Advanced Settings' to reduce noise on each color channel individually. 'Sharpen Details' will add artificial sharpening to your image after the 'Reduce Noise' filter is added, so it's best to keep this at zero.
Using the Surface Blur to Reduce Noise
If there is still noise after the 'Reduce Noise' filter is used, adding a Surface Blur may help. The key to using a Surface Blur to reduce noise in photos is to balance the radius and threshold. If the threshold is too low, the image will not be effected. Threshold controls where the blur will stop. It uses differences in tone to find edges, and tries to preserve those edges. The higher the threshold, the more separate elements in the image will blur into each other. The Blur radius determines the area that will be blurred - the larger the radius, the more blur.
It's best to bring both of these values as high as possible without destroying image details.
 0:03:19
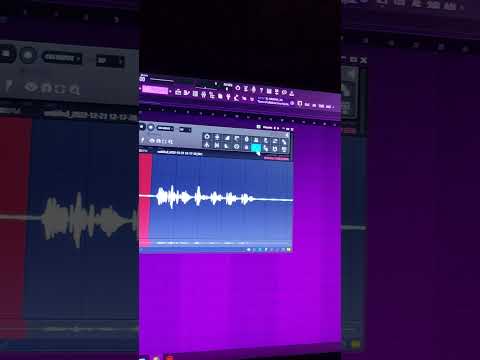
How To Remove Background Noise In Audacity
 0:00:41
How To Remove Background Noise In FL Studio 21 (FL Studio 2022)
 0:00:20
Reduce Noise - Short Photoshop Tutorial
 0:00:54
Remove ALL Background Noise with One Click! #Shorts
 0:03:40
How To Remove Background Noise In Audacity
 0:01:00
How to remove background noise with Audacity
 0:00:28
How to Remove Background Noise in Video or Audio Problem Solved
 0:00:27
Remove Noise from Videos FAST #shorts #davinciresolve
 0:01:00
how to reduce noise from air bubble fish aquarium pump, fish tank ke air pump ki aawaj kese kam kre🐟...
 0:00:33
How to Get Rid of Noise in Your Samples! Fl Studio 20
 0:00:33
REMOVING BACKGROUND NOISE IN #CAPCUT 🤔💡
 0:00:29
How to remove noise from recordings - FL Studio
 0:02:35
How to Remove Background Noise - Adobe Premiere Pro 2024 Tutorial
 0:03:26
Tip To Reduce Noise in Photoshop | Reduce Grains | Photoshop Tutorial
 0:00:08
#Iphone -Phone Noise Cancellation
 0:00:56
How to remove noise from photo in Photoshop
 0:01:17
How to Remove Background Noise from Video | NO Download required
 0:02:57
How to Reduce Noise in Photoshop 2022 | Noise Reduction | Remove Grains From Photos
 0:00:24
Audio se Background Noise Kaise REMOVE Kare Free Me #shorts #ai
 0:03:23
How to Remove Background Noise in Adobe Audition 2025
 0:05:51
Don't use noise reduction in Lightroom, use THIS instead
 0:00:16
How To Reduce Wind Noise In Car Or Truck To Quiet Your Ride DI #shorts Wind Noise Through Truck Door
 0:00:26
BEST Spot to add Car Sound deadening Material For ROAD Noise
 0:08:01
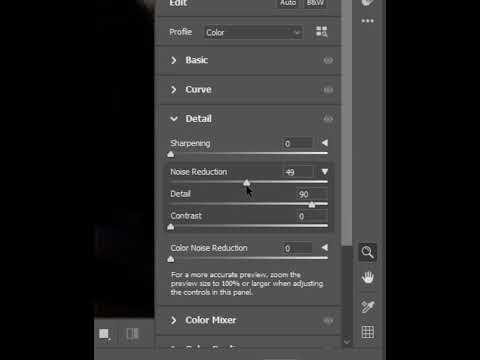
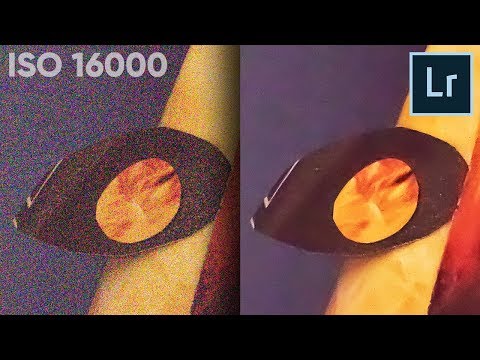
How to Remove High ISO Noise in Lightroom
Комментарии