filmov
tv
How to take PANNING PHOTOS | Wildlife Photography for Beginners
Показать описание
Learn how to successfully take those challenging panning shots when you're next on safari.
===============================================
Enrol in Wildlife Photography for Beginners and Amateurs:
===============================================
=================================
Gear I use to film and produce my videos:
=================================
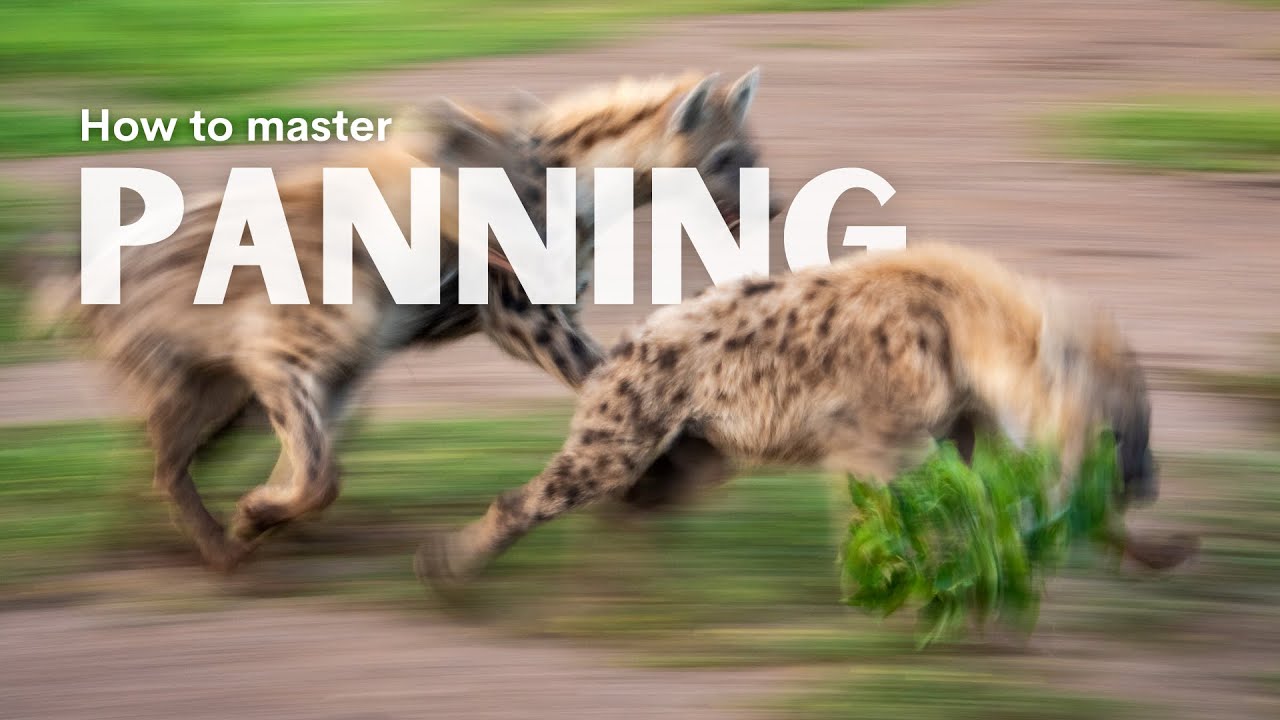
Many beginners and amateur wildlife photographers wonder how to take panning photos when they are in the field. It's a very creative wildlife photography technique that requires the right settings, lots of practise and a bit of luck.
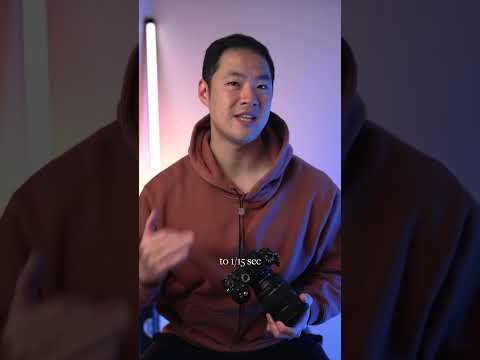
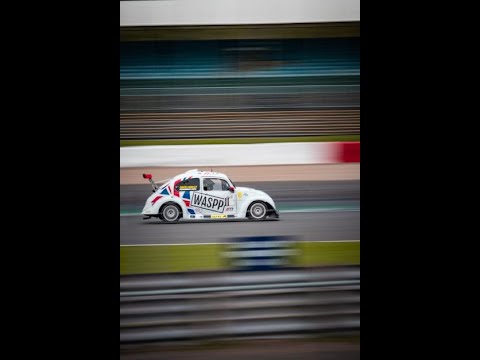
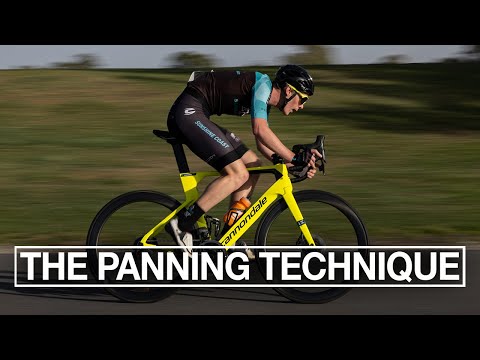
The trick to taking good panning shots, is to use a slow shutter speed. Switch to Shutter Priority (S/Tv) and choose a shutter speed value between 1/5 sec and 1/50 sec, depending on how fast your subject is moving. If it's walking slowly, use a slower shutter speed, and if it's running/flying, use a faster shutter speed.
In order to prevent over-exposure at such slow shutter speeds, also switch over to automatic ISO so that the camera can drop your ISO value if necessary. On relatively bright days, it may go as low as ISO100 and when it's very sunny, you may not be able to take nice panning shots without over-exposing, simply because it's too bright. That's why panning shots are typically best taken early in the morning, late in the afternoon or on overcast days.
Once you've got the right settings, you've got to get the panning technique right, and believe me - it's not that easy. You have to keep your subject, which should be moving parallel to you, in frame, lock focus on it, and then take the slow-shutter photo WHILE the camera is moving with the animal. You can take, then move the camera, or move the camera and then take the shot. It has to be one fluid movement and action - pressing the shutter button while the lens is moving from one side to the other.
The toughest thing with panning photos is actually finding animals that walk parallel to you at a fast enough speed.
Remember that not all your panning photos will come out perfectly. In fact, probably only 1 or 2% of the photos you take might work. But don't let that discourage you! Believe me, even us pros have a low hit rate. That's because it's nearly impossible to know what the right shutter speed is for each sighting. Most of the time it's trial and error. Just make sure you 1) keep the animal in the frame; 2) you keep it in focus; 3) you move at the same speed as it; 4) you press the shutter button while the lens is moving and 5) you take as many photos as possible. If you do these five things, you're giving yourself a sporting chance to get a good panning photo.
And remember, the whole animal doesn't have to be perfectly in focus. As you saw from the examples in the video, only parts of the animal has to be sharp. As long as you have that, together with a nicely streaked background, it's a good panning photo.
Best of luck taking panning photos of wildlife when you're next on safari. I really hope these tips helped you. And if you'd like to improve your wildlife photography skills even more, please follow the link at the top of this description and enrol in my online course called Wildlife Photography for Beginners and Amateurs.
CONTACT ME:
IMPROVE YOUR PHOTOGRAPHY SKILLS:
Disclaimer: Keep in mind that some of the links in this post are affiliate links and if you click on them to make a purchase I will earn a small commission at no additional cost to you. I only promote products that I trust and the and the income from these links allow me to keep producing videos.
FOLLOW ME ON SOCIAL MEDIA:
===============================================
Enrol in Wildlife Photography for Beginners and Amateurs:
===============================================
=================================
Gear I use to film and produce my videos:
=================================
Many beginners and amateur wildlife photographers wonder how to take panning photos when they are in the field. It's a very creative wildlife photography technique that requires the right settings, lots of practise and a bit of luck.
The trick to taking good panning shots, is to use a slow shutter speed. Switch to Shutter Priority (S/Tv) and choose a shutter speed value between 1/5 sec and 1/50 sec, depending on how fast your subject is moving. If it's walking slowly, use a slower shutter speed, and if it's running/flying, use a faster shutter speed.
In order to prevent over-exposure at such slow shutter speeds, also switch over to automatic ISO so that the camera can drop your ISO value if necessary. On relatively bright days, it may go as low as ISO100 and when it's very sunny, you may not be able to take nice panning shots without over-exposing, simply because it's too bright. That's why panning shots are typically best taken early in the morning, late in the afternoon or on overcast days.
Once you've got the right settings, you've got to get the panning technique right, and believe me - it's not that easy. You have to keep your subject, which should be moving parallel to you, in frame, lock focus on it, and then take the slow-shutter photo WHILE the camera is moving with the animal. You can take, then move the camera, or move the camera and then take the shot. It has to be one fluid movement and action - pressing the shutter button while the lens is moving from one side to the other.
The toughest thing with panning photos is actually finding animals that walk parallel to you at a fast enough speed.
Remember that not all your panning photos will come out perfectly. In fact, probably only 1 or 2% of the photos you take might work. But don't let that discourage you! Believe me, even us pros have a low hit rate. That's because it's nearly impossible to know what the right shutter speed is for each sighting. Most of the time it's trial and error. Just make sure you 1) keep the animal in the frame; 2) you keep it in focus; 3) you move at the same speed as it; 4) you press the shutter button while the lens is moving and 5) you take as many photos as possible. If you do these five things, you're giving yourself a sporting chance to get a good panning photo.
And remember, the whole animal doesn't have to be perfectly in focus. As you saw from the examples in the video, only parts of the animal has to be sharp. As long as you have that, together with a nicely streaked background, it's a good panning photo.
Best of luck taking panning photos of wildlife when you're next on safari. I really hope these tips helped you. And if you'd like to improve your wildlife photography skills even more, please follow the link at the top of this description and enrol in my online course called Wildlife Photography for Beginners and Amateurs.
CONTACT ME:
IMPROVE YOUR PHOTOGRAPHY SKILLS:
Disclaimer: Keep in mind that some of the links in this post are affiliate links and if you click on them to make a purchase I will earn a small commission at no additional cost to you. I only promote products that I trust and the and the income from these links allow me to keep producing videos.
FOLLOW ME ON SOCIAL MEDIA:
 0:00:55
How to do panning photography
 0:05:16
5 Tips to INSTANTLY improve YOUR Panning Photography
 0:05:56
Epic Panning Photography TUTORIAL
 0:11:19
HOW TO SHOOT PANNING PHOTOGRAPHY!!!
 0:06:48
How to take PANNING PHOTOS | Wildlife Photography for Beginners
 0:01:00
How to Take Panning Photos | Beginner Tutorial
 0:04:32
How To Do Panning Photography - Fujifilm X100V
 0:00:20
Mastering Panning Photography with iPhone: Tips and Techniques
 0:12:39
Tiny Steam Trains & Classic Cars: A Day of Photography at RH&DR (Fujifilm X-T4 + 10-24mm F4)
 0:07:53
PANNING photography settings.
 0:05:57
SHARP Panning Photos of Moving Cars
 0:15:37
Focus Settings for Panning Photography? | Ask David Bergman
 0:00:14
HOW TO GET PANNING SHOTS 📸🤯 #photography #carphotography #photographytips #tutorial
 0:01:00
PANNING PHOTOGRAPHY TIPS
 0:00:33
How To Do A Panning Photo!
 0:00:59
This panning photography technique will turn you into a PRO
 0:10:44
Panning Technique - Camera settings and tips for beginner photographers.
 0:06:58
5 Essential Tips for Shooting Panning Car Photos
 0:00:41
Take SHARPER PHOTOS with this RULE 📷 What is Shutter Speed?
 0:00:16
How to get a panning shot on the Samsung Galaxy S23 Ultra
 0:00:45
The BEST panning technique #photography
 0:00:16
Panning Photography Tutorial video #mobilephotography #tutorial #panning #ytshorts #update
 0:07:12
Sports Photography Tips and Settings: Shutter Speed, Focus, Panning and More!
 0:08:05
How To Shoot Panning Photos of Cars (Photography Tutorial)
Комментарии