filmov
tv
Photoshop Retouch Tricks for FAST High End Retouching By wicckk
Показать описание
#adobe #colors #edit #retouching
welcome back to my channel! Today, I'm excited to share some essential Photoshop retouching techniques that will help you transform your photos into stunning works of art. Whether you're a beginner or an experienced photographer, these tips will come in handy for enhancing your images. So, let's dive right in!"
[Step 1: Import Your Image]
"The first step in the retouching process is to import your image into Photoshop. You can do this by going to 'File' and selecting 'Open.' Choose the image you want to work on and click 'Open.' Your image will now appear on the canvas."
[Step 2: Duplicate the Background Layer]
"Before making any changes, it's crucial to duplicate the background layer. This allows you to work non-destructively and preserve the original image. To do this, right-click on the background layer and select 'Duplicate Layer.'"
[Step 3: Basic Adjustments]
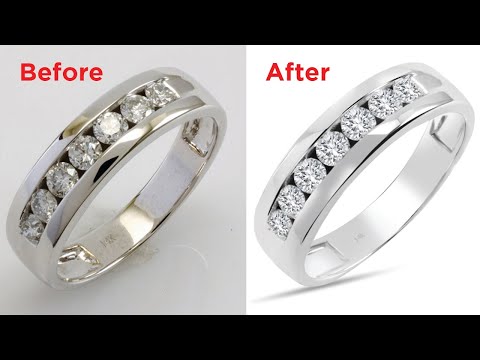
"Now, let's start with some basic adjustments. You can use tools like 'Levels,' 'Curves,' or 'Brightness/Contrast' to improve the overall exposure and contrast of your photo. These adjustments can make a significant difference in the image's quality."
[Step 4: Spot Healing Brush]
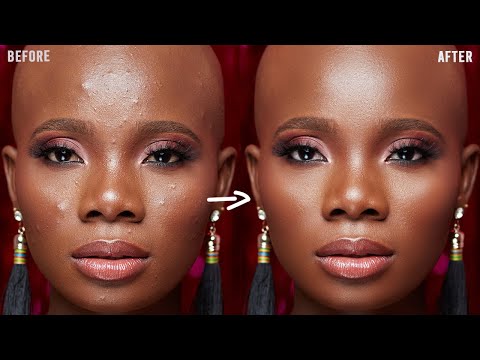
"To remove small imperfections, blemishes, or distractions on the subject's skin or background, we'll use the 'Spot Healing Brush.' Simply select the tool, brush over the areas you want to retouch, and watch them disappear magically!"
[Step 5: Dodge and Burn]
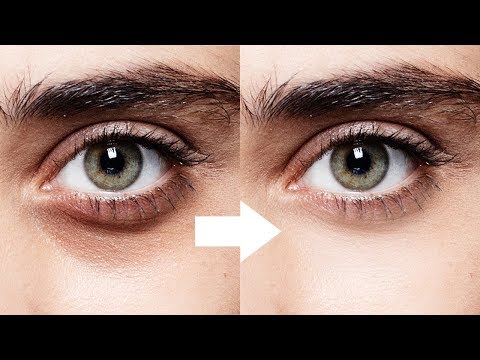
"For more precise control over highlights and shadows, we'll use the 'Dodge' and 'Burn' tools. Dodge lightens areas, while Burn darkens them. This technique helps you emphasize certain parts of your image and create depth."
[Step 6: Frequency Separation]
"For more advanced retouching, like smoothing skin or reducing wrinkles, we'll utilize the 'Frequency Separation' technique. This involves splitting your image into two layers - one for texture and one for color. It's a powerful method for achieving professional-level skin retouching."
[Step 7: Selective Color Adjustments]
"To enhance specific colors in your photo, you can use the 'Selective Color' adjustment layer. This allows you to tweak individual color channels, giving your image a unique and polished look."
[Step 8: Final Touches]
"After making all the necessary adjustments, take a step back and review your work. You can compare it to the original by turning off the duplicated layer. Make any final touches or tweaks to ensure your photo looks its best."
[Conclusion]
"And there you have it! These are some of the essential Photoshop retouching techniques to elevate your photos. Remember, practice makes perfect, so keep experimenting and refining your skills. If you found this tutorial helpful, don't forget to give it a thumbs up and subscribe for more Photoshop tips and tricks. Thanks for watching, and I'll see you in the next video!
Thank you all
.
-~-~~-~~~-~~-~-
Please watch: "Create a Highly Realistic SKIN TEXTURE in Photoshop"
-~-~~-~~~-~~-~-
welcome back to my channel! Today, I'm excited to share some essential Photoshop retouching techniques that will help you transform your photos into stunning works of art. Whether you're a beginner or an experienced photographer, these tips will come in handy for enhancing your images. So, let's dive right in!"
[Step 1: Import Your Image]
"The first step in the retouching process is to import your image into Photoshop. You can do this by going to 'File' and selecting 'Open.' Choose the image you want to work on and click 'Open.' Your image will now appear on the canvas."
[Step 2: Duplicate the Background Layer]
"Before making any changes, it's crucial to duplicate the background layer. This allows you to work non-destructively and preserve the original image. To do this, right-click on the background layer and select 'Duplicate Layer.'"
[Step 3: Basic Adjustments]
"Now, let's start with some basic adjustments. You can use tools like 'Levels,' 'Curves,' or 'Brightness/Contrast' to improve the overall exposure and contrast of your photo. These adjustments can make a significant difference in the image's quality."
[Step 4: Spot Healing Brush]
"To remove small imperfections, blemishes, or distractions on the subject's skin or background, we'll use the 'Spot Healing Brush.' Simply select the tool, brush over the areas you want to retouch, and watch them disappear magically!"
[Step 5: Dodge and Burn]
"For more precise control over highlights and shadows, we'll use the 'Dodge' and 'Burn' tools. Dodge lightens areas, while Burn darkens them. This technique helps you emphasize certain parts of your image and create depth."
[Step 6: Frequency Separation]
"For more advanced retouching, like smoothing skin or reducing wrinkles, we'll utilize the 'Frequency Separation' technique. This involves splitting your image into two layers - one for texture and one for color. It's a powerful method for achieving professional-level skin retouching."
[Step 7: Selective Color Adjustments]
"To enhance specific colors in your photo, you can use the 'Selective Color' adjustment layer. This allows you to tweak individual color channels, giving your image a unique and polished look."
[Step 8: Final Touches]
"After making all the necessary adjustments, take a step back and review your work. You can compare it to the original by turning off the duplicated layer. Make any final touches or tweaks to ensure your photo looks its best."
[Conclusion]
"And there you have it! These are some of the essential Photoshop retouching techniques to elevate your photos. Remember, practice makes perfect, so keep experimenting and refining your skills. If you found this tutorial helpful, don't forget to give it a thumbs up and subscribe for more Photoshop tips and tricks. Thanks for watching, and I'll see you in the next video!
Thank you all
.
-~-~~-~~~-~~-~-
Please watch: "Create a Highly Realistic SKIN TEXTURE in Photoshop"
-~-~~-~~~-~~-~-
 0:13:45
3 Photoshop Tricks for FAST High-End Retouching!
 0:14:49
Photoshop Retouch Tricks for FAST High End Retouching By wicckk
 0:22:07
Fast Photoshop Retouch Tricks for High End Results
 0:10:54
Face Retouching - Best Photoshop Tutorial | Skin Retouching
 0:08:02
How to RETOUCH SKIN like a PRO in Photoshop - Easy Tips !!
 0:05:21
Face Retouching - Best Photoshop Tutorial | Skin Retouching 2023
 0:14:01
3 Superfast Ways to Auto-Repair Skin + Free Actions! - Photoshop Tutorial
 0:09:03
Dodge & Burn FAST with 'Lines' in Photoshop!
 0:10:08
From Blemished to Beautiful: Master Acne SKIN RETOUCHING in Photoshop Elements
 0:01:01
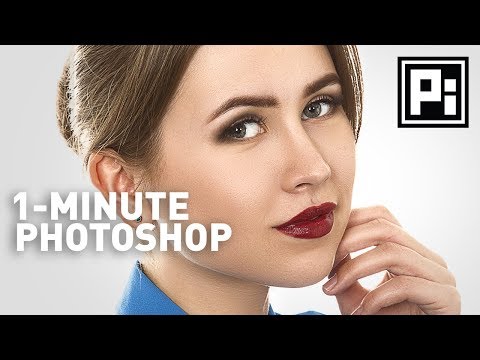
Skin Softening with Beautiful Texture | 1-Minute Photoshop (Ep. 4)
 0:12:22
High-End Skin Retouching Beginner Photoshop Tutorial 10 Minutes | Frequency Separation
 0:16:34
The 3 Steps to High-End Skin Retouching in Photoshop!
 0:05:32
Get Free Photoshop Action & Retouch Action Pack!
 0:05:00
Fast Retouching Technique in Photoshop for Any Skin
 0:07:15
HOW to SMOOTH SKIN using FREQUENCY SEPARATION in Photoshop | Skin Retouching Tutorial
 0:01:00
Skin Retouch Photoshop
 0:09:09
Simple COLOR GRADE Trick To Make Your Photo 'Pop' (Look MORE 3D!)
 0:01:01
1-Minute Photoshop - Remove Dark Circles Naturally
 0:25:28
How to Dodge and Burn in Photoshop [2023 Updated Skin Retouching Tutorial]
 0:07:58
Hi End Jewelry retouching & Photoshop Tutorial
 0:02:54
Clean Your Skin - Skin Retouching | Best Photoshop Tutorial
 0:44:45
The Ultimate Guide To Retouching Perfect Portraits With Photoshop
 0:00:38
Convert Low-Res Graphic to High-Res in Photoshop! #Shorts
 0:15:09
8 Photoshop Hacks For STUNNING Portraits!
Комментарии