filmov
tv
Tutorial 03: Arduino IDE and Sketch Overview: Arduino Course for Absolute Beginners (ReM)

Показать описание
🤩 FREE Arduino Crash Course 👇👇
*Click Below to Read About This Topic on Our Website*
We designed this circuit board for beginners!
SHOP OUR FAVORITE STUFF! (affiliate links)
---------------------------------------------------
Get your Free Trial of Altium PCB design Software
We use Rev Captions for our subtitles
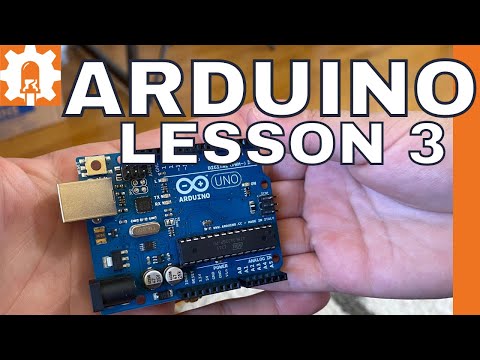
Arduino UNO R3:
Budget Arduino Kits:
Multimeter Options:
Helping Hands:
Soldering Stations:
AFFILIATES & REFERRALS
---------------------------------------------------
FOLLOW US ELSEWHERE
---------------------------------------------------
*Description:*
IDE stands for Integrated Development Environment. Pretty fancy sounding, and should make you feel smart anytime you use it. The IDE is a text editor like program that allows you to write computer code for your Arduino board.
When you open up the Arduino program, you are opening the IDE. It is intentionally stream lined to keep things as simple and straightforward as possible. When you save a file in Arduino, the file is called a sketch - a sketch is where you save all the computer code that you have written.
Lets take a look at some of the buttons on the IDE.
The button that looks like a checkmark is called "verify". When you press this, your code will be compiled and any errors will be displayed in the window at the bottom. The short cut key for verify is Control + R.
The button in the shape of an arrow pointing right is the upload button. When you press this, the sketch will be uploaded to your Arduino board. The short cut key for upload is Control + U.
The button on the far right side of the screen is the serial monitor button. When you use the serial monitor functions, you can send and receive information from your Arduino board while it is running. We will talk much more about serial monitor later, but I just wanted to point it out now. The shortcut key for serial monitor is Shift + Control + M.
*Try On Your Own:
This course is based around the example sketches provided with the Arduino IDE. Open up your Arduino IDE and go to File - Example - 01.Basics and open up three different sketches. Try loading the sketches to your Arduino using the mouse and the key board short cuts.
*Further Reading:*
*About Us:*
This Arduino tutorial was created by Open Source Hardware Group. We are an education company who seek to help people learn about electronics and programming through the ubiquitous Arduino development board.
*Click Below to Read About This Topic on Our Website*
We designed this circuit board for beginners!
SHOP OUR FAVORITE STUFF! (affiliate links)
---------------------------------------------------
Get your Free Trial of Altium PCB design Software
We use Rev Captions for our subtitles
Arduino UNO R3:
Budget Arduino Kits:
Multimeter Options:
Helping Hands:
Soldering Stations:
AFFILIATES & REFERRALS
---------------------------------------------------
FOLLOW US ELSEWHERE
---------------------------------------------------
*Description:*
IDE stands for Integrated Development Environment. Pretty fancy sounding, and should make you feel smart anytime you use it. The IDE is a text editor like program that allows you to write computer code for your Arduino board.
When you open up the Arduino program, you are opening the IDE. It is intentionally stream lined to keep things as simple and straightforward as possible. When you save a file in Arduino, the file is called a sketch - a sketch is where you save all the computer code that you have written.
Lets take a look at some of the buttons on the IDE.
The button that looks like a checkmark is called "verify". When you press this, your code will be compiled and any errors will be displayed in the window at the bottom. The short cut key for verify is Control + R.
The button in the shape of an arrow pointing right is the upload button. When you press this, the sketch will be uploaded to your Arduino board. The short cut key for upload is Control + U.
The button on the far right side of the screen is the serial monitor button. When you use the serial monitor functions, you can send and receive information from your Arduino board while it is running. We will talk much more about serial monitor later, but I just wanted to point it out now. The shortcut key for serial monitor is Shift + Control + M.
*Try On Your Own:
This course is based around the example sketches provided with the Arduino IDE. Open up your Arduino IDE and go to File - Example - 01.Basics and open up three different sketches. Try loading the sketches to your Arduino using the mouse and the key board short cuts.
*Further Reading:*
*About Us:*
This Arduino tutorial was created by Open Source Hardware Group. We are an education company who seek to help people learn about electronics and programming through the ubiquitous Arduino development board.
 0:08:27
Tutorial 03: Arduino IDE and Sketch Overview: Arduino Course for Absolute Beginners (ReM)
 0:09:37
Arduino Tutorial 03: Analog Inputs
 0:08:46
2023 Arduino Tutorial for Beginners 03 - Hello World
 0:20:46
Arduino Tutorial für Einsteiger: Eigene Beispielschaltung, ersten Sketch schreiben | Arduino #3
 0:07:54
Arduino Tutorial for Beginners 3 - How to Install Arduino IDE on Windows 10 + First Sketch
 0:00:18
When Your Crush Knows Morse Code 💀 #electronics #arduino #engineering
 0:23:03
Arduino Tutorial 03 - Structure and Syntax
 0:00:11
LED Matrix - Arduino Project for Beginners #arduino #engineering #diy
 0:09:28
IoT based Decibel Meter using Sound Sensor and ESP8266 NodeMCU || Arduino IoT Cloud
 0:00:21
learn Arduino programming in 20 seconds!! (Arduino projects)
 0:07:16
Lesson 3 | Download and Install the Arduino IDE for PC | Arduino Crash Course
 0:00:14
LCD Display with Arduino #arduino #diy #programming
 0:00:17
Top 5 Arduino Projects for Beginners. Full tutorial videos in Youtube Channel #arduino
 0:00:19
Testing a CHEAP LCD Display! #engineering #arduino #electronics
 0:49:35
Arduino IDE 2.0 - Testing Release Candidate 3
 0:05:52
Arduino Tutorial - 3. Einfacher Input (#3)
 0:27:37
Arduino IDE 2.0 erklärt | Tutorial Deutsch
 0:00:16
ESP32 Temperature and Humidity Sensor Project#arduino #electronics #engineering #esp32
 0:00:08
arduino cool light | arduino project | arduino tutorial | arduino led chaser | #arduino #electronic
 0:16:34
You can learn Arduino in 15 minutes.
 0:13:47
Arduino Video Tutorial 03: The Love-O-Meter | RS Components
 0:00:18
Simple Arduino & Python Projects 👀🧑🏻💻💫 | #arduino #python #opencv #electronic #computervision...
 0:00:17
When The Quiet Kid Does Your Homework 💀 #electronics #arduino #engineering
 0:00:10
Arduino Projects 😱
Комментарии