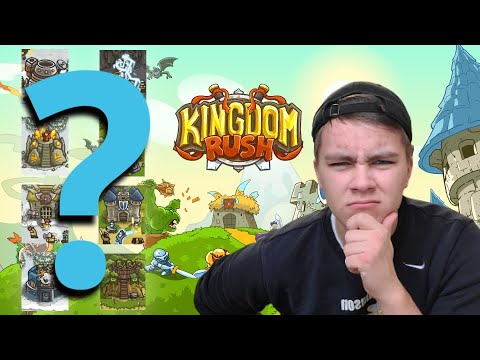
What's the Best Tower in Kingdom Rush Vengeance?

preview_player
Показать описание
Sorry for the late upload! Here is my ranking of the NINETEEN towers in Kingdom Rush Vengeance. Leave any video suggestions in the comments below. I hope you enjoy.

Thanks for Watching.
Рекомендации по теме
Комментарии
Автор

**Laughs in Steam Version** _"Hah! You brought them with Money?"_

aro_ger_
Автор

Hard disagree on the harassers.
They deal insane damage with their upgrades, like a physical blazing gem, and have a very good dodge chance for blocking.

Don#t use them as blockers, but as a damage tower.
Ideally, pair them with a mausoleum and put them behing the gargoyles. Then you have great physical and magic damage, you can still block people who temporarily get behind the gargoyles and you just shred everything.

You can do a solo run with just harassers, no Eiskalt, and it doesn't even feel that hard. That should show you how strong they are imo

aldoushuxley
Автор

Kingdom Rush Frontiers is/was the gold standard for me.

WingWingHerro
Автор

Objection the furnace is good at slowing and stalling enemies and stops most fast enemies for you to prepare and have time to get a perfect soul impact

stormy
Автор

Molten furnace is so much better than rotten forest imo, it works so much more often, it deals better damage
At least in my opinion

alechandro
Автор

I'd rather use melting furnace instead of rotting forest.

venzan
Автор

The melting furnace is one of the best towers in the game. When properly placed it can hit two, three or even four other towers with its 30% dmg boost. With that ability alone it can produce more damage than a fully upgraded tower. It stuns, it hits every enemy in its range at once and it has a powerful area attack. This tower when placed properly will out damage EVERY other tower in this game. It requires proper placement and there are some maps where there just isn't a good choke point for it, but on maps where you can find at least one choice spot this tower will dominate the battle. Its only weakness is that it isn't good against single powerful enemies. Against large groups, with two or three neighbor towers within its damage-boosting range, this tower is devastating. It is best paired with some other tower that can stall enemies since it will synergize with its area stun attacks to create a truly formidable kill box.

kirbyjoe
Автор

Harrasers being lower tier kinda hurt my feelings and my strategy.

Harrasers are not meant to be blocker they are meant for dps/damaging enemies and supporting the blockers like orc den and adding up damage with the shadow archers

I have this strategy called "harraser's spotlight" where i put harrasers behind orcs and surround them with shadow archer and asra running around the map, this strategy is good at stopping enemies in one spot and killing enemies quickly, this strategy is great as an all around since it synergize with other type of strategy.

kanetashadowfall
Автор

Don't take this as hate, but as a guy that has done many challenges in KrV and played with literally every tower for hours... The best advice I can give you is : "playstyles" . I've been wanting to make a ranking video for towers in KrV for so long, but every time I think I've found a place for a tower, it turns out to be wrong . Because there are many combinations with towers and heroes that make up a different playstyle.
Try to play a bit more with Gobrangs (bees do true damage). Place them in the front to shoot towards the exit .Gobrangs are mid game to endgame towers . Much Love . Keep up the gw .

babyhandlebreak
Автор

the insta-kill for swamp thing is for him being in his pool, too. he throws a red rock when it's going to insta-kill.

xenxander
Автор

the Bone Flingers are also come with the Bone Golem, a rather tanky blocker that can also shoot, and summon skeleton warriors.

if you fill the map with Bone Flingers with skeleton warrior upgrade, you can fill the map with waves of skeletons, even can outnumber the enemy waves

OrisOsiris
Автор

Grim cementery + rotten forest is an extreme combo, because the zombies keep the enemies at bay while the forest does cheap damage, plus with the fog and the hands upgrade, you're unstoppable(downside:flying enemies)

pelagiaorcine
Автор

With Apple Arcade the game comes with all towers and hero’s, you just have to unlock them as you progress the campaign

AngerMaker
Автор

The blazing gem is litterally the exact same thing as an inferno tower from clash of clans/clash royale.

ItsAidanGames
Автор

You need to play the Kingdom Rush ReVengeance mod!

travis
Автор

I strongly disagree with the orc den and elite harassers, if you pair these two together they can do so much damage, imo the orcs are better since one extra unit provides more stalling power, and the arrow ability on the harassers can shred most heavily armored enemies that the orcs need help dealing with.

cerberus
Автор

The Hog Rider card is unlocked from the Spell Valley (Arena 5). He is a very fast building-targeting, melee troop with moderately high hitpoints and damage. He appears just like his Clash of Clans counterpart; a man with brown eyebrows, a beard, a mohawk, and a golden body piercing in his left ear who is riding a hog. A Hog Rider card costs 4 Elixir to deploy.
Strategy
His fast move speed can boost forward mini tanks like an Ice Golem in a push. At the same time, he can also function as a tank for lower hitpoint troops such as Goblins as he still has a fair amount of health. Most cheap swarms complement the Hog Rider well, as they are nearly as fast as him and usually force more than one card out of the opponent's hand.
The Hog Rider struggles with swarms, as they can damage him down and defeat him quickly while obstructing his path. Barbarians in particular can fully counter him without very strict timing on the defender's part, though be wary of spells.
A Hunter can kill the Hog Rider in 2 hits if placed right on top of it. However, if you place something in front of the Hog Rider, the Hunter's splash will damage the Hog Rider and hit the card in front of it more.
The Hog Rider in conjunction with the Freeze can surprise the opponent and allow the Hog Rider to deal much more damage than anticipated, especially if the opponent's go-to counter is a swarm, or swarms are their only effective counter to him. Skeletons and Bats will immediately be defeated by the spell, while Spear Goblins, Goblins, and Minions will be at low enough health to be defeated by a follow up Zap or Giant Snowball.
However, this strategy isn't very effective against buildings as the Hog Rider will take a while to destroy the building, giving the opponent ample time to articulate another counter.
Against non-swarm troops, it can deal a lot of damage during the freeze time, but this can allow the opponent to set up a massive counterpush. For this reason, players should either only go for a Hog Rider + Freeze when they have other units backing it up from a counterattack, or if the match is about to end and they need to deal as much damage as possible.
It is not a good idea to send in a Hog Rider simply to destroy a building, especially if it is the only building targeting unit available, as defeating Crown Towers becomes substantially more difficult. Spells or simply waiting out the lifetime of the building are more effective. The exception to this is an Elixir Collector placed in front of the King's Tower. If a Hog Rider placed at the bridge, he can destroy the Collector for a positive Elixir trade, though the damage from both Princess Towers will usually mean he does not survive to deal any damage to them. However, if the opponent sends in defending troops, it can be an opportunity to gain spell damage value.
In a deck with several low-cost cards, it might be worth it to simply send the Hog Rider against one building. These decks shuffle their card rotation quick enough, that they will arrive to their next Hog Rider before the next building arrives in the opponent's card rotation.
Long-ranged troops like Musketeer and Flying Machine can snipe those buildings, preserving some of the Hog Rider's health, possibly allowing it to get some Tower damage.
When there are buildings placed in the middle to counter the Hog Rider, understanding the placement of the Hog Rider and the type of building placed can help the Hog Rider to bypass certain buildings.
Passive buildings such as spawners and Elixir Collector have a larger hitbox than defensive buildings; which means that if a passive building was placed 3 tiles away from the river in the middle of the opponent's side, then it is impossible for the Hog Rider to bypass that placement as the Hog Rider will get pulled to that building.
Defensive buildings have a smaller hitbox than a passive building, which means if that if a defensive building was placed three tiles away from the river in the middle of the opponent's side, a Hog Rider placed at the very left or right side of the Arena may be able to bypass it due to its smaller hitbox.
If the player has a building already placed down in the center of the arena, and the opponent tries to bypass it with a Hog Rider at the edge of the arena, they can use certain air troops to push the Hog Rider towards the building as it jumps over the river, effectively denying the bypass attempt. They must be already hovering over the correct placement, as very quick reflexes are required to correctly perform this technique.
For Bats, Skeleton Dragons, and Minion Horde, they should be placed right in front of the Hog Rider as soon as it is deployed.
For Minions, Skeleton Barrel, Mega Minion, Flying Machine, Electro Dragon, Baby Dragon, Inferno Dragon, Balloon, and Lava Hound, stagger the above placement one tile to the right if the Hog Rider is placed on the left side of the arena, and vice versa.
They can also use ground troops to achieve the same result. Something like an Ice Golem deployed at the Hog Rider’s landing spot will obstruct his path and force him to go around the unit, which causes him to be closer to the building instead of the Crown Tower.
The Hog Rider can kite Very Fast non-building targeting troops due to his own Very Fast speed and building only targeting if he is placed on the fourth tile from the bridge, slightly into the opposite lane. He can also stall grounded units when placed right at the bridge. He will pull them towards him while deploying, and then be untargetable by them when he jumps over the bridge. After landing, he will pull them back. This can be useful when the player needs to deal damage in the same lane they are defending. It will also help separate troops behind a tank in a large push.
A Tornado placed on the second tile front of the player's King's Tower and staggered two tiles towards the Princess Tower will activate it without any damage dealt to the Princess Tower, helping them in defending future pushes. This can also be a method of mitigating all damage dealt to a Princess Tower, but doing this more than three times may result in the King's Tower's health being low enough to be targeted directly, opening up the possible threat of a back door three crown. A better alternative is to pull the Hog away from the Princess Tower into the attacking range of all three Crown Towers, which will negate all damage as long as none of them are already distracted
A very powerful combo is the Hog Rider, the Musketeer, and the Valkyrie, typically referred to as the Trifecta. The Musketeer will defend against most troops, while the Valkyrie can protect her and the Hog Rider from swarms or high damage units. The Hog Rider is used to deal damage to the tower.
This can be effectively countered by Lightning, one-shotting the Musketeer and severely damaging both the Valkyrie and Hog Rider. The Minion Horde is also effective, but the enemy can Zap them and the Musketeer will one-shot them all. Even if the Musketeer is defeated, the Hog Rider and Valkyrie will have enough time to severely damage the Tower.
The Hog Rider should be placed behind the Valkyrie to give it a boost so that it stays in front of the Hog Rider, protecting it.
A Hog Rider combined with a Goblin Barrel can be awkward for the opponent to defend against. Timing it so that the Hog Rider is tanking the tower shots for the Goblins is the most effective way to deal damage. However, a Barbarian Barrel can shut this down with minimal Tower damage for a positive Elixir trade, as long as the Goblin Barrel was placed directly on the Tower.
Pairing the Hog Rider with the Balloon can deal devastating damage. If executed properly, the Hog Rider will act as a tank while the Balloon threatens to deal massive damage. The Hog Rider can also destroy any buildings attempting to slow down the combo. However, this combo is very vulnerable to swarms and anti-air cards as neither of the troops target anything but buildings. Additionally, they are easy to separate, due to the disparity in move speeds. Alternatively, the Hog Rider and the Balloon can be played in different lanes to spread the opponent's defenses thin. However, a building or Tornado can bring them back together for an easier defense.
The Hog Rider can be paired with the Lumberjack as both a swarm bait and damage combo. It is a very fast combo with an extremely high damage output potential, so the enemy will likely try to counter it with a swarm. If this happens, use a spell like Arrows to render the opponent defenseless. If they manage to defeat the Lumberjack, the dropped Rage will make the Hog Rider even more dangerous than it normally is.
A fast and deadly combination is the Hog Rider and Mini P.E.K.K.A. combo. Both units are fast but the Mini P.E.K.K.A. does much more damage and does not attack only buildings so the Mini P.E.K.K.A. can deal with troops like the Executioner and Musketeer. However, this combo can be defeated with swarms like Skeleton Army, which will defeat both of them since neither of them can deal area damage. They are also unable to target air troops, so the Minion Horde can stop this easily.
A risky play is to deploy the Hog Rider at the bridge as soon as the match starts. If the opponent does not react fast enough, the Hog Rider will deal a significant amount of damage to the Princess Tower. This can also allow the player to quickly scout the opponent's deck if they happen to react to him fast enough.

astroze
Автор

This is the first tier list that i agree on.
All i would change is
Deep devil's reef swap with bone flingers.
The bone flingers are literally unstoppable if you have multiple of them. All of the summons of the skeletons
create an army like necromancer, the bonems do extra damage with their ranged attack, and got milk increases the overall performance of the tower.
Of course this is your opinion, and i respect it.

astroze
Автор

Many thanks! I never ever changed my towers - will do so now!

FirstLast-isxe
Автор

For the people that just wanted to equip the 5 best towers and not to spend money. The list for free games goes as fallows (I think)
1. Bone flingers
2. Spectral mausoleum
3. Infernal mage
4. Dark knights
5. Shadow archer
6. Orc shaman
7. Rocket riders
8. Orc warrior den
9. Elite harassers
10. Melting furnace
11. Goblirangs

If I got them out of order from the list plz add a comment under this one.

CommandoNugs