filmov
tv
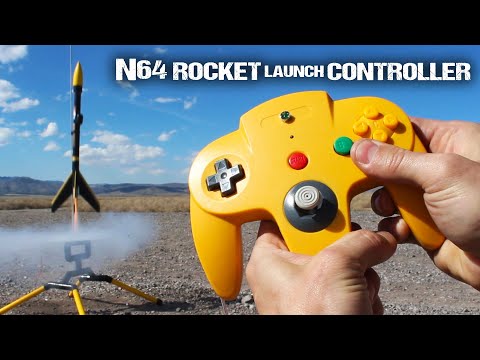
How To Make An N64 Rocket Launch Controller

Показать описание
Here's how to hack an N64 game controller, into a remote rocket launch controller ... That'll launch freakin' rockets in real life, and ignite fireworks up to 30 feet away.
Some quick links to a few of the materials I used:
Endcard Links:
See What Else I’m Up To:
Project Inspired By:
This was an original idea. (Original to me anyway).
This video is only for entertainment purposes. If you rely on the information portrayed in this video, you assume responsibility for the results of your actions. Have fun, but always think ahead, and remember that every project you try is at YOUR OWN RISK.
Project History & More Info:
This project was inspired by the old Estes Launch Controllers for small model rockets.
Looking inside, I saw that basically all it was, was a simple circuit using 4 AA batteries, with a switch to close the connection and send electricity to two alligator clips at the end. There were a couple of other components, but they aren't really worth mentioning.
For $25 I thought I could do a lot better than that, and perhaps make a controller that looked a lot cooler, and nerdy?, than a square yellow box.
I went online and found a yellow N64 game controller for $10 (free shipping).
I thought the yellow controller would be a nice touch, because of how it matched the rocket and launch-pad color scheme.
I knew that basically all I needed to do was rig the controller with an internal power source, and find a way to re-route the circuits to deliver 2+ amps of electricity when a button was pushed.
Originally I tried soldering and re-routing the existing circuitry, but the internal resistances of the contact pads severely limited the available output current.
I made a trip to Radio Shack to play around with buttons, LED's, and buzzers, and eventually found some that worked for around $5-8 total.
I had to modify the slot with a file to shave down the walls enough to hold the batteries firmly in place, but not so tight that they couldn't be removed.
I left the other buttons in the controller for show, and left the circuit board inside even though it doesn't serve any electrical purpose anymore. It just helps hold everything together, and keeps the buttons firm.
I made the lead wires 30 feet long, which reduces the amount of available DC current at the igniter end.
I have measured 2.5 amps at the igniter end, while the controller shows you can get closer to 7 amps of current without the wires connected. I imagine different lengths of wire will produce results between 2.5-7 amps. However, all you need to light an igniter is 2 amps, so it works!
But that's just my opinion. :)
#tkor #thekingofrandom
 0:21:29
I built a MODERN N64...
 0:02:10
How to Make N64 Style Graphics
 0:21:02
Making a Nintendo 64 out of Cardboard
 0:08:37
How To Make An N64 Rocket Launch Controller
 0:08:50
How I made the most beautiful N64 Level
 0:05:03
Make N64 Repros At Home (No soldering/wiring/skills required!)
 0:21:10
Building a Portable Nintendo 64
 0:12:48
how to create accurate ps1 and n64 styled graphics
 0:00:51
How to Ssetup an N64 to Today's TVs
 0:00:47
Making N64 Textures #indiegame #n64 #blender #gamedev
 0:00:17
Trying Out N64 Style Low Poly with Blender
 0:00:38
A Mystery N64 Game
 0:11:36
Bringing N64 graphics to Unreal Engine | Devlog
 0:09:05
EASY Way to Make N64 REPROS - Nintendo 64 Reproduction Games
 0:02:14
How to tell if your N64 game is fake
 0:00:43
Making the main character for my game #indiegame #n64 #blender #gamedev #gaming
 0:06:01
A New Game... For The N64?
 0:01:24
Quick & Easy Nintendo N64 No Video Fix!
 0:10:32
Who knew the N64 could look this good? - Nintendo 64 HD Setup with EON Super 64 | Nintendrew
 0:00:59
DO THIS To Make Your N64 REGION FREE!
 0:04:15
N64 Classic Edition - The World's Smallest Nintendo 64 (DIY!)
 0:19:48
Making my N64 Inspired Adventure Game // DEVLOG #1
 0:06:05
Project64 N64 Emulator Setup Guide 2024
 0:00:46
Switch Games on N64?! #shorts #nintendo #n64 #switch #videogames #games #viral #facts #gaming #fake
Комментарии