filmov
tv
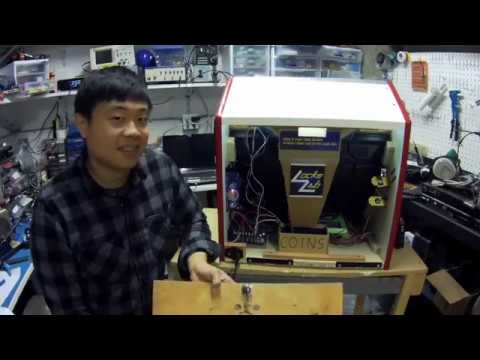
BARTOP ARCADE CABINET Layout Design and Build Tips PART 2

Показать описание
Like, subscribe, and comment below.
This video covers tracing the template found on my website and cutting out a side panel. I am using this specific panel as a router template so I can crank out a bunch of these quickly without having to layout everything with a ruler or the paper template for future builds. I am going to try and cut out parts of the interior of this template so I can trace on layout lines to a piece underneath as well for a time saver. Basically creating an Arcade Jig to help students with some of the trickier math and measurements to give us excellent repeatable cuts!
If you found this video helpful consider buying me lunch!
Programming the GPIO buttons to work with RECALBOX (old method):
Full Bartop Build Video
BARTOP ARCADE CABINET Layout Design and Build Tips PART 1
After taping together the side panels sheets measure them before cutting any wood/mdf to make sure your printer settings were correct. I personally use 11x17" paper and haven't tried the 8.5 x 11" paper.
More explanations and downloadable packages!
Raspberry Pi and ODroid XU4 operating system - donate to them!
joystick and button sets for $60-$100
My Local suppliers
 0:04:32
BARTOP ARCADE CABINET Layout Design and Build Tips
 0:05:27
BARTOP ARCADE CABINET Layout Design and Build Tips PART 2
 0:00:16
Custom Built Bartop Arcade. no 1UPArcade needed
 1:05:05
Build a BIGGER BARTOP ARCADE - FULL LENGTH AND FREE PLANS!
 0:00:27
Working on the wall-mount arcade cabinet😍 Can’t wait to show you the end-result 🕹️ #arcademachine...
 0:42:04
How I Made My 3rd Bartop Arcade Machine, A Step by Step Process
 0:04:11
BIGGER Bartop Arcade 2018 build. Free arcade plans!
 0:00:09
My arcades at home 🥰
 0:00:16
Bartop Evo Xr - WooDBartop's
 0:13:24
DIY wall-mounted or bartop ARCADE MACHINE! (free plans!)
 0:09:10
Building an Arcade Cabinet? STOP! Do NOT Make These Mistakes!
 0:14:39
Nintendo Style Bartop Arcade Kit Assembly Video
 0:00:24
Ultimate DIY Bartop Arcade build video available on our channel! 🕹🔥👾😁
 0:07:08
How to Build a Custom Bartop Arcade -PART ONE-
 0:00:31
Bar top build v1
 0:10:27
Designing A Curved Bartop Arcade in Fusion360!
 0:00:58
Homemade bar top arcade
 0:12:36
How To: Make an awesome Arcade Cabinet / Bartop Arcade for under £2 / $3 !
 0:00:20
DONKY KONG . VERTICAL BARTOP
 0:15:41
I built a Retro Arcade Machine from Old Pallets
 0:04:42
Sketch Up Digtial Design - Bartop Arcade Build
 0:00:53
DIY Bartop Arcade build
 0:12:49
How to Build a Retro Bartop Arcade Part 1
 0:03:06
Bartop Arcade Cabinet Free Plan .dxf Control panel Layout
Комментарии