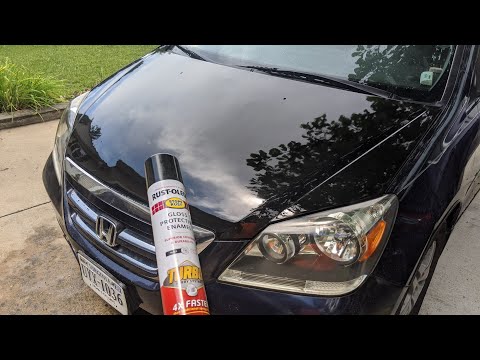
Rust-Oleum turbo paint buff and wax! Must watch!

preview_player
Показать описание
Hi, in this video I will show you how to make your $9 paint job look like a $200 paint job.

Products used:

Рекомендации по теме
Комментарии
Автор

I have to say for a rattle can paint job it looks pretty dam good!!! Here are a couple of tips for you. Before you do any bodywork you should wash the vehicle laundry detergent works very well and get edges underneath. You used the green primer that is what we call an e coat primer to seal the metal you should have put a primer surfacer then sanded if you needed to, also get one of those wet sanding sponges so you don't get the finger lines as you sand and put a couple of drops of ivory liquid dish soap in the water it helps with smoother sanding. The biggest thing never ever wax a fresh paint Wax doesn't make the paint shine buffing makes the HIGH GLOSS the wax is what protects the shine that you just created... get rid of that buffer you need one that you can feather the switch if your afraid of burning the edges put some of the blue painters tape on the edges to help you from burning... Hope this helped Not judging just want to make all cars shiny...Good luck

kp-xwtt
Автор

Nice job.

I had never painted a car or body parts in 30 years and at least 25 cars I've owned. This past week I painted my teenage son's Impreza in an open carport on gravel and dirt ground. I figured out what works for my area (western Colorado). I did 5 and 7 light to medium-wet coats on a whole car, over 4 sessions without fail. Apply and let dry for 15 (minimum) to 20 (maximum) minutes between coats and it works fine for the paints I used. You should spray two small test areas with all environmental/time factors the same before the actual project. For example, if you have an area to spray that takes 10 minutes to paint it, wait and warm-up/shake your next can(s) for 5 minutes and start the next coat. That's a total of 15 minutes. I know up to 20 minutes is also good. But 40 minutes was too long because that induced chemical reactions and severe wrinkling. I painted in the same order/pattern each time I sprayed a section. I had zero runs, spray errors, or reaction defects. The original paint condition was below average. No body rust, but 50% of clear coat was gone and hunter green was faded and rock chips galore.

Below is the weather, process and paint I used.

1. Up to 3-mph occasional breeze is okay, anything faster or constant is to be avoided. Clear skies, for light, preferred. 20% to 40% humidity. Temperature between 50F and 72F while spraying. Warmed spray cans in hot water in a bucket. Shake them as much as possible.

Paints used on sides, nose and rear (3 sections):
-- Rust-Oleum Painter's Touch Gloss Navy Blue 2X Paint + Primer: 1 medium-wet coat.
-- Rust-Oleum Stops Rust Enamel Gloss Navy Blue: 2 medium-wet coats.
-- Rust-Oleum Stops Rust Enamel Crystal Clear coat: 2 light coats + 2 medium-wet coats. I think a 5th coat could be applied with no problems.

Paints used on hood, roof and hatchback (1 section):
-- Rust-Oleum Painter's Touch Gloss Black 2X Paint + Primer: 2 coats.
-- Rust-Oleum Universal Hammered Black: 3 coats (4th coat optional). ***Color dries gloss dark grey with blackish specs, not solid black.

2. Sanded car with 100 and 150 grit dry paper by hand, with a scrubby dish sponge as the pad to fold the paper around. First, I sanded high defect/damaged spots...double their original size. Then I sanded vertically and again horizontally (cross hatched) the whole car.

3. From this point forward you must walk carefully to protect from dirt contamination...do not drag or scuff the ground. Wet the surrounding area to help keep dust out of air. Douse car with hot water and wipe down with rags. Let air dry 30 minutes. Check that all areas are smooth/scuffed well...touch up as needed. Wash with hot water+dish soap and rags/sponge. Rinse well. Dry with microfiber. Air dry 15 minutes. Tape up as necessary. 10 to 15 minutes before paint spraying use a microfiber cloth and lighter fluid or mineral spirits (same thing) to wipe down the section to be painted. Immediately before painting wipe all surface with a tack cloth. As you're spraying move slowly and don't scuff the ground.

4. Even in the open air you will want to use a painting respirator, but at minimum cover nose and mouth with thick damp cloth or N95/N100 face mask. Clear, tight fitting safety eye glasses work best...the larger goggles reflect light and make wet paint difficult to see clearly. I had to go without eye cover and just squinted my eyes when the paint spray was thick, because goggles distorted the light.

5. It will take these paint formulas 3+ hours to dry to firm finger touch so leave it alone for 5 hours. I let it dry 24 hours in the carport and then put it in the Sunlight for 2 more days before driving. At 25 to 30 days I'll polish and wax it.

If you want to see pics drop me your email and I'll send you a couple.

thesetruths
Автор

That my friend, is a Sweet Heart of a JOB!!! YEAH!!! I am doing my wife's entire Toyota Matrix in Black!

BenjaminGonzalez-wvcy
Автор

I cant believe that came out of a spray can. Good job Sir!

charlespratt
Автор

Came out decent but would highly recommend using a sanding block to get the paint flat and even before buffing. Can't wait to see rest of car good job man

ptraleigh
Автор

This gives me confidence in my car! Awesome job man. Thanks for this.

aaronfraser
Автор

That was awesome, talk about a mirror image. I’m doing this to my wife’s Durango. Just picked up 5 Turbo cans of Gloss White. Later this Fall I’m painting my truck with the Turbo Black. You did a great job Sir.

deanbarr
Автор

I do see ripples on the whole hood but due to hand sanding vs. Block, but the results came out awsome regardless. Not bad for budget job.👍

stevelozano
Автор

You should definitely wet sand with the backing pad so you have even and consistent pressure.
No circular motions, either.

jumpinjojo
Автор

Very nice job! This is so exciting! I'm picturing my lawn tractor, my tiller, my trailer, and my metal kitchen cabinets all looking like a million bucks!

Thank you for posting this video.

johnafagerquist
Автор

Looks fantastic! This is how smart people save $!!! FYI- After you paint the whole van just be careful when pumping gas, it has a tendency to eat through or stain the rustoleum.

bretc
Автор

Automotive Spray paint in a can is STILL paint; follow the procedure, (patience included😉) you'll get the results! GREAT JOB!!!!

ZanyJIntPictures
Автор

Be carefully bro I bet every paint shop is getting together right now plotting to get ya 🤣
Outstanding job I will be trying this very soon before they catch us out 😂

tomcruise
Автор

I’m in the process in doing two sides to my Mercedes sprinter van I think I’ll start job after watching this great job and awesome video 👍🏼

FRram
Автор

Very nice, it's hard to believe it came out of a spray can thanks for sharing.

tommycollier
Автор

I just painted the front end of my car with this and was suprised honestly how well it worked BUT now seeing this I am going to go back and paint the whole car and then wetsand and buff it!

Bradvision
Автор

Love it. Been prepping an old trailer. you sold me . I'm ready.

jth
Автор

My man! You got skillzzzz. I bought that paint for my daughter’s accord. Now you raised the bar what it should look like. Damn. Ps; a guy like you needs a compressor. Please look into Fortress line at Harbor freight. Super quiet, dependable. Had mine awhile. Love it.

bufftileguy
Автор

I wish u were my neighbor this way I could do my 96 civic dx coupe, it needs paint bad, you could handle it 4 sure, great video and talent!

v-modsolutions
Автор

This is AMAZING! so I could do this to my whole car if I wanted to? This is crazy good !

junior
visit shbcf.ru