filmov
tv
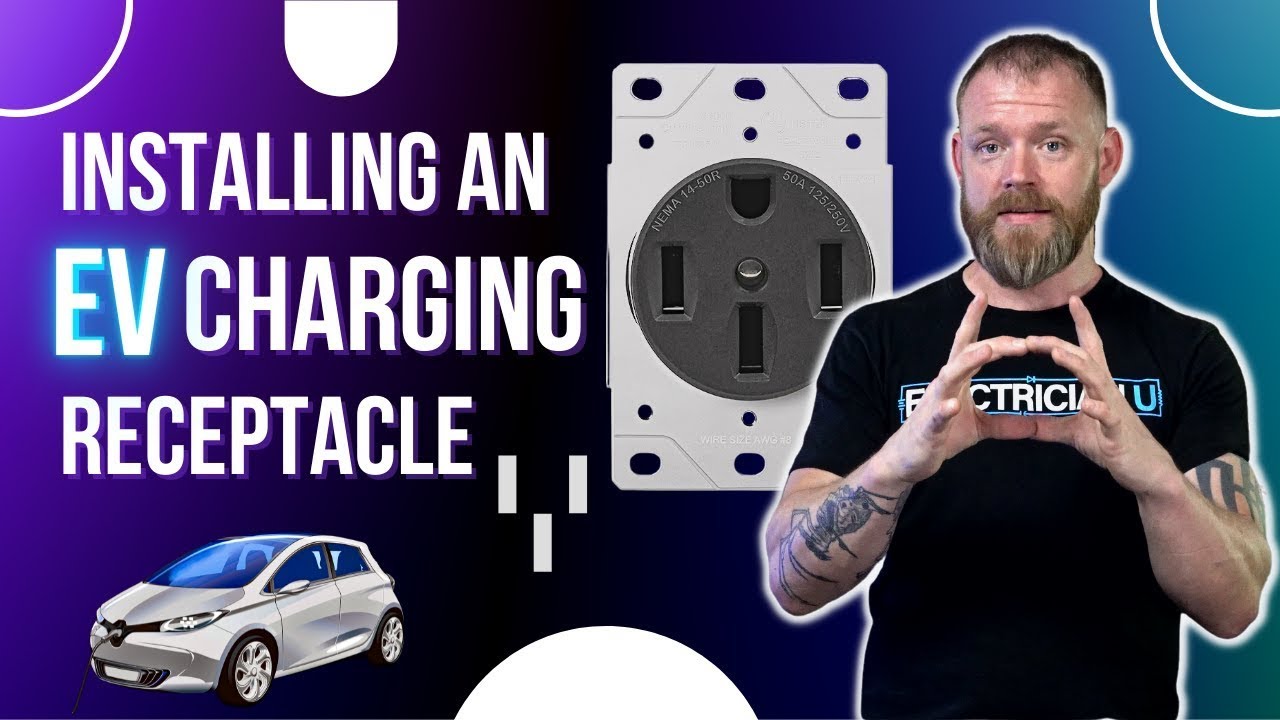
How to Install an Electric Vehicle Charger Receptacle
Показать описание
Electric Vehicles are becoming more and more popular on a daily basis. Maybe you own one yourself or know someone that does. Either way, one of those vehicles are going to need a way to charge their batteries. In this latest episode of Electrician U, Dustin walks us through the process of installing an electric vehicle charging receptacle in a residence.
🤘⚡️EU Learning System⚡️🤘
-Video courses on every side of the electrical trade (theory, code, safety, wiring, install, troubleshooting, leadership, and more)
-Practice exams for 2017, 2020, 2023 code
-YouTube videos categorized and searchable
-Audio lessons
-Forum
-Business version has admin portal and ability to assign learning to technicians and monitor progress
-Any business size from 2 techs to 2,000!
🎓💡CONTINUING EDUCATION💡🎓
-State Approved
-Video Based
✍📝PRACTICE EXAMS📝✍
-2017, 2020, and 2023 NEC versions
-Online Residential Wireman Exam
-Online Journeyman Exam
-Online Master Exam
-300 Question Online Code Cannon (not license specific, all code)
-Take as many times as you want
-All of the above come with printable PDFs
🎤🎧PODCAST🎧🎤
Spotify:
Apple Podcast:
📱👍SOCIALS👍📱
🎧🎹Music, Editing, and Videography by Drake Descant and Rob LeBlanc🎹🎧
#electrician #electrical #electricity
For most EV chargers a Nema 14-50R receptacle will be used. Most of us have probably seen one of these receptacles before in our homes. They are the same ones used for the oven! These receptacles are rated for 50 amps at 250 volts.
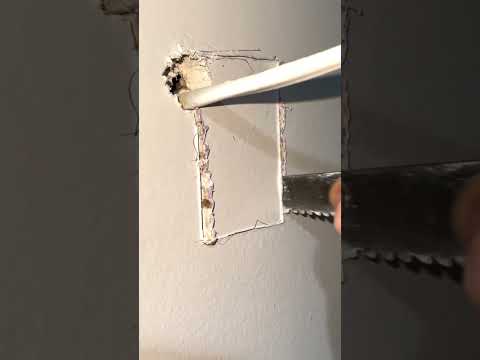
The very first step in the process would be to hire a professional electrician to install the receptacle. Now this would not only be for the non-electrician, but also for an electrician lacking the experience of installing this type of circuit. The second step in the process would be to remove power from the panel you will be installing the wiring to, so we aren’t working in a hot panel. Once we have that done, we need to figure our WHERE the new receptacle will be placed so the two-gang box can be installed. If you are installing the receptacle in an existing house, you will most likely be installing an old work box (sometimes called a pop in box). To finish this portion of the installation, simply cut out the substrate to expose the void in the studs the size of the box you just marked, and you are ready to install the wiring!
For this installation, Dustin is using 8/3 NMC. So, it has 3 #8 conductors (2 hots and 1 neutral) along with a #10 bare copper ground. The cable will need to be fished down the wall to the box location. This will result in you having to go DOWN to the location where you cut the hole in the wall and reach inside the wall cavity to grab hold of the cable and pull it out of the hole. Once the cable is out, simply knock out one of the tabs in the box and pull the cable thru it and secure the box to the wall. Make sure you do not over tighten the screws on the wings so those little tabs don’t break off.
Once the box is installed and wire is in place, then carefully remove the outer insulation from the NMC with a sharp razor knife. Don’t put pressure on the cable with the knife, just let the blade score the insulation gently so it can be removed. Next, remove just enough insulation for each conductor to go into the port on the receptacle. Put those stripped conductors into their respective ports on the receptacle itself and then tighten them down (making sure you are not over or under tightening them). Carefully fold the conductors back into the box and secure the receptacle to the box making sure that the bare copper ground wire is NOT contacting any other exposed metal parts of the receptacle or the exposed wires.
The last couple of steps must be repeated (sort of!!) on the other end to get the cable into the panel. Once the wire is into the panel and the connector tightened, the wires simply need to be landed into their respective places. The black & red conductors will be put on the breaker and the white goes to the neutral bar while the ground to the ground bar. Put the panel cover back on and you are ready to reenergize the panel and test the receptacle! Never walk away from an installation without testing what you just installed!!
🤘⚡️EU Learning System⚡️🤘
-Video courses on every side of the electrical trade (theory, code, safety, wiring, install, troubleshooting, leadership, and more)
-Practice exams for 2017, 2020, 2023 code
-YouTube videos categorized and searchable
-Audio lessons
-Forum
-Business version has admin portal and ability to assign learning to technicians and monitor progress
-Any business size from 2 techs to 2,000!
🎓💡CONTINUING EDUCATION💡🎓
-State Approved
-Video Based
✍📝PRACTICE EXAMS📝✍
-2017, 2020, and 2023 NEC versions
-Online Residential Wireman Exam
-Online Journeyman Exam
-Online Master Exam
-300 Question Online Code Cannon (not license specific, all code)
-Take as many times as you want
-All of the above come with printable PDFs
🎤🎧PODCAST🎧🎤
Spotify:
Apple Podcast:
📱👍SOCIALS👍📱
🎧🎹Music, Editing, and Videography by Drake Descant and Rob LeBlanc🎹🎧
#electrician #electrical #electricity
For most EV chargers a Nema 14-50R receptacle will be used. Most of us have probably seen one of these receptacles before in our homes. They are the same ones used for the oven! These receptacles are rated for 50 amps at 250 volts.
The very first step in the process would be to hire a professional electrician to install the receptacle. Now this would not only be for the non-electrician, but also for an electrician lacking the experience of installing this type of circuit. The second step in the process would be to remove power from the panel you will be installing the wiring to, so we aren’t working in a hot panel. Once we have that done, we need to figure our WHERE the new receptacle will be placed so the two-gang box can be installed. If you are installing the receptacle in an existing house, you will most likely be installing an old work box (sometimes called a pop in box). To finish this portion of the installation, simply cut out the substrate to expose the void in the studs the size of the box you just marked, and you are ready to install the wiring!
For this installation, Dustin is using 8/3 NMC. So, it has 3 #8 conductors (2 hots and 1 neutral) along with a #10 bare copper ground. The cable will need to be fished down the wall to the box location. This will result in you having to go DOWN to the location where you cut the hole in the wall and reach inside the wall cavity to grab hold of the cable and pull it out of the hole. Once the cable is out, simply knock out one of the tabs in the box and pull the cable thru it and secure the box to the wall. Make sure you do not over tighten the screws on the wings so those little tabs don’t break off.
Once the box is installed and wire is in place, then carefully remove the outer insulation from the NMC with a sharp razor knife. Don’t put pressure on the cable with the knife, just let the blade score the insulation gently so it can be removed. Next, remove just enough insulation for each conductor to go into the port on the receptacle. Put those stripped conductors into their respective ports on the receptacle itself and then tighten them down (making sure you are not over or under tightening them). Carefully fold the conductors back into the box and secure the receptacle to the box making sure that the bare copper ground wire is NOT contacting any other exposed metal parts of the receptacle or the exposed wires.
The last couple of steps must be repeated (sort of!!) on the other end to get the cable into the panel. Once the wire is into the panel and the connector tightened, the wires simply need to be landed into their respective places. The black & red conductors will be put on the breaker and the white goes to the neutral bar while the ground to the ground bar. Put the panel cover back on and you are ready to reenergize the panel and test the receptacle! Never walk away from an installation without testing what you just installed!!
 0:20:23
How To Install Rough In Electricity In A New Construction House - Beginners Guide To Electrical
 0:06:58
Electrical Wiring For Lights (House Wiring Made Easier)
 0:05:45
How to Install an Electrical Panel | Electricity
 0:07:23
How to Install Rough Electricity in New Construction | Ask This Old House
 0:12:16
How To Wire An Electrical Outlet - EASY Receptacle Wiring STEP BY STEP
 0:13:12
APPARENTLY IT'S EASY, CONSUMER UNIT INSTALL. ELECTRICIAN UK
 0:16:01
How to Install a New Electrical Outlet in an Existing Wall
 0:43:50
How To Wire A Main Electrical Panel - Start To Finish! NEATLY And VERY DETAILED
 0:00:57
Nest power connector for Nest WiFi thermostat with no C wire to Burnham boiler
 0:09:28
House wiring Tutorial(Tagalog)Electrical Installation
 0:06:00
How to Install an Electrical Outlet
 0:05:12
Electric Water Heater Installation
 0:00:54
How to Install an Electrical Outlet Box
 0:00:24
Old Work Electrical Box Install #electrical #homeimprovement #wiring #construction #tools #shorts
 0:01:43
How to: Install An Electric Fence
 0:05:45
Easiest Electric Outlet to Install in 100 Years - Safest too!
 0:00:59
INSTALL CIRCUIT BREAKER/1 BULB 1 SWITCH/LINE TO NEUTRAL CONNECTION#Shorts
 0:19:12
How to wire a single phase distribution board and load circuits - tutorial
 0:06:10
How To Install an Electric Water Heater | The Home Depot with @thisoldhouse
 0:05:38
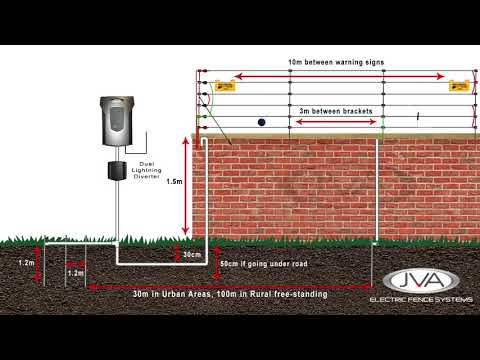
Electric fence installation - Walltop Installation Guideline
 0:10:47
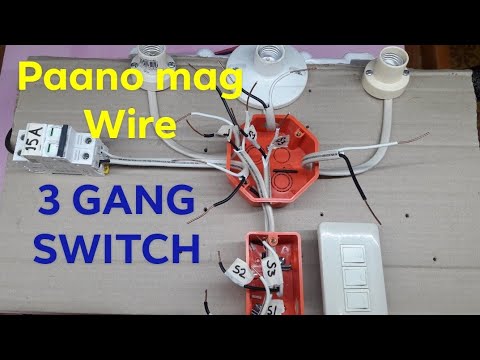
3 Gang Switch Wiring tutorial-electrical wiring installation-house wiring-nc2 | Local Electrician
 0:20:14
How to bend and install electrical conduit
 0:08:37
Electric Hob Installation How to install Electric hob in worktop & wiring
 0:04:59
How to Install an Electric Stove Cord
Комментарии