filmov
tv
Running a MacOS 14 Sonoma VM in ProxMox VE

Показать описание
#MacOS #Sonoma #Proxmox #VirtualMachine
*** Updated 03/31/2024
💡 NOTE: MacOS higher than version 12 requires a CPU with AVX2 instruction support
03. Extract the downloaded KVM OpenCore bootloader .gz file
04. Upload the Sonoma and KVM OpenCore .iso files to the Proxmox ISO library
05. Log into the ProxMox web UI
06. Right click the ProxMox node name ≫ Create VM
07. Type MacOSSonoma in the name field, set the VM ID to 1400 (unless 1400 is in use) ≫ Next
08. On the OS tab, set the Type field to Other and select the KVM OpenCore .iso in the ISO Image field ≫ Next
09. On the System tab, set the Graphic card field to VMware compatible, BIOS field to OVMF (UEFI), Uncheck the Pre-Enroll Keys checkbox, Check the Add EFI Disk checkbox, Machine field to q35 and the SCSI Controller to VirtIO SCSI ≫ Next
10. On the Hard Disk tab, set the Bus/Device field to VirtIO Block, Disk size field to 64, Cache field to Write back (unsafe) ≫ Next
11. On the CPU tab, set Cores field to 4, Type field to host ≫ Next
12. On the Memory tab, set the Memory to 4096 ≫ Next
13. On the Network tab, set the Model field to VMware vmxnet3 ≫ Next
14. Verify the summary and click Finish
15. Click the MacOSSonoma VM ≫ Select Hardware from the left sub-navigation menu
16. Click Add ≫ CD/DVD Drive
17. Select the MacOS Sonoma .iso downloaded earlier ≫ Click Create
18. Select the MacOSSonoma VM ≫ Options ≫ Boot Order
19. Set the KVM OpenCore disk as the first boot option ≫ Click OK
20. Right click the ProxMox node name ≫ Console
21. Run the following commands in the terminal
# edit the VM conf file, change 1400 to the VM ID for the MacOSSonoma VM
22. If running on an Intel CPU, add the following line to the bottom of the .conf file:
FULL STEPS ON GITHUB LINK ABOVE
23. If running on an AMD CPU, add the following line to the bottom of the .conf file:
FULL STEPS ON GITHUB LINK ABOVE
24. Press CTRL+W and search for ,media=cdrom
25. Delete the ,media=cdrom from the two attached .iso files (KVM OpenCore and Sonoma) and add cache=unsafe
26. Press CTRL+O, Enter, CTRL+X to write the changes to the conf file
27. Back in the Proxmox web UI, right click the MacOSSonoma VM in the left navigation pane ≫ Start
28. Click console in the left sub-navigation menu
29. At the OpenCore menu, select UEFI Shell ≫ Press Enter
30. Type the following in the UEFI shell:
fs0:
# launch the MacOS installer
31. After a long initialization sequence the MAC OS Setup should start
32. Select Disk Utility
33. Select the VIRTIO Block Media ≫ Click Erase
34. Name the drive MacOS ≫ Set the Format to APFS ≫ Click Erase
35. Click Done ≫ Close Disk Utility
36. Click Install macOS Sonoma
37. Click Continue ≫ Click Agree ≫ Click Agree again
38. Select the MacOS disk ≫ Click Install
39. Wait while Mac OS installs files, the VM will reboot several times
40. Select your Country or Region ≫ Click Continue
41. Confirm your languages and keyboard layout ≫ Click Continue
42. Click Not Now on the Accessibility screen
43. Click Continue on the Data & Privacy screen
44. Select Not Now on the Migration Assistant screen
45. Select Set Up Later and then Skip on the Apple ID screen
46. Click Agree ≫ Agree again
47. Enter a name, user name, password ≫ Click Continue
48. Click Continue ≫ Select Use or Don't Use for Location Services
49. Pick a timezone ≫ Click Continue
50. Uncheck Share Mac Analytics with Apple ≫ Click Continue
51. Click Set Up Later on the Screen Time screen
52. Pick a theme ≫ Click Continue
53. Welcome to MacOS 14 Sonoma
Configuring Booting Without OpenCore Mounted
01. Log into the MacOSSonoma VM
04. Start LaunchPad from the dock
05. Search terminal ≫ Click Terminal to launch it
06. Run the following commands in the terminal window
cd ~/Downloads/MountEFI
chmod +x MountEFI.command
./MountEFI.command
....Full steps can be found on GitHub [link at the top]
### Connect with me and others ###
 0:08:26
Running a MacOS 14 Sonoma VM in VMware
 0:09:03
Running a MacOS 14 Sonoma VM in ProxMox VE
 0:15:03
Can you run macOS 14 Sonoma with 2 GB of RAM?
 0:23:38
EASY GUIDE; How to Install MacOS Sonoma 14 on an UNSUPPORTED MacBook, iMac, Mac Mini, Mac in 2023!
 0:10:42
How to Install macOS Sonoma on Unsupported Macs (Quick and Easy)
 0:07:43
Install MacOS 14 Sonoma on VirtualBox - Issue Fixed [2024]
 0:14:46
macOS Sonoma - 17 Settings You NEED to Change Immediately!
 0:26:27
Forcing MacOS 14 Sonoma onto a MacBook Pro 17”
 0:09:07
Getting 4K brilliant video with an Apple iPhone, Telecast and OBS
 0:26:36
Run macOS Sonoma in a VM on a Windows PC
 0:09:05
Download and Install macOS 14 (Sonoma) on Hyper V
 0:17:14
Install MacOS Sonoma 14 on VMware | iServices works, AMD/Intel
 0:03:43
DON'T Update To MacOS Sonoma...Do THIS Instead! |Musicians, Producers, Engineers |
 0:04:25
How to Download macOS 14 Sonoma ISO File
 0:05:45
Updating to macOS Sonoma 14.5 on Unsupported Macs + Support for Older Macs
 0:07:01
How to install macOS 14 Sonoma On VirtualBox Windows PC
 0:20:16
macOS 14 Sonoma on a 15 year old Mac (classic Mac Pro 2008)
 0:05:59
How to Install Windows onto macOS Sonoma 14 [M1 & M2 Mac's]
 0:04:43
macOS Sonoma: Best Features You Need to Know!
 0:08:42
How to install macOS 14 Sonoma | Hackintosh macOS 14 Installation and Setup Tutorial [2023]
 0:27:41
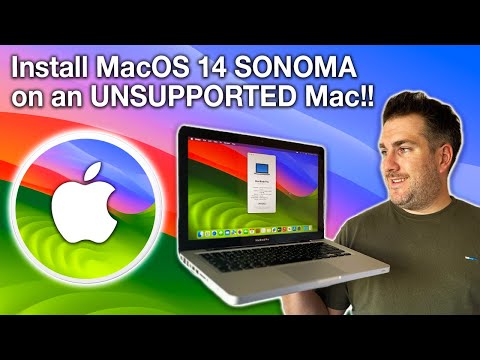
How to Install MacOS Sonoma 14 on an UNSUPPORTED Mac, MacBook, iMac or Mac Mini in 2023!
 0:19:02
Run macOS Sonoma in a VM on an Intel-based Mac
 0:37:28
macOS Sonoma Released - What's New? (100+ New Features)
 0:06:23
macOS Sonoma: Everything Musicians Need to Know
Комментарии