filmov
tv
Spur Gear Design 3 - Construct, Edit and Animate

Показать описание
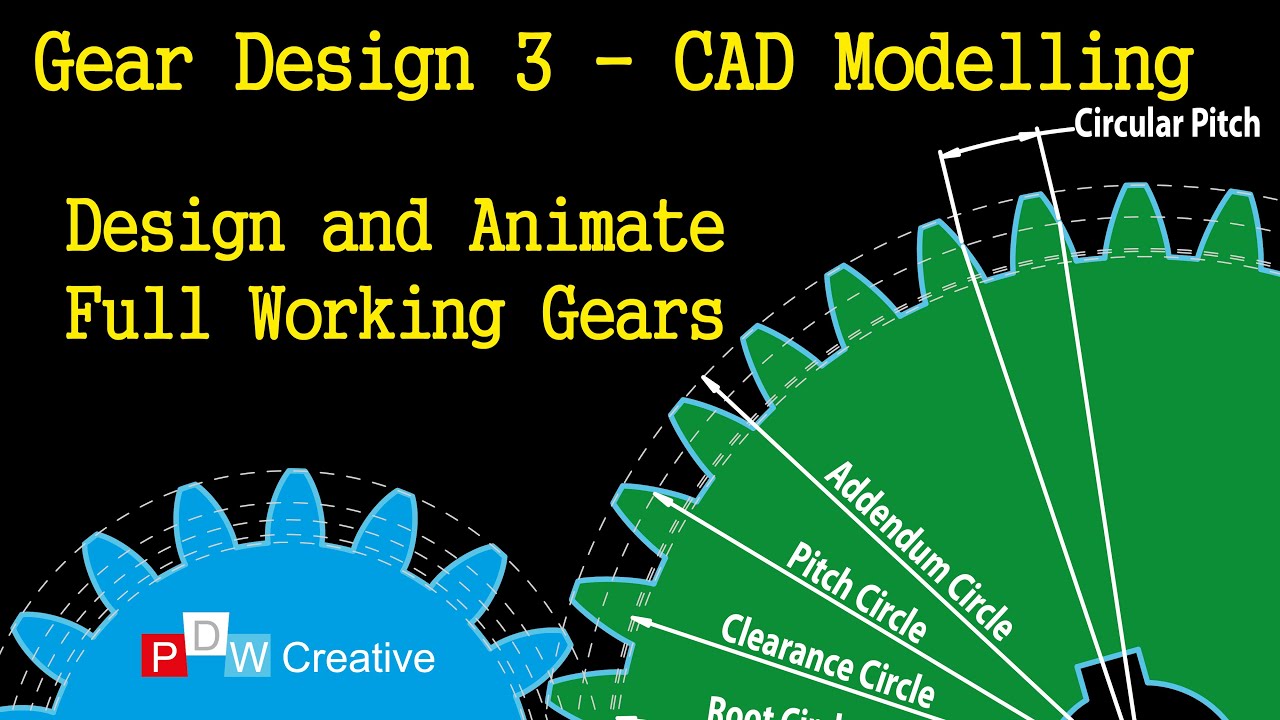
How to design and make a working spur gear, calculate the involute of the circle and animate. This video shows how to manipulate the template gear using equations.
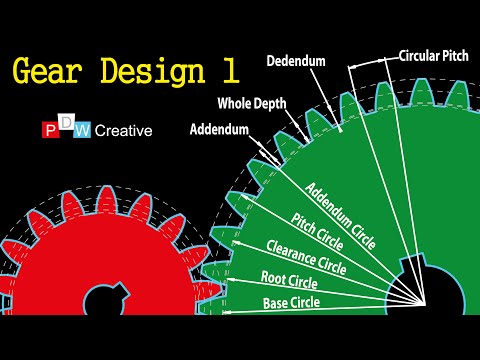
This video follows on from parts 1 & 2 which details how gears of different diameters interact or mesh, identifies which characteristic control the gear ratio and why the module is important. The relationship between addendum and dedendum in terms of clearance is also discussed. Video 2 details how the involute of a circle is calculated. characteristics of gear design including the top land, face, flank, bottom land, gear tooth profile, pitch circle, circular pitch, dedendum, addendum, whole depth, addendum circle, clearance circle, root circle, base circle, pressure angle, line of action and angle of interaction are all discussed in this series..
This video follows on from parts 1 & 2 which details how gears of different diameters interact or mesh, identifies which characteristic control the gear ratio and why the module is important. The relationship between addendum and dedendum in terms of clearance is also discussed. Video 2 details how the involute of a circle is calculated. characteristics of gear design including the top land, face, flank, bottom land, gear tooth profile, pitch circle, circular pitch, dedendum, addendum, whole depth, addendum circle, clearance circle, root circle, base circle, pressure angle, line of action and angle of interaction are all discussed in this series..
Spur Gear Design 3 - Construct, Edit and Animate
How to design involute spur gear # 3 in Solidworks
1) Bevel 2)Spur 3)Worm 4)Helical 5)Planetary 6)Herringbone #3danimation #cad #gear #engineering #3d
Spur Gear Design Assignment, Part 3, More on the Tooth Profile Sketch – Various Diameters & Mean...
solidworks tutorial - how to make spur gear . specially for beginers.
How to design a Reduction Spur Gear Box ( Ratio 1:3) Link in description #355 | Design with ajay |
What makes planetary gearboxes so amazing?
Create Custom 3D Printable Gears in Fusion 360 | Practical Prints #1
Spur Gear Design 1 - How gears work
Solidworks tutorial | Design of Spur gear with Solidworks toolbox
Reduction Spur Gear Box (Ratio 1:3) Link in Description #designwithajay #shorts
Design of Spur Gear 3
Solidworks tutorial - Spur gear design
Why Gear Teeth Have This Shape
How to design a Spur Gear Wheel | Industrial design | |SolidWorks| @DesignWithAjay
Simple spur gear design in fusion 360
Spur Gear With Spline #gears #designwithajay #shorts @DesignWithAjay
Reduction Spur Gear Box coming soon #shorts #designwithajay
Design Of Spur Gear with Equation in SolidWorks
Gear Types, Design Basics, Applications and More - Basics of Gears
Design of spur gear 3
Drawing Gears with a Compass (simplified method)
Reduction Spur Gear Box ( Ratio 1:3) Link in Description #designwithajay #shorts #ytshorts
Normal Diametral Pitch & Module on an Engineering Drawing for Spur & Helical Gears || Course...
Комментарии
 0:31:46
 0:14:30
 0:00:05
 0:06:53
 0:03:47
 0:00:27
 0:09:59
 0:19:42
 0:05:52
 0:13:17
 0:00:16
 0:08:38
 0:11:14
 0:00:18
 0:00:16
 0:00:57
 0:00:19
 0:00:13
 0:15:59
 0:15:45
 0:45:58
 0:03:02
 0:00:15
 0:01:12