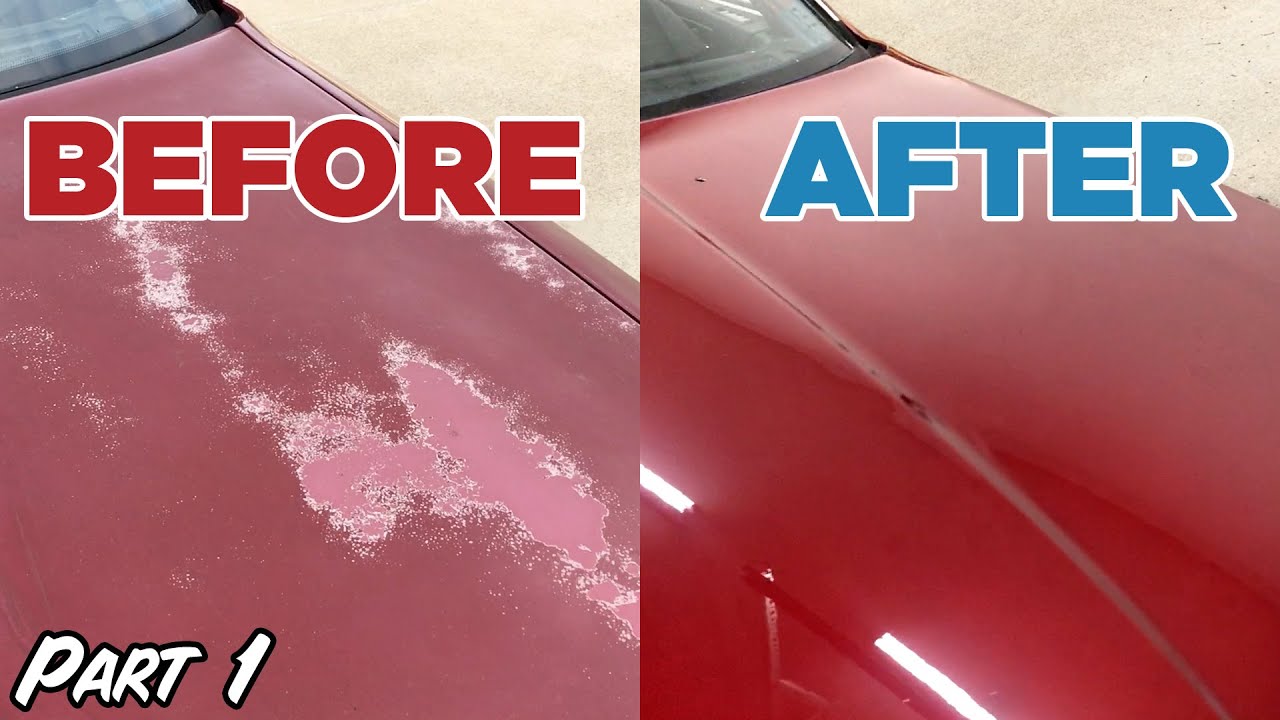
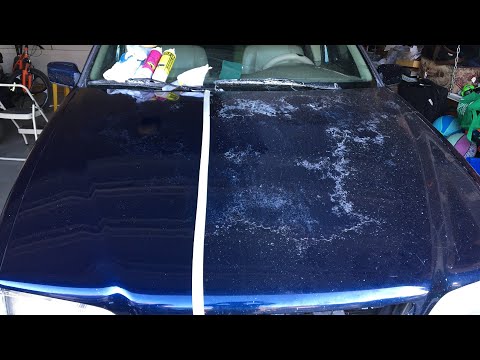
How to: Fix/Repair faded flaking damaged Clear Coat Paint - Part 1

preview_player
Показать описание
The Clear coat was faded and flaking on my $350 Acura Legend, to the point that the paint would have to be sanded and re-painted in some areas.

Products used:
(I earn a small amount on each product purchased through an affiliate link - Thank you for helping support this channel!)

How to Repair & Paint a Scratched Plastic Bumper - Easy Fix!

Follow Us:
Instagram: 6th_gear
Рекомендации по теме
Комментарии
Автор

This was my Grandparents exact car. You bought it from my uncle Ron. So many memories in this thing. Thanks for taking rehabing this!

noahziegler
Автор

I now understand why getting a paint job is very expensive. This is a lot of work and takes very special equipment, talent, patience, and labor. Thanks for sharing. This was an awesome and fun video to watch.

TheAaronmcmahon
Автор

I painted my teen son's 95 Impreza with rattle cans. From forest green to navy blue. I used Rust-Oleum brand enamel. I do not buy the spray cans with the caps like this guy used...they are often junk, and on big projects will cramp your finger faster too. I did the whole job in phases, in 7 days start to finish, under an open carport. 1 day later, after a decent dry time, the Colorado wind gusts picked up for days. I was very blessed! Close call!

My recipe was: sand with 320, then 600, clean with soap/water, mask/cover, clean with lighter fluid twice, tac cloth, 2 coats black primer, 3 coats color, 3 coats clear...each 10 to 12 minutes apart. All paint has to applied within 90 minutes from start, upon a flashed off coat. 2 years later and still good. I don't even think he's waxed it yet. 😅

Oh, i didn't sand between any coats, obviously. It didn't look perfect but good enough for a teen ride.

thesetruths
Автор

I painted an entire car including clear coat with rattle cans. It had bad fading and peeling all over. In it's condition it was only worth about $2000. I sold it today for $6000. The paint job wasn't perfect but it looked 100x better than it did before. Was a lot of work but ended up being a fun project. I learned a lot. I used your video as a guide as well as a bunch of other ones. Thanks

AchillesWrath
Автор

this guy speaks sooo good better than a shop teacher! so much pleasure to listen to him.

strikerls
Автор

It's not often you hear Tchaikovsky in the background of an auto repair video. Then followed by the Blue Danube. Love it!

markloegering
Автор

Quick tip. Prior to painting at any temp unless it's 120°F out I put my paint cans 80% submerged in very hot water 15min +/- prior to painting. It thins the paint inside and allows good pressure to build. 😉

s.o.s.exploration
Автор

The paint leaking out of the can is usually a result of the company that made your paint not installing the proper nozzle for the can. It the stem of the spray nozzle is too loose it will gush and splatter everywhere. I usually keep all my old tips from previous cans just in case the wrong nozzle or a worn out nozzle is in the can. Always clean them with Acetone and blow them out with compressed air. Also heating up the can after you fix the nozzle will allow the paint to flow beautifully and flow out better. I hope this helps. We have all had that frustration from paint can splatter.

vegasheat
Автор

One thing I’ve learned from not having a paint booth is to create your own! Cheap tarps from harbor freight hung from the ceiling on three sides ( four if painting in a shed or barn ) and a clean shop floor is a must ! Place a few box fans on low 50:27 in front of garage door blowing air out of shop and put cheap ac filters over them to catch any overspray so your not blowing it outside and onto other things! Next find a way to filter the air coming in from the man door into your spray area! I used an old screen door and zip tied it to my tarps that are stretched tight. That’s the other tip make sure your tarps or drop cloths, whatever your using to create a temporary booth is secure enough that if there was a blast of wind from outside that it’s not going to blow against the vehicle your painting! Last tip I have is to set up your booth after you have prepped the vehicle!! Otherwise you will have dust from sanding all over your sides and floor and the blast even from spray cans can dislodge the dust particles and wreak havoc! I roll up my tarps and leave them hanging from ceiling and when I’m sanding anything I have my shop fan blowing as much dust out of my shop as possible! Another tip, if you have a compressor when u roll vehicle outside use the blower nozzle on compressor to blow out crevices prior to washing and that way you get more dust out of hidden area!

kenwillis
Автор

I'll soon be painting a car I did major rust repair on, this is my first time so this video was REALLY helpful. I've watched a lot of Youtube videos over several months and tried to find something like this but got buried under so many pro autobody shop videos that live in a different reality than the DIYer, although many will be titled something like, 'Paint your car yourself', or 'Fix peeling clearcoat in a matter of minutes!'. I've wasted many hours of time. You start watching a supposed DIY video for newbies but the guy is in a state of the art paint booth using SATA guns and stuff like clear base, expensive blending agents and paint mixes and saying things like 'I used 10-15% more reducer' with no explanation, or not filming a few key steps but not telling you that let alone what he did, etc. And most of these guys can't teach at all, like they give no thought to what they're going to say before turning on the camera or maybe have the gist of an idea and just start talking and assume it's all going to come out good. Sorry for the rant! Again, great video and great instruction. Thanks again for making content for the other 99% of us.

jwerner
Автор

Regardless of how well you paint it’s always good to go over with wet sanding to make sure it’s smooth and consistent the attention to detail makes a great paint job

intralockshorts
Автор

Nice work. I was in the collision industry (specializing in paint) for 10+ years. A little advice, if you want it: 1) always use primer filler over areas where you've sanded through layers of paint. I noticed you didn't do that on the hood. A few weeks or months after the paint job, you'll probably start to see "mapping" or "bullseyes" of the layers as the new paint shrinks down. It's not as noticeable right after painting. Using the 800 wet was good, though, to prevent sand scratch swelling, which also happens as the paint shrinks down tight on the substrate surface. 2) Tack off the color (it should be dry enough to do so) just before starting the 1st coat of clear. I think a lot of the junk in the clear could have been avoided. Tack off the paper masking as well, as any dust collected on the masking will blow off and can land back in the fresh paint because of the powerful blast of air from the gun. 3) Forget tack coats of clear. Two wet coats. You could make the first coat a little more dry, but not that much. You need to get enough clear on in two coats to provide enough UV protection for the color. Keep in mind that wet sanding and buffing the clear will remove some of that UV protection, so the idea is to lay the clear on heavy enough to still provide UV protection even if you do have to cut and buff.

Also, where'd you get that Planet Color clear? That is the darkest clear I've ever seen come out of the can. Some clears are yellowish, but if a professional painter came across that, they'd never use it. That dark of a color out of the can could mean there's a problem with the clear. Barrett Jackson clears, primers, and colors, are just repackaged Dimension products. Even DC5020 is a very transparent clear coat when poured out. At the prices I'm seeing online for the Barrett Jackson clear kits, though, I wonder if it's discontinued, or if it's Finish 1 clear coat. FC720 maybe. When I worked for SW, though, they told us it was repackaged Dimension.

nebekoronius
Автор

All things considered, you did a fantastic job for a DIYer. Be cautious, sometimes neighbors report you, and it's not good. Occasionally, I don't think you will have a problem. I did this type of work for 22yrs and there are so many new products out now, I would be a rookie. Great job, enjoy your efforts.

stevesanford
Автор

great video! and most comments are helpful to learn more info also. its not that everything you did was perfect thats important, its your detailed information and the goal you had in mind with the outcome! you turned a 350$ car into a 3500$ car. its not a show car but now a gem for an older car for a first time driver or a low budget ride that looks good and a no rust. in my experience as a do it my selfer, most of the "pro" body men and painters want us to think its impossible to do any of this at any level without them and their "years of experience" not to say we can do equal work. but "goodnuf" is ok and we get better the more we do it too.
thanks for doing these

scottvenema
Автор

i just bought a 2004 chevy 1500 and im litterally going to be trying to make it look as good as possible. Im so thankful for your videos because i to am just an average guy with very little equipment and experience

RazzleFrazzle
Автор

Pro tip here, work your way to the center of hood and then do the other side of the hood and then the other side fenders, that way you don't have dry edges.This is a must on single stage paint. Good job and video

jpeknowbody
Автор

This video was exactly what I needed. I appreciate the whole video with the ups and downs that you dealt with. I was planning on doing some touch up on one of my vehicles. Thanks for keeping it real.

aREALBADMOFO
Автор

Not Bad. I'm a 20 year Autobody Technician and have done of few cars in my time, Firstly i noticed that you didn't have the spray gun at a 90 degrees at all time alot more on the roof. 2nd most times you spray 2-3 Med-wet coats, they all should be like glass every coat but not heavy coats but look wet everytime..3rd Also you where spraying way to far from the panels, you need to be about 1--2 inches closer that way it sprays on like glass and you won't get the foggy--ness you got on all the coats you sprayed, Notice that the bumpers came out Great that's because you where spraying alot closer.. Painting is not the easiest thing to do remember that. It takes many years to perfect..It's nice to see your not scared to try, that's Awesome keep going and don't Stop.
Your video was very good showing what happens if... and then showing how to fix it. Bang on!!
I hope our Tips help you to Master the Art of painting..
Spray on Buddy you'll only get better at it.

hawhaw
Автор

I don’t even need to paint my damn car but I watched this entire thing

swaewithme
Автор

One of the best "paint your car at home" videos on YouTube and I have watched many. The best part about this video is that you're not trying to shill one brand's product for doing x or y, just a very matter of fact description on how to obtain something resembling factory paint with rattle cans. I really enjoyed this video as well because It really covered all of the different problems/hurdles that come up with doing paint correction at home; missing clear coat, missing paint, a mixture of both, and how to correct without doing an entire panel. Thanks for making this, and please continue to make more. You truly have the DIY/Pro balance in a sweet spot!

karljk