filmov
tv
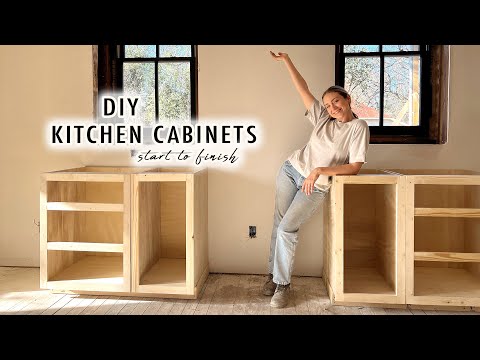
DIY Kitchen Cabinets | How to Build a Cabinet Fridge | Kitchen Makeover Part 2

Показать описание
The first 1,000 people to use this link will get a 1 month free trial of Skillshare:
DIY Kitchen Cabinets | How to Build a Cabinet Fridge | Kitchen Makeover Part 2
Im so excited to be sharing with you how i built my own Kitchen cabinets! After buying a new fridge i realized it did not fit in my old fridge cabinets so i built my very own....
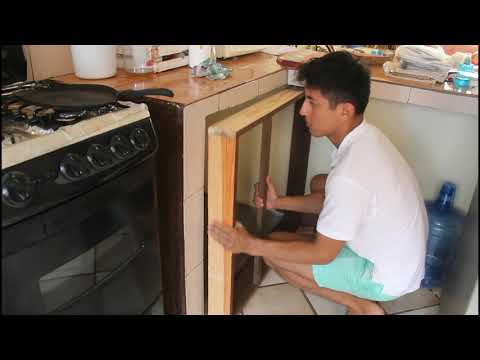
I will show you how to build a cabinet fridge that can be functional for your space. Of course keep in mind your dimensions will be custom as no kitchen space is the same and your appliance may be different as well.
I allowed 2" of clearnace from the back of the fridge to the wall, 4" of clearance on the top and 1" on either side... Remember to allow enough clearance to allow your fridge to remain cool and not overheat!
and remember this is my Kitchen Makeover Part 2! If you missed the first video where i
DIYd a kitchen island you can catch up here
FINAL KITCHEN REVEAL
SUBSCRIBE TO MY CHANNEL
FOLLOW ME ON. SOCIAL MEDIA
IF YOU DIDNT ALREADY KNOW IVE BEEN ON A MISSION TO FLIP FURNITURE TO HELP FUND ALL OF MY DIY CONTENT INCLUDING RENOVATING MY 1950S HOME! CHECK OUT MY LATEST HOUSE TO HOME EPISODES HERE!
If you'd like to help support my projects, and creating new content you can now buy me a coffee!
I used 1/2" Maple and birch plywood
1x3s for the rail and stiles of the doors
1/4" birch for the door panels
1/4" for the back panels for the boxes
Color- Sherwin williams -
Primer- Kilz 2
Hinges - soft close face frame 1/2" overlay
**Disclaimer**
Some links may be affiliate links, and I may earn a commission at no additional cost to you. If you shop through my affiliate links, THANK YOU! it truly does help fund this channel and creating more content and i appreciate it so much!
DIY Kitchen Cabinets | How to Build a Cabinet Fridge | Kitchen Makeover Part 2
Im so excited to be sharing with you how i built my own Kitchen cabinets! After buying a new fridge i realized it did not fit in my old fridge cabinets so i built my very own....
I will show you how to build a cabinet fridge that can be functional for your space. Of course keep in mind your dimensions will be custom as no kitchen space is the same and your appliance may be different as well.
I allowed 2" of clearnace from the back of the fridge to the wall, 4" of clearance on the top and 1" on either side... Remember to allow enough clearance to allow your fridge to remain cool and not overheat!
and remember this is my Kitchen Makeover Part 2! If you missed the first video where i
DIYd a kitchen island you can catch up here
FINAL KITCHEN REVEAL
SUBSCRIBE TO MY CHANNEL
FOLLOW ME ON. SOCIAL MEDIA
IF YOU DIDNT ALREADY KNOW IVE BEEN ON A MISSION TO FLIP FURNITURE TO HELP FUND ALL OF MY DIY CONTENT INCLUDING RENOVATING MY 1950S HOME! CHECK OUT MY LATEST HOUSE TO HOME EPISODES HERE!
If you'd like to help support my projects, and creating new content you can now buy me a coffee!
I used 1/2" Maple and birch plywood
1x3s for the rail and stiles of the doors
1/4" birch for the door panels
1/4" for the back panels for the boxes
Color- Sherwin williams -
Primer- Kilz 2
Hinges - soft close face frame 1/2" overlay
**Disclaimer**
Some links may be affiliate links, and I may earn a commission at no additional cost to you. If you shop through my affiliate links, THANK YOU! it truly does help fund this channel and creating more content and i appreciate it so much!
 0:16:51
How to Build Kitchen Cabinets | START TO FINISH
 0:16:56
How to Build Base Cabinets with Face Frames--EASY!
 0:25:17
Building Our KITCHEN CABINETS From Scratch! (Kitchen Makeover Part 3) | XO, MaCenna
 0:13:49
Building a Base Kitchen Cabinet | DIY | D.a Santos
 0:16:34
How to Make DIY Kitchen Cabinets
 0:11:12
Interior Design For Your Kitchen // Making Kitchen Cabinets Simple for Beginners - How to - DIY
 0:20:00
How to Build Basic Cabinets--Using ONLY PLYWOOD!
 2:16:10
DIY Cabinets - The Complete Guide
 0:01:01
DIY kitchen cabinet installation #diy #ikeahacking #homedecor
 0:22:54
Kitchen Cabinets: Cheaper to Build or Buy? | I Like To Make Stuff
 0:15:48
How to BUILD CABINETS Fast and Easy - Frameless Plywood Cabinets
 0:31:33
Design and Build Kitchen Cabinets like a PRO
 0:09:47
diy frameless kitchen cabinets
 0:06:40
The Total DIY Kitchen: Part 1 Base Cabinets
 0:15:13
STOP overbuilding cabinets
 0:05:35
Cabinet Making for Beginners | First Attempt
 0:09:01
Design Ideas For Kitchen // How to Make Kitchen Cabinets (Part 1/2)
 0:37:10
How To Install Kitchen Cabinets: The Ultimate DIY Guide
 0:08:08
INCREDIBLE DIY Kitchen Cabinet Makeover | Power of paint and new doors!
 0:34:25
Cheaper to Build or Buy Kitchen Cabinets?!
 0:19:00
the BEST diy kitchen cabinet upgrades & organization hacks | diy dream home: kitchen makeover ep...
 0:06:40
DIY CHEAP Cabinets Part 1
 0:24:45
How To Install PERFECT KITCHEN CABINETS (DIY GUIDE)
 0:10:27
DIY KITCHEN MAKEOVER | Painted Kitchen Cabinets | Before & After
Комментарии