filmov
tv
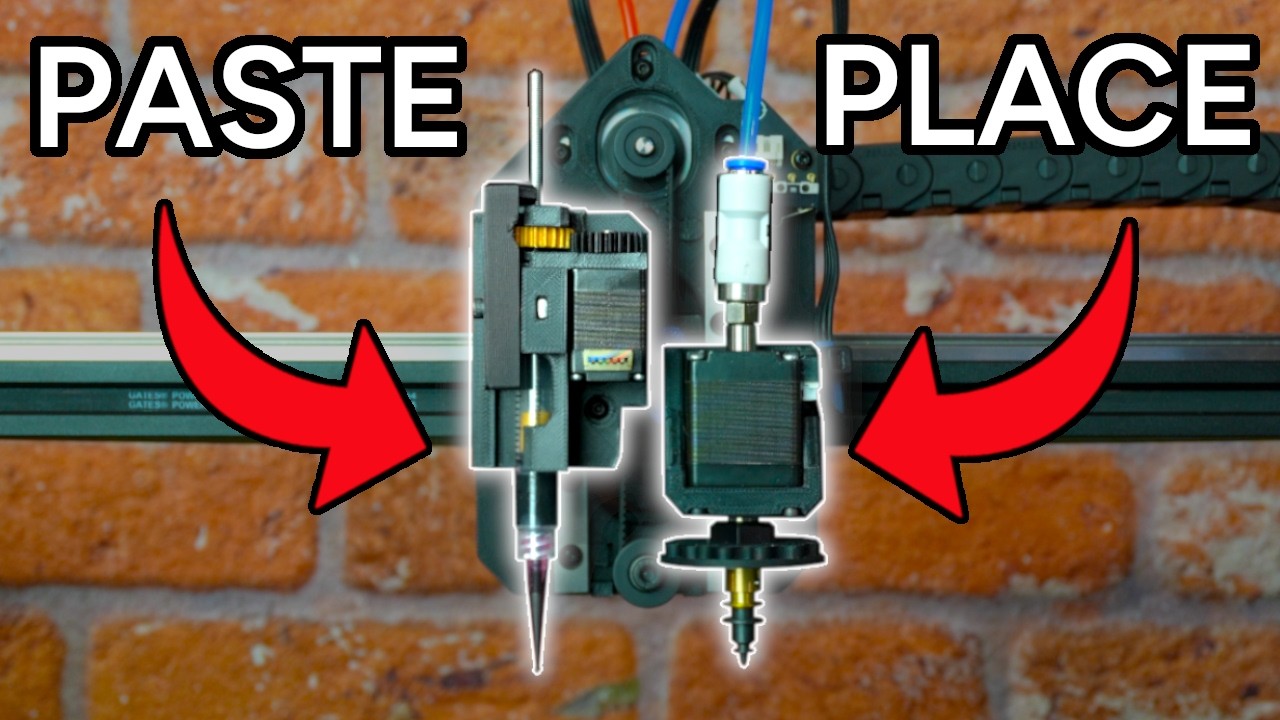
one machine for PCB assembly
Показать описание
The LumenPnP can now do it all: deposit paste, then immediately place parts! Blank board goes in, working board comes out!
-------------------------------------------------------------------
-- FOLLOW --
-- GEAR --
These are affiliate links so if you buy anything through them I get a small percentage which helps out the channel. Thank you!
-------------------------------------------------------------------
-- FOLLOW --
-- GEAR --
These are affiliate links so if you buy anything through them I get a small percentage which helps out the channel. Thank you!
 0:11:00
one machine for PCB assembly
 0:12:23
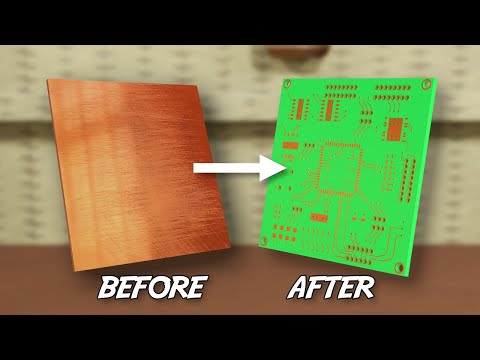
You can now PRINT PCBs! Creating a homemade PCB with the Voltera V-One PCB Printer!
 0:00:17
One-Stop PCB & SMT Assembly |Reliable Manufacturing #oem #pcbmanufacturer #smtfactory #pcba #sm...
 0:01:47
Automated PCB Assembly Using Pick & Place Machine
 0:03:16
Bittele Electronics - One-stop PCB Assembly House
 0:00:16
The Best One for AOI Inspection for PCB Assembly #pcbmay #pcbengineering #electronicsmanufacturing
 0:00:21
#pcbassembly#technology#ic#arduno#circutboard#innovation
 0:02:24
How to Upgrade Your Manual Odd-Form PCB Assembly to Machine Automation
 0:13:10
PCB Manufacture and PCB Assembly inside PCB Factory China - PCBWay
 0:00:30
Best way to solder a wire on PCB #diy #soldering
 0:12:47
Full Yamaha SMT line up 2025 | Yamaha YR series | PCB assembly of the future
 0:00:29
Advanced PCB Assembly Choosing the Right Pick and Place Machine
 0:00:09
PCB assembly In Circuit Test ICT
 0:08:53
PCB Manufacturing and Assembly Process in Factory | How Printed Circuit Boards are Made | Production
 0:00:14
One stop solution For PCBs, PCBAs
 0:00:42
one-stop solution: pcb manufacturing and pcb assembly
 0:00:28
High-speed placement machine-PCB Assembly Factory Tour
 0:00:37
How SMT PCB Unloader working for Smart EMS factory PCB assembly
 0:00:31
One-stop pcb printing, component procurement, pcba assembly #chips #pcba #smartdoorlock
 0:00:13
Surface Mount pcb Assembly | PCBA one-stop production, fast delivery, 100% quality products
 0:00:50
How PCB is from design to production-1 minute let you know
 0:00:23
one-stop pcb/pcba manufacturer👨🔧 #scspcba #scspcb #pcb #pcba
 0:06:08
What is a PCB?
 0:01:52
PCB Assembly One Stop Solution HENGKAITUO Company Profile
Комментарии