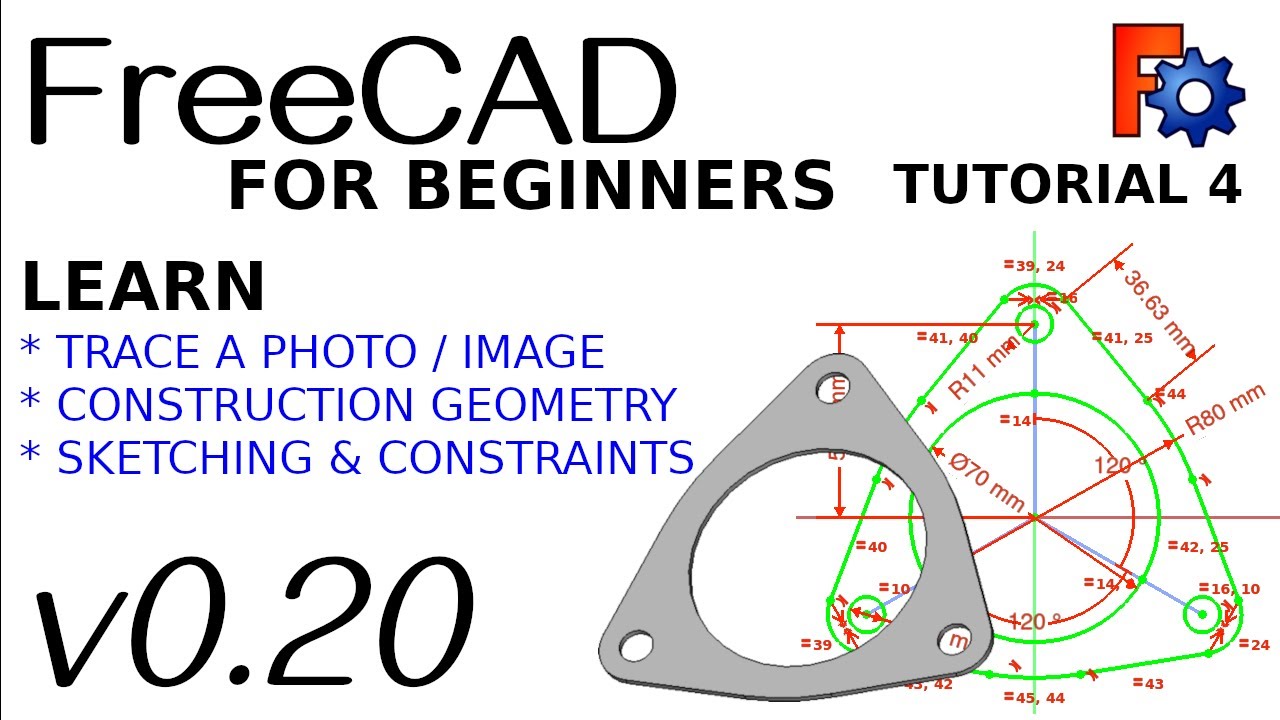
FreeCAD 0.20 For Beginners | 4 | Tracing Photo / Image to Build a Simple Model
preview_player
Показать описание
Welcome to part 4 of the total beginners course to FreeCAD 0.20. In this lesson we will learn basic skill of tracing reference images to create a simple part design model. We will be introducing the fundamentals of construction geometry in FreeCAD sketcher to reduce the amount of constraints needed. Learn about angle constraints and use of the arc tools. As an introduction to the Image workbench we will help teach the fundamentals of freeCAD understanding the basics but delivering via teaching you different workflows.

NOTE:
If you can't find the image workbench please look at this video:

REFERENCE IMAGE:
If the image is not public please let me know as either their is a technical issue or I have forgot to make it public.

We aim to teach you freeCAD in a practical way.

to keep up to date with the video releases.

#FreeCAD , #CAD , #Python , #3D , #3DPrinting, #CNC
Journey with me and

Patreon

Donate:

Subscribe:

Browse my Redbubble Shop:
Рекомендации по теме
Комментарии
Автор

Got a bit lost in the beginning as it seems Image bench was depreciated after version 0.20.
In version .21.1+ you now need to go File -> Import, to select your image file and add it to the 3d workspace.
Double Click on the imported image in the left bar to access the Image Plane settings, this is where you can choose your plane.
To scale the image, use Calibrate to get the selector for the red line, as in the video.

Lord_Nytmare
Автор

The only downside to watching these videos is I'm now starting to question my design choices on previous parts I have modeled up on FreeCAD. Thanks for great pacing, no loud music and videos that actually implement the methods you talk about!

joellindsey
Автор

Without doubt, the best Freecad videos to be seen. This guy is an absolute Freecad NINJA 10/10

trollobite
Автор

CAD instruction for beginners showing how it SHOULD be done. Solid gold tutorial.

grahamnichols
Автор

If anyone also had a problem with setting up symmetry constraints to arcs - I have found another solution, which for me worked fine.

Draw a line between both ends of an arc. Select this new line and the respective construction geometry line (like with symmetry constraint) and add perpendicular constraint. Repeat for all three arcs. Select these three lines and add equal constraint. After that convert them to construction geometry.

moonlyer
Автор

Just discovered this excellent series, have previously tried FreeCad trying to follow others but gave up ! Wish I have discovered this channel a couple of years ago. Well done and keep adding to the channel.

colint
Автор

Brilliant presentation and bravo for the pedagogy!

augilmar
Автор

Excellent tutorial!!! I've been going through your tutorials and am glued to my laptop. For CAD beginners such as me, this playlist is The Holy Grail. Work and learn surely helps in quicker grasping of important concepts. Can't thank you enough.

lucifer
Автор

This channel has to got to be one of the best ones I've found for learning freecad. I appreciate you! Thank you

kwekunelson
Автор

i must say that I'm picking up on this very fast, thanks to your simple explanations and breaking things down. i can't wait to move to the next video.

mrmoxley
Автор

Love your style. You take your time, and don't go wizzing around pressing buttons without explaining things. Gr8 stuff

johnrayfield
Автор

One of the most useful Freecad videos that I have seen.
Thank you very much.

paulstephenson
Автор

This is easily the best FreeCad series out there. So clear and helpful. I've been using this for years and done some seriously big/expensive commercial projects using FreeCad. Now going back to basics, I learn that there are loads of little things I never knew or was using wrong

John-xprh
Автор

I did it! It took me several minutes after your video to get this thing constrained and figure out why freecad wasn't closing the wire, but I finally got it!

apaxis
Автор

All the nuances of the design are explained very well. Thanks!

Dolfost
Автор

Helpful Timestamps:

0:18
Workflow:
IMAGE WORKBENCH - SKETCHER - PART DESIGN

2:53
Image to be sketched should be clear with preferably with a 90° topdown view and without shadows

3:19
New Document - START - IMAGE - CREATE IMAGE PLANE (creates a planar image in 3D space) - CHOOSE AN IMAGE FILE TO OPEN (image file preferably '.png' as it preserves transparency) - CHOOSE ORIENTATION (XY Plane)

4:18
For accurate dimensions, the image needs a scale reference from IRL,
SCALE IMAGE PLANE - DISTANCE (mm) (Set the reference measurement which allows for the rest of model to be as per scale) - SELECT FIRST POINT (choose between two points that represent the actual measurement of the original model

6:04
Verify the image scale by, MEASURE DISTANCE

6:44
COMBO VIEW - MODEL - UNNAMED - IMAGEPLANE (selected) - CREATE A SKETCH - (pop-up) SKETCH ATTACHMENT - select the method to attach this sketch to selected object - DON'T ATTACH - CHOOSE ORIENTATION (XY Plane

7:14
The image should be centrally aligned with the model canvas,
COMBO VIEW - MODEL - IMAGE PLANE (selected) - DATA (Tab) - PLACEMENT (nudge around with the axis until the image is relatively central)

8:27
For better visibility between the image plane and the canvas
IMAGE PLANE (selected) - VIEW - TRANSPARENCY (as needed)

9:41
CREATE A CIRCLE (Auto constraints activated, so as to centrally align it with the 00, 00 coordinates) - drag out from the center point to the diameter required

13:15
For PCD of the flange holes, sketch straight lines from the 00, 00 coordinate to the flange circles center, angle the two flange holes by selecting both the lines, bonding them with the CONSTRAIN ANGLE (fix the angle of a line or the angle between two lines) and set the degree of angle require

13:15
Make both the lines of equal length by selecting the. and clicking CONSTRAIN EQUAL

16:15
Add a length to the line between the centre point and the flange hole's center by selecting the line and clicking CONSTRAIN VERTICAL DISTANCE (Fix the vertical distance between two points or line ends) - INSERT VERTICAL LENGTHS

17:35
To only represent the sketch of the model, click SKETCH - SKETCH GEOMETRIES - TOGGLE CONSTRUCTION GEOMETRY, after selecting the lines that should not appear on the model

18:40
To create the rounded vertices of the flange click,
ARC - CENTER AND END POINT (center point of flange hole as reference, drag out the arc-circle to match the image boundary, click on the where the ARC should begin and end as two points that match the image

19:24
Make the ARC points symmetrical by selecting both then selecting the reference point to which they should align and click '><' - Use the CONSTRAIN RADIUS tool to refine the ARC's dimension

20:50
Use CONSTRAIN TANGENT (create a tangent constraint between two entities) to connect the ARC with straight line in following the outline of the image

31:18
START - PART DESIGN - BODY (make the BODY PARENT by dragging SKETCH (under COMBO VIEW - MODEL) under the BODY

31:40
The above step allows for the SKETCH to be worked on with PART DESIGN e.g PAD

Carrot_beans
Автор

I've been watching several videos in English ( because in Spanish they're empty and they're made for experts that already work speed fast) and since the workflow and detailed instructions with patience? your channel is my preferred . Also have to congratulate you for being the most viewed tutorial on the web, a great reason for that. also I'm also subscribed already.

maquinasproductivass.der.l
Автор

Just want to thank you for this vid. Referenced it a few times now. I dont work with images often, so I have sometimes forgotten how to do it, so youve been a great help! Tyvm

blivids
Автор

FYI for anyone who has an issue with your outer lines appearing a different color (light blue in my case) and not showing up in the 3D view (almost like they are invisible). I realized later on that the newly created lines were set to "Geometry Construction Mode" (as mentioned @ 17:16). This button is a global toggle instead of a one-time action (which MangoJelly mentioned to at 18:00, but I didn't realize I necessarily had to untoggle it in the moment). Just select all your outer lines and toggle the "Geometry Construction Mode", and your lines should come back to life! Using version 0.21.2.

JamesMowery
Автор

Thank you for these tutorials. I have about 600 hours experience using OnShape and I am moving to FreeCad. These videos have been extremely helpful. Thank you. I respect the pace you are presenting the tools and techniques as well. You give them something new then let them repeat it a few times to help it sink in. I would like to see a follow up video that shows how to accomplish the same sketch but using Mirrors and Symmetry instead of repeating the same tasks to create the rest of the sketch. Just an idea but once I learned that in OnShape my design time was cut by about a third. Since the FreeCad "Symmetry" tool doesn't automatically add the Symmetric Constraint to the Points it takes a bit longer but it is still a faster approach that requires less brain power.

EDIT: I see the next video is using polar pattern. I like that. However, I still think that using Symmetric tools in the Sketch is also worth knowing. (My opinion.) Great job. Love your work.

mordiev