filmov
tv
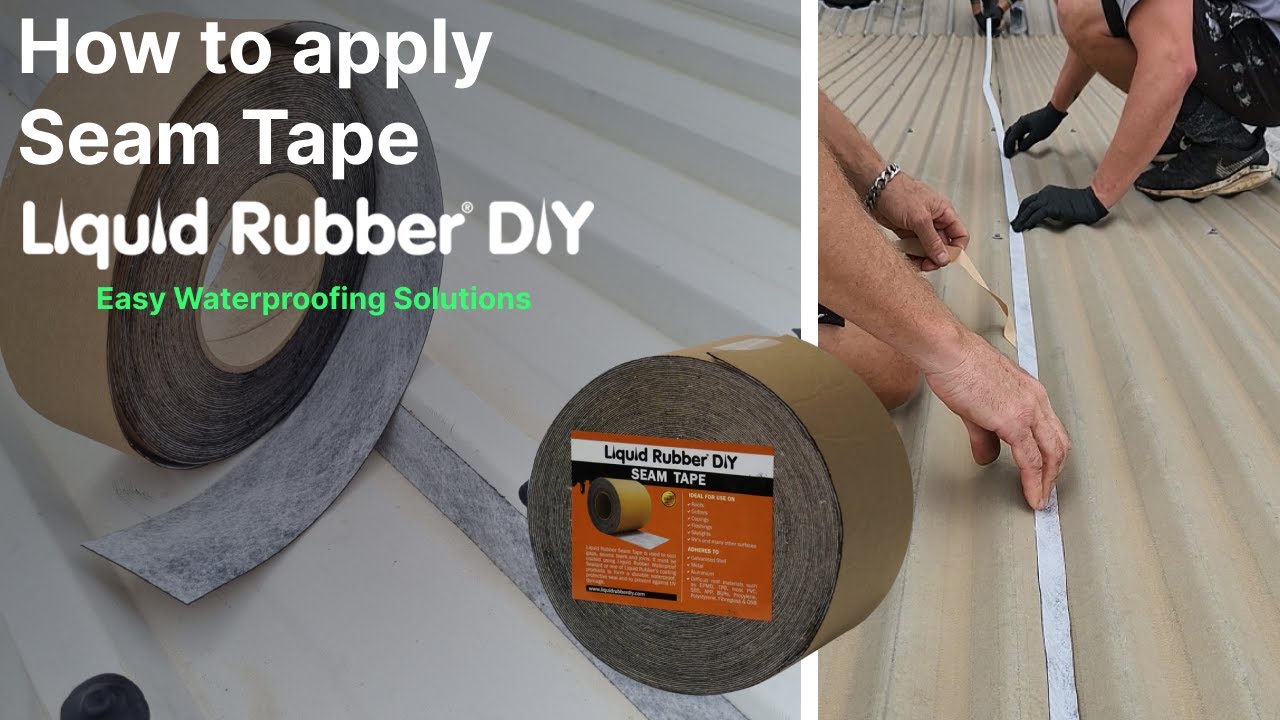
How to apply Seam Tape / Sticky back on roof seams - Liquid Rubber DIY
Показать описание
Applying seam tape, also known as sticky back, to metal roof seams is a simple process that can help to seal and protect the roof from leaks. Here's a step-by-step guide:
Visit our online shop to get the Seam Tape in different sizes:
Products used in the Video:
1.) Seam Tape:
2.) Waterproof Sealant
3.) Rapid Cure Spray
Step by Step instruction on applying Seam Tape:
Begin by cleaning the area where the seam tape will be applied. This should be done with a degreaser and a wire brush to remove any dirt, oil, or other contaminants.
Step 1:
Measure the length of the seam and cut the seam tape to the appropriate size or cut it at the end.
Step 2:
Peel the backing off of the seam tape and align it with the seam. Press the tape firmly into place and smooth out any wrinkles or bubbles.
Step 3:
You can use a roller to ensure a strong bond.
Step 4.
Repeat the process for any additional seams and make sure to overlap the tape by at least 1cm.
By following these steps, you'll be able to effectively seal your metal roof seams and protect your roof from leaks. It's important to note that the surface should be dry and clean before applying the seam tape.
Step 5. Apply 1 - 2 coats of Liquid Rubber DIY - Waterproof Sealant on top of the seam tape for best waterproofing results. Use Rapid Cure Spray to instantly set the Sealant in case rain is imminent.
 0:07:22
How to Use the Hot Melt Seam Sealing Tape
 0:00:53
Hemming & Mending Tape Tutorial - Habee Savers
 0:02:26
How To Sew: Attach Seam Tape
 0:00:25
How to use seam Sealing Tape?
 0:00:46
How to apply Seam Tape / Sticky back on roof seams - Liquid Rubber DIY
 0:06:28
How to DIY Waterproof Tape Your Seams
 0:01:21
Artificial Grass Joining Seam Tape - Self Adhesive Seaming Joins
 0:06:56
How to Use 1/4' Diagonal Seam Tape (Erica's Quilt Quick Tips!)
 2:11:00
April 2023 Tuesday Class #4 - Trailblazer
 0:05:48
How to Hem Your Pants using Fabric Tape #DIY #Hem #LongPants
 0:01:19
How to Drywall - Taping Drywall Seams
 0:04:19
How to fix waterproof Gore Tex seams using repair tape
 0:05:51
How to Use Diagonal Seam Tape
 0:04:21
Adding Diagonal Seam Tape to Your Sewing Machine
 0:05:34
How-to make the perfect seam with vinyl.
 0:00:26
Tip of the Week: Should You Tape Insulation Seams?
 0:05:49
How to use Batting Seam Tape
 0:07:59
How to Use quarter inch Diagonal Seam Tape
 0:16:20
Laurens Guide to interfacing and tapes for dressmaking
 0:16:53
Most People Do This the HARD Way - Seam Seal a Tent or Tarp and Make Repairs - Seam Sealing Guide
 0:01:01
Using diagonal seam tape
 0:02:28
Carpet Cleaning & Installation : How to Use Carpet Tape
 0:01:49
Repair a Ripped Tent! Tenacious Tape and Seam Grip
 0:04:16
How To Carpet Seam, Step By Step
Комментарии