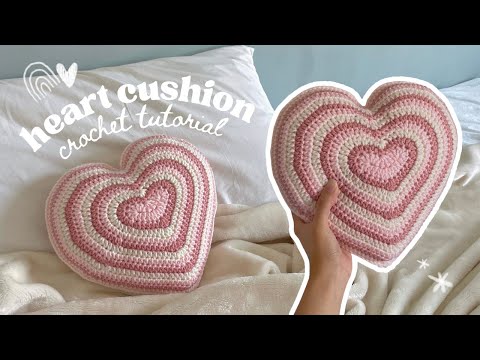
Heart Pillow Crochet Tutorial

preview_player
Показать описание

♡━━━♡━━━♡━━━♡━━━♡━━━♡━━━♡━━━♡

* Some links may be affiliate links which will allow me to make a commission for purchases made through these links.

♡━━━♡━━━♡━━━♡━━━♡━━━♡━━━♡━━━♡

ABBREVIATIONS
(US Crochet Terms)

st(s): stitch(es)
sl st: slip stitch
ch: chain

sc: single crochet
chainless sc: Insert hook into second chain from hook. Draw up a loop (2 loops on the hook), then draw through only the first loop on hook (2 loops on your hook). Draw through both loops.

inc: increase (make 2 sc in the same space)
dec: decrease (sc2tog)

[#]: number of stitch(es) in a round

♡━━━♡━━━♡━━━♡━━━♡━━━♡━━━♡━━━♡

Youtube Channel: @GratiaProject

Thank you for watching!
Please subscribe for more tutorials.

♡━━━♡━━━♡━━━♡━━━♡━━━♡━━━♡━━━♡

Music:
Рекомендации по теме
Комментарии
Автор

Thank you. My friend just had heart surgery and I’m told that it helps to hug a pillow if you have to cough post-surgery. So thank you. ❤️

amandahugginkiss
Автор

[WRITTEN PATTERN]


Make 2, sew or single crochet together, (I used the whip st for mine) stuff before finishing

[total sts]

Row 1: ch 8. Start from 2nd space from hook, sc 7 [7]
Ch 3, turn
Row 2: sc 9, continue sc 1 using “chainless sc” and 1 more sc in the same st [11]
Ch 3, turn
Row 3: sc 13, continue sc 1 using ‘chainless sc” and 1 more sc in the same st [15]
Ch 2, turn
Row 4: sc 15, inc in the last st [17]
Ch2, turn
Row 5: sc 18, continue sc 1 using ‘chainless sc” and 1 more sc in the same st [20]
Ch 2, turn
Row 6: sc 20, inc in the last st [22]
Ch 2, turn
Row 7: sc 22, inc in the last st [24]
ch2, turn
Row 8: sc 25 [25]
Ch 2, turn
Row 9: sc 25, inc in the last st [27]
ch2, turn
Row 10: sc 28 [28]
Ch 1, turn
Row 11: sc 27, inc in the last st [29]
ch1, turn
Row 12: sc 29 [29]
Ch1, turn
Row 13: sc 28, inc in the last st [30]
Ch1, turn
Row 14: sc 30 [30]
Ch 1, turn
Row 15: sc 29, inc in the last st [31]
Ch 2, turn
Row 16: sc 30, dec in the last 2 sts [31]
Ch 1, turn
Row 17: sc 31 [31]
Ch 2, turn
Row 18: sc 30, dec in the last 2 sts [31]
Ch 1, turn
Ro 19: dec, sc 29 [30]
Ch 2, turn
Row 20: sc 29, dec in the last 2 sts [30]
Ch 1, turn
Row 21: dec, sc 28 [29]
Ch 2, turn
Row 22: sc 27. 3 sts left. Dec in the next 2 sts. Leave the last empty. [28]
Ch 1, turn
Row 23: dec, sc 25, inc in the last st [28]
Ch 1, turn
Row 24: dec, sc 25, inc in the last st [28]
Ch 3, turn
Row 25: sc 28, dec in the last 2 sts [29]
Ch 1, turn
Row 26: sc 28, inc in the last st [30]
Ch 2, turn
Row 27: sc 29, dec in the last 2 sts [30]
Ch 1, turn
Row 28: sc 29, inc in the last st [31]
Ch 2, turn
Row 29: sc 30, dec in the last 2 sts [31]
Ch 1, turn
Row 30: sc 31 [31]
Ch 2, turn
Row 31: sc 30, dec in the last 2 sts [31]
Ch 1, turn
Row 32: dec, sc 29 [30]
Ch 1, turn
Row 33: sc 30 [30]
Ch 1, turn
Row 34: dec, sc 28 [29]
Ch 1, turn
row 35: sc 29 [29]
Ch 1, turn
Row 36: dec, sc 27 [28]
Ch 1, turn
Row 37: sc 26, dec in the last 2 sts [27]
Ch1, turn
Row 38: dec, sc 23, dec in the last 2 sts [25]
Ch 1, turn
Row 39: sc 23, dec in the last 2 sts [24]
Ch 1, turn
Row 40: dec, sc 20, dec in the last 2 sts [22]
Ch 1, turn
Row 41: dec, sc 18, dec in the last 2 sts [20]
Ch 1, turn
Row 42: slip stitch (sl st), dec, sc 15, dec in the last 2 sts [17] (do not count any of the sl sts)
Ch 1, turn
Row 43: dec, sc 13, dec in the last 2 sts [15]
Ch1, turn
Row 44: sl st, dec, sc 9, dec in the next 2 sts. Leave the last st empty. [11]
Ch 1, turn
Row 45: sl st, dec, sc 5, dec [7]
Ch1, turn
Row 46: sc 7 [7]
Finish off

tis_ella
Автор

Making this for my friend for Valentine's, with a few changes. I made it half a light pink, and the other half is darker, then I used white yarn to attach them, and it's so cute!!

teddycat
Автор

Thank you for this tutorial, easy to follow and the result is awesome.i made one for my auntie.i embroidered the first letter of her name with beads on the heart.it came out very nice and she loved it so much.i will make one for myself too

bita
Автор

the heart turned out soo well this tutorial was great and was so easy to follow thank you for this tutorial!

pinksunshine
Автор

Lovely! I've bought the pink yarn n I'm going to start the heart cushion for my grand daughter's 5th birthday! Thank you so much!

hirakelshikar
Автор

Thank you for this.This is the best crochet heart pillow I’ve seen. Most of them are a wired shape. I LOVE THIS SO MUCH❤️❤️❤️

aprilpostema
Автор

Written instructions are very clear. Thank you for this tutorial..

shanthi
Автор

I love it! I will start to make a couple very soon. Thank you for the tutorial

giedofredo
Автор

Very pretty and love the way you do the creases and decreases.Thanks for sharing!!!

mariavalenzuela
Автор

i'm making this in a beautiful pink color for my new room. this is my first amigurumi and its coming out so well! your instructions are so clear and easy to follow! thank you so much!! <3

cherise
Автор

How smart pattern! Amazing heart. Simple and beautiful. Can't wait to make one ❤️😊

catz
Автор

Omg its so cute 😨😨😨✨✨✨im going to make one *gets a color yarn and a hook* well im ready to crochet with u =3

blxckmellow
Автор

Thank you very much for sharing beautiful heart !

tuyetphan
Автор

Such a cutie Pillow. Aww! :) Well-done!

AllForPets
Автор

The best tutorial for heart pillow :) can I ask how much of yarn did you use for the pillow ? Greetings :)

Sandra-bkge
Автор

By row 4 how do you go from a total of 15 stitches, increase one and suddenly that’s 17 stitches? There’s a few spots like this that don’t make sense and my project is getting all kinds of confusing and messed up…… can anyone help? I see so much this is so easy to follow and the math in my head isn’t making sense.

mikowolf
Автор

Hello, I have gotten onto the 13 crotchet mark and I keep repeating as either the loops are too small and difficult to get into or the loops twist and clump together. (Not really far) I am a beginner and I end up not getting a flat piece of yarn rather a ball of 3D twisted yarn! Any advice? How are you able to keep each stitch uniform and tidy?

rhashem
Автор

I'm going to try to do this now. Thanks for sharing

CuppysCrochet
Автор

Do you have a free print for this pattern on your website? Because it's hard doing it without looking at the picture while watching the video. I always keep forgetting what row I'm in.

jkseraphim