filmov
tv
Make Your Cardboard Super Strong! (10 DIY Tips You Wish You Knew)

Показать описание
Learn 10 Easy Tips To Make Your Cardboard Projects Nearly INDESTRUCTIBLE!
Cardboard is a great material for creating models and sculptures, but many people don't know how to make their cardboard strong enough to stand up to regular use. In this video, we're going to show you 10 easy tips that will help you make your cardboard creations super strong and durable! From making your cardboard extra durable to adding extra strength to your models, these tips will help you create cardboard creations that will last longer and look better than ever!
📝Disclaimer: This video is NOT sponsored but attached products and resources may be affiliate links. ( :
📕Show Notes📕
1️⃣ (VIDEO) Watch The Full Version Of This Video For More In-Depth Tips:
2️⃣ (VIDEO) How to Make Cardboard Crafts HARD and STRONG After They are Finished:
3️⃣ (VIDEO) How to Make a Super Strong CARDBOARD SHIELD with CLEAR Windows:
4️⃣ (VIDEO) 5 Biggest MISTAKES People Make When Creating With Cardboard:
⬇⏰⏰VIDEO CHAPTERS⏰⏰⬇
0:00 - The Goal
0:16 - Wood Renforcments
0:51 - Pins
1:38 - Hot Glue Fraying Edges
2:21 - Extra Beads of Hot Glue
3:08 - Fold The Cardboard
3:37 - Layer The Cardboard
4:27 - Grain Orientation
6:01 - Cardboard Ribs
6:29 - Use Other Materials (Build Around Something)
7:10 - Coat Your Cardboard
8:10 - BONUS TIPS!
QUESTION OF THE DAY:
💡❓ How Do You Make Your Cardboard Projects Stronger? ❓💡
- I read and reply to every comment so I would love to hear your answer in the comments below!
📜 About the Video:
In this video, Elli teaches 10 methods for making your cardboard much stronger with simple DIY hacks. You will lean how to enforce your cardboard with everything form proper gluing techniques to grain orientation, to applying special coatings to the cardboard. Weather you are just a beginner or a seasoned crafter, this video contains vital tips that you will wish you know sooner.
#MakerBrain #EliTennant #cardboardcrafts #crafting #cardboardproject #craftingideas #craftingtutorials #crafttools #CardboardBasics #diy #diycrafts #diyprojects #diyvideos #diyideas #diycraftswithpaper
🔎Gear Used To Shoot My Videos🔍
- Camera: [my phone]
⬇️Microphones⬇️
💻 About Maker Brain:
My name is Eli Tennant and on this channel, you will receive weekly DIY project tutorials as well as maker tips and tools videos. You will also get the "Maker Brain Show" where I go Live every Sunday to help you on your journey of creativity. Whether you are just starting to make your ideas or have been at it a while, Maker Brain has got content to help take you to the next level!
🔵Check out the full video library and Maker Brain YouTube channel ➡ @Maker Brain
🏆 Mission:
Maker Brain's mission is to help you access and implement your God-given creativity by sharing cardboard crafting tips, tricks, and tutorials so that you can make your best DIY projects at home.
Thanks for watching and God bless you!
- Eli Tennant
 0:08:54
Make Your Cardboard Super Strong! (10 DIY Tips You Wish You Knew)
 0:30:10
How to Make Cardboard Stronger! (10 tips)
 0:10:36
How to Make a Cardboard Sword! (So Strong It Can Break Wood!)
 0:00:16
How to Make Cardboard Stronger Without Glue! (Quick and Easy)
 0:03:08
HOMEMADE GLUE - THE SECRET OF DURABLE CARDBOARD FURNITURE
 0:09:41
How to Make a Super Strong CARDBOARD SHIELD with CLEAR Windows! (Simple Cardboard Hack)
 0:14:58
How to Make Cardboard Crafts HARD and STRONG After They are Finished (the Cheap way)
 0:00:27
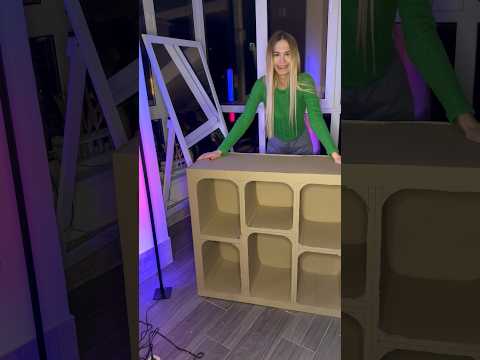
DIY cardboard shelf #shorts #diy #processvideo #homedecor #crafts #papermache #tutorial #furniture
 0:11:44
Ascension Legends // First Impressions Review
 0:03:12
Homemade strong cardboard || how to make cardboard at home || cardboard||cardboard make||Sajal'...
 0:03:46
Pull to Eject | Awesome Cardboard Craft ( Wrapped )
 0:00:30
Wonderful chair making with cardboard
 0:18:20
DIY Captain America MAGNETIC Shield! *Cardboard*
 0:07:39
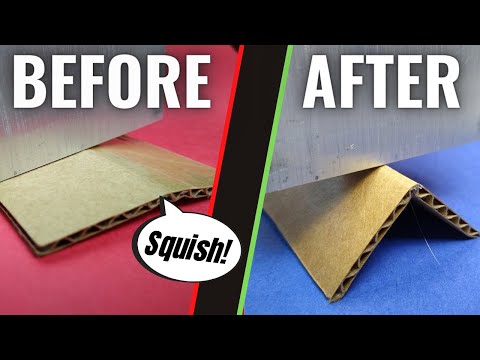
How to Make Strong Folds in Cardboard!
 0:00:15
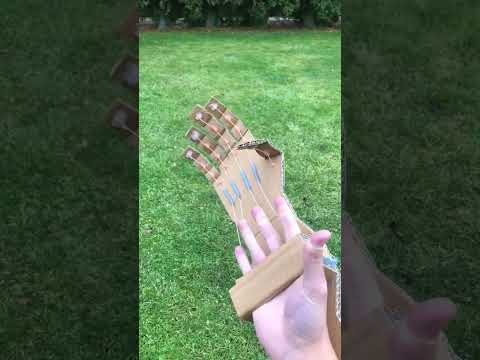
How to Make a Robotic Arm from Cardboard #shorts #lifehacks
 0:08:17
Cardboard Hardware Boxes
 0:08:45
COOL HACK HOW TO MAKE A CARDBOARD KNIFE || Awesome Invention
 0:02:54
DIY Thor's Hammer (Mjolnir) Super Cool at Home With Cardboard
 0:20:09
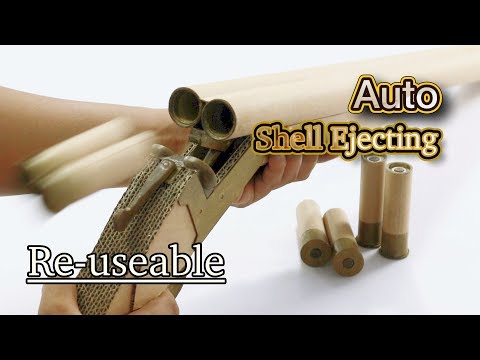
Re-useable Version | How To Make Cardboard DIY
 0:05:09
HOW TO MAKE X-MEN WOLVERINE CLAWS FULL AUTOMATIC, WITH CARDBOARD
 0:05:20
Thousand Chance | Amazing DIY Cardboard Craft
 0:18:23
133. Simple DIY - working with corrugated cardboard - part 1
 0:00:34
CARDBOARD GLOCK G17 GEN 2 - SHORT.
 0:00:15
Cardboard weapon showcase
Комментарии