filmov
tv
Lock Laces® Installation Instructions - How to Install Your Lock Laces®
Показать описание
See below for transcription:
In this video, we're going to walk you through how to install your Lock Laces®, step by step.
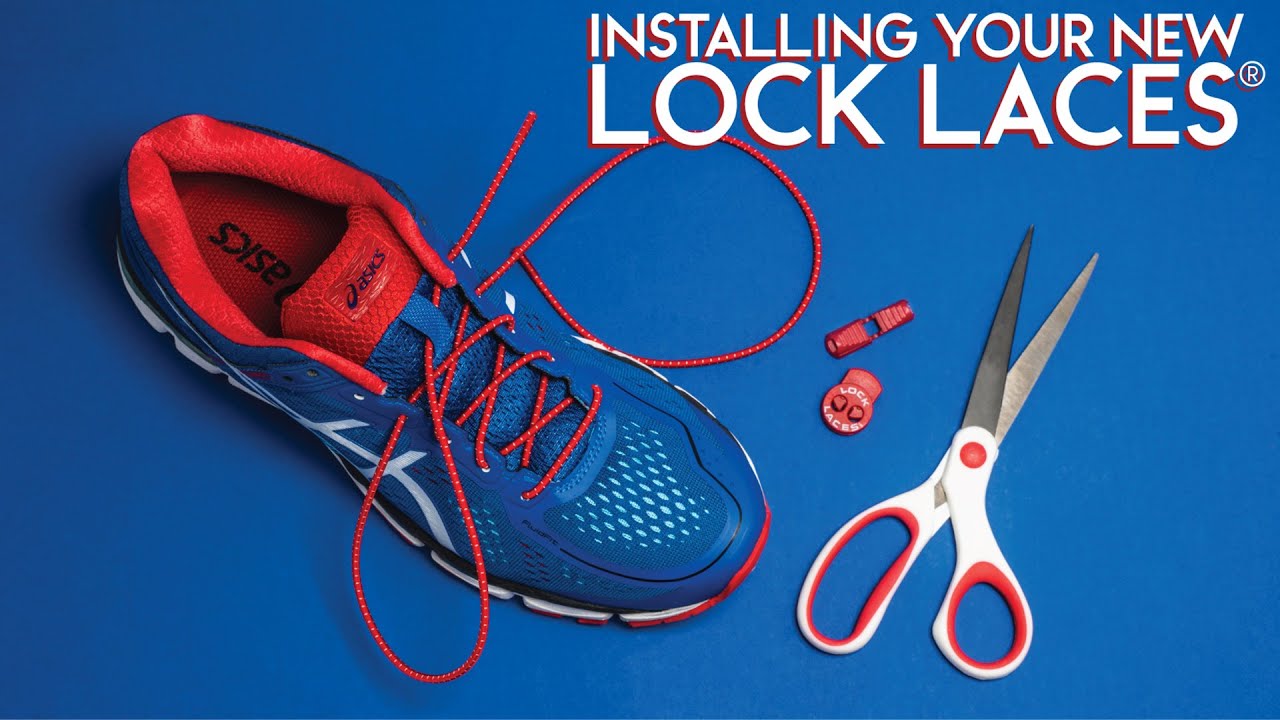
Before you start, you'll need:
- 1 pair of shoes, with the laces removed
- 1 pair of scissors (any kind will do)
- and, of course, 1 pair of Lock Laces
Open the package using the zip lock on top. Inside, you should find:
- 2 elastic laces
- 2 double-eyelet lock devices
- and 2 cord clips, or "end pieces"
We're going to go over installation for one shoe. Simply repeat this process for the second shoe.
Start by putting your foot in the shoe. This helps to ensure that your Lock Laces® fit properly.
Once your foot is in the shoe, go ahead and start lacing up with the elastic laces. The laces will fit through nearly any type of eyelet that your shoe may have.
After you've laced up, give the laces a quick adjustment to make sure they're comfortable.
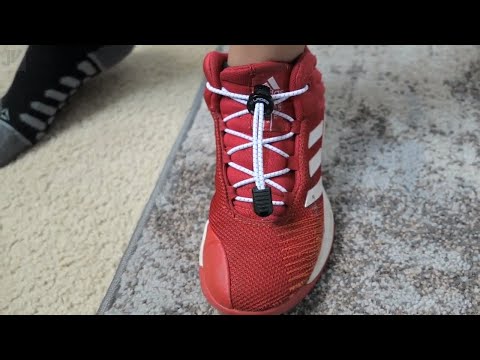
Next, press down on the button on top of the lock device to open the passages, and thread the laces through the openings. Then, slide the lock device to the tongue of the shoe.
Time for another adjustment. Wiggle your foot around in the shoe or stand up and walk around to make sure they're not too tight.
When your laces are comfortable, pull the excess lace taut with one hand and grab the scissors with the other hand. Cut the excess lace approximately 3 inches below the lock device to leave room for future adjustments.
Next, grab one cord clip. Slide the cord clip onto the trimmed lace ends with the teeth facing the toe of the shoe. Align the trimmed lace ends with the teeth inside the cord clip and clamp together to secure.
At this point, some people prefer to tuck the excess lace like so, but this step is entirely optional.
Just like that, your Lock Laces® are properly installed and guaranteed for the life of your shoe.
Make sure to connect with us!
Please give us a like and subscribe to our channel!
If you have any questions, please feel free to leave a comment below!
In this video, we're going to walk you through how to install your Lock Laces®, step by step.
Before you start, you'll need:
- 1 pair of shoes, with the laces removed
- 1 pair of scissors (any kind will do)
- and, of course, 1 pair of Lock Laces
Open the package using the zip lock on top. Inside, you should find:
- 2 elastic laces
- 2 double-eyelet lock devices
- and 2 cord clips, or "end pieces"
We're going to go over installation for one shoe. Simply repeat this process for the second shoe.
Start by putting your foot in the shoe. This helps to ensure that your Lock Laces® fit properly.
Once your foot is in the shoe, go ahead and start lacing up with the elastic laces. The laces will fit through nearly any type of eyelet that your shoe may have.
After you've laced up, give the laces a quick adjustment to make sure they're comfortable.
Next, press down on the button on top of the lock device to open the passages, and thread the laces through the openings. Then, slide the lock device to the tongue of the shoe.
Time for another adjustment. Wiggle your foot around in the shoe or stand up and walk around to make sure they're not too tight.
When your laces are comfortable, pull the excess lace taut with one hand and grab the scissors with the other hand. Cut the excess lace approximately 3 inches below the lock device to leave room for future adjustments.
Next, grab one cord clip. Slide the cord clip onto the trimmed lace ends with the teeth facing the toe of the shoe. Align the trimmed lace ends with the teeth inside the cord clip and clamp together to secure.
At this point, some people prefer to tuck the excess lace like so, but this step is entirely optional.
Just like that, your Lock Laces® are properly installed and guaranteed for the life of your shoe.
Make sure to connect with us!
Please give us a like and subscribe to our channel!
If you have any questions, please feel free to leave a comment below!
 0:01:17
Lock Laces Instructions - How to Install your Lock Laces
 0:02:33
Lock Laces® Installation Instructions - How to Install Your Lock Laces®
 0:00:45
Lock Laces Instructions - Cord Clip Removal and Installation
 0:01:24
LOCK LACES Instructions, Review, Test - How to Install your Lock Laces
 0:01:39
Lock Laces Boot Installation
 0:00:16
Lock Laces
 0:00:32
No Tie Screw-Lock Shoelaces HOW TO USE
 0:00:29
Unique Brand Press Lock Shoelaces Without Ties | Elastic Laces for shoes | #shoes #shoelaces #usa
 0:00:11
How to put on Elastic Shoe Laces
 0:01:19
Nathan Sports: How to Use LOCK LACES™ (@ Campmor)
 0:08:09
Lock Lace review and install
 0:00:26
LaceSpace Elastic Laces Instructions
 0:00:36
How to Install your no tie shoelaces - instruction
 0:00:35
Shoe Laces Stretching Lock
 0:00:27
Lock Laces® Quick Installation
 0:03:57
No Tie Shoelaces - Kids & Adults
 0:04:05
No TIE shoelace METAL LOCK | How to attach metal shoelace lock
 0:00:34
KOREA - TwinBuckle / lock Laces Instructions / untied shoelaces / How to Install your Lock Laces
 0:00:22
I will never tie my shoes again! These lock laces are a must have 👌
 0:02:21
Robert Killian Lock Laces Pro Series Installation
 0:04:21
Lock Laces Review and Installation
 0:00:15
No-Tie SHOELACES
 0:00:11
Product Link in the Comments! 👟 No Tie Shoe Laces Lock Button 👟
 0:00:20
LOCK LACES.Gadget #short video. Best Buy link description...
Комментарии