filmov
tv
This is why shooting HDR is important - Photoshop Tutorial

Показать описание
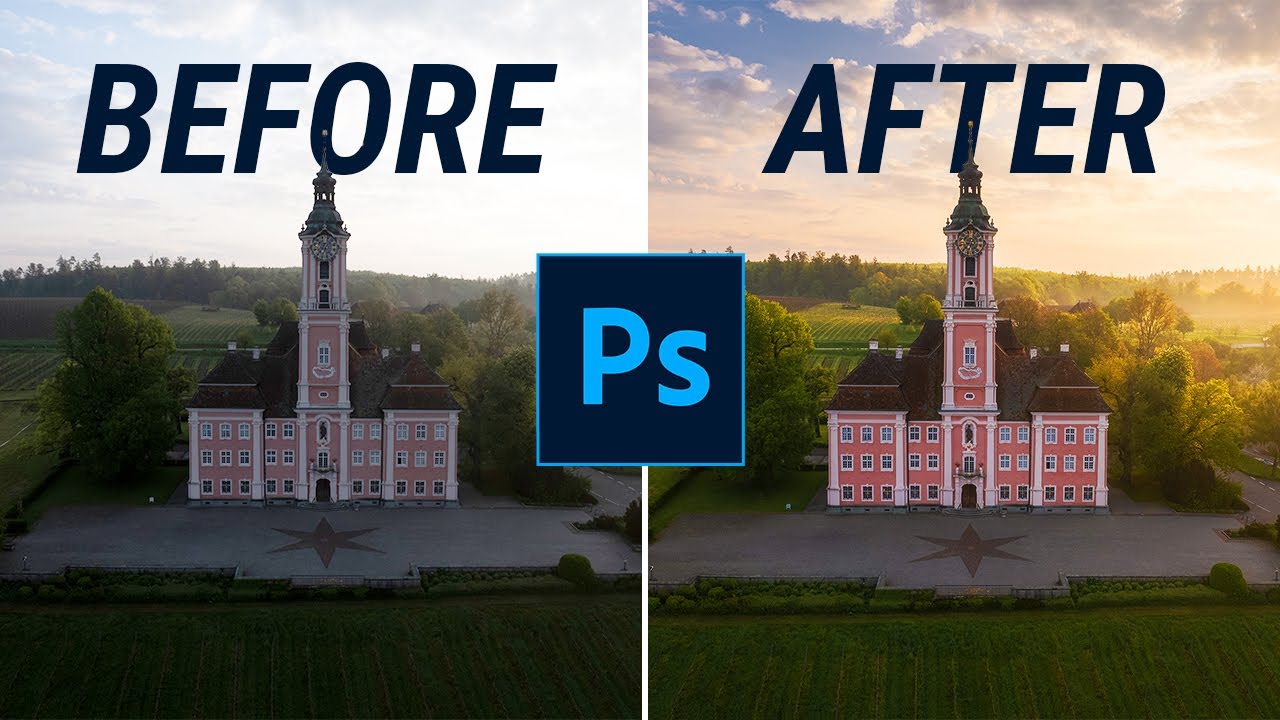
Here is another example why we should make use of HDR when working with contrast rich scenes in Photoshop!
Feel free to follow along this Photoshop Tutorial by downloading the raw files here:
▬▬▬▬▬▬▬▬▬▬▬▬▬▬▬▬▬
Thank you for watching my video!
▬▬▬▬▬▬▬▬▬▬▬▬▬▬▬▬▬
0:00 Intro
For this HDR photo I wanted to get a nice balance between the highlights and shadows. Most of that was achieved in the camera raw editor but I also used Photoshop to fix a few skewed lines, add some more glow and apply dodging to the highlights of the foreground.
0:19 Merging HDR
1:54 Basic Raw Adjustments
I started by changing the profile to Adobe Landscape for more saturation. Then, I adjusted the white balance giving the whole image a warmer, golden hour look. As the unedited HDR was quite dark, I then started by increasing the exposure and shadows. To control the overexposure, I brought down the highlights. For a dreamy look, I dropped the dehaze and clarity slightly.
4:25 Masking
Using a color range mask, I targeted the blues of the sky and made them slightly darker. I also added a linear gradient above the top part of the image and further brought down the exposure to make the sky look more interesting. For the glow on the right, I used a very big radial gradient and increased the blacks and decreased the dehaze inside of it while also adding an orange tone. Then, using a select subject mask I made the building in the center slightly brighter.
7:43 Color Grading
In the color mixer I brought up the orange and yellow saturation, while dropping the greens. I also slightly raised the blue tones. In the luminance tab I continued by dropping the blue luminance making the sky even darker. For the split toning I made use of a warm color for the highlights and the mid tones
9:10 Sharpening
10:02 Photoshop
Using the warp Transformation I fixed a few skewed lines in the foreground (should have used Perspective warp here tbh). Then, I dodged the highlights of the trees in the foreground using a luminosity mask on an overlay layer and painting over it using a white brush
Комментарии
 0:15:44
 0:03:31
 0:06:10
 0:07:18
 0:00:23
 0:00:32
 0:08:42
 0:15:35
 0:35:11
 0:03:38
 0:00:52
 0:07:47
 0:11:17
 0:08:40
 0:08:15
 0:00:51
 0:03:36
 0:11:47
 0:07:38
 0:36:38
 0:00:47
 0:00:50
 0:08:25
 0:06:22