filmov
tv
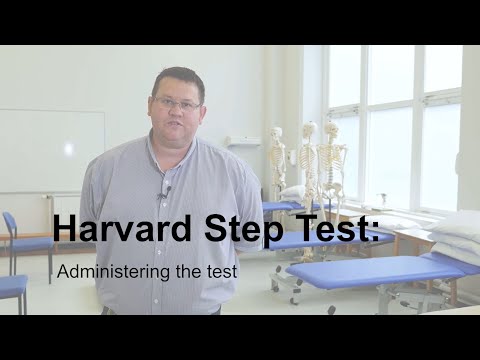
Physiology practical demonstrations - Harvard Step Test: Background and preparation

Показать описание
In this short video, Dr. Terry Gleave (University of Liverpool, UK) explains what the Harvard Step Test is, how it was originally used and how to prepare for the test including equipment and appropriate health and safety.
This video has been adapted from a Massive Online Open Course (MOOC), titled 'Physiology: The Science of Life', which ran in 2018 and 2019. The course was developed in partnership between The Physiological Society and the University of Liverpool and was hosted on FutureLearn.
Transcript:
Today we're looking at the Harvard Step Test. A bit of an introduction for the test is that it was originally used via thoracic surgeons to look at your level of cardiovascular and respiratory fitness to see whether you can undergo operations. The reason we're using the Harvard step test today is it's a simple test requiring very little equipment. You simply need to step. Bottom step of your stairs at home about eight inches would be adequate in height, or one of the many fitness steps that are available. You also need pen paper to note down your results. A stopwatch and preferably, if you've got a friend or a colleague that could help you with the results and the timing.
And also you need a metronome or something that would enable you to keep to time, so that we can control the investigation. Don't worry if you've not got an old fashioned metronome, because you can use your mobile device. And there are a number of free apps that are available for a number of operating systems, and so you could download one of those.
As we said, the Harvard Step test doesn't require any specialist equipment but it does require you to think about your own health and safety, and you need to risk assess the environment that you're going to be doing the test in. I would recommend that you make sure it's free from any trip hazards. Also make sure that you wear comfortable clothing. You're wearing your trainers-- we recommend you don't do it in bare feet-- and if you're wearing your trainers, make sure that the shoe laces are tied and therefore not going to come undone, and you're not going to fall over. Having a colleague or a friend with you can help to make sure that everything is OK.
And if you feel nauseous, dizzy, or you feel short of breath, at any point in time, then please stop the test and sit down. So it's important to have a chair close by, so that you can take a seat immediately after you've completed the test, which is required. And also, if you feel you need to stop, then please do stop. You don't need to complete the test.
For this test, you need to be able to measure your pulse, and there are two locations that you can measure your pulse from. The first one is on your wrist, just at the base of your thumb. So if you have your right arm or left arm, it doesn't really matter, bent slightly at the elbow, and using your other hand, you can place your fingers-- preferably not your thumb. OK, so if you want to remove your thumb and place your first two fingers at the base of your thumb, and you should just about, with light pressure on your wrist, you'll be able to feel that radial pulse.
What you're feeling for is there's locations where your arteries run close to the skin, and that's what enables you to feel the blood coming through the arteries, which is your pulse. The second location that you can measure your pulse rate from would be on your neck, which is just to the side of your windpipe and the groove as you move back towards your ear. And it's the carotid pulse, and you're feeling for that as the blood comes through the carotid artery. And again, you should feel the blood coming through that artery, and you can measure your pulse from your neck on your carotid.
 0:03:26
Physiology practical demonstrations - Harvard Step Test: Administering the test
 0:03:18
Physiology practical demonstrations - Harvard Step Test: Background and preparation
 0:05:40
Ergography, Fatigue & Calculation of Work done. | MUHS | #mbbs #practical
 0:10:11
Harvard Step Test
 0:05:50
Harvard step test
 0:14:22
Perimetry- Field of Vision. |MUHS|#mbbs #practical
 0:01:31
How to perform a spirometry test
 0:01:22
Brian Cox explains quantum mechanics in 60 seconds - BBC News
 0:03:22
The Modified Harvard Step Test for VO2 Max
 0:00:35
Elon Musk Shares How Many Hours of Sleep He Needs to Be Productive! | @MindMasteryX
 0:05:58
Harvard Step Test - Know your fitness
 0:02:01
LAB RULES - Dua Lipa 'New Rules' Parody | SCIENCE SONGS
 0:11:13
SPIROMETRY & RESPIRATORY EFFICIENCY TEST | CLINICAL LAB | PHYSIOLOGY PRACTICALS
 0:01:08
How the brain learns to read
 0:10:58
'There's NO Going Back' | INSTANT THIRD EYE ACTIVATION
 0:01:34
Harvard Medicine: The Art of Medicine
 0:11:20
Introduction to Anatomy & Physiology: Crash Course Anatomy & Physiology #1
 0:01:19
How Neurons Communicate
 0:06:37
7 Note-taking Secrets of the Top 1% of Students
 0:18:19
Brain Hack: 6 secrets to learning faster, backed by neuroscience | Lila Landowski | TEDxHobart
 0:23:37
CONFIRMED STUDY: This Harvard Expert Shows How to Activate Your Third Eye
 0:05:26
'Your Behaviour Won't Be The Same' | Dr. Andrew Huberman (Stanford Neuroscientist)
 0:02:03
Emotions and the Brain
 0:08:31
Exercise Physiology Ospe/Practical#09 Predicting VO2 Max Using Harvard Step Test | DPT Lecture
Комментарии