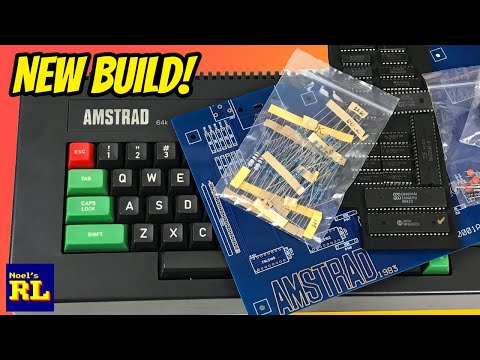
Building the World's Newest Amstrad CPC

preview_player
Показать описание
Let's build the world's newest Amstrad CPC with the new Amstrad CPC 464 replica board and (almost) all-new components. This new replica board was still untested so there were a few bumps along the road ironing out some bugs.

Chapters:
00:00 Intro
01:00 Replica PCB
03:29 Assembly
05:48 Short!
12:44 Transistors
15:07 ICs
16:41 Clock circuit
18:33 CPU clock
23:10 Input
24:49 Conclusion

You can also support Noel's Retro Lab on YouTube by joining this channel:

Links:

Music tracks:

Connect with Noel's Retro Lab:

#amstrad #janstrad #janstrad2022
Рекомендации по теме
Комментарии
Автор

I respected you before I saw this video but after seeing that you've taught your daughter to solder and you play MInecraft with her, I think you're freaking awesome.

gklinger
Автор

So glad you got it going. And sorry you had to be the guinea pig tester! Thanks for your effort and patience and keep up the great work.

robtaylor
Автор

Love that you got your daughter doing some hands on learning. Kids need more early introduction to skilled trades. Even if they never pursue it as a career, they will always have the knowledge.

Druid_Plow
Автор

i m a great fan of Amstrad CPC... my brain exploded watching this video! I want make a new Amstrad CPC in 2022! Marvelous!

rymstudiodesign
Автор

As a woman in electronics tech I just want to tell you how much I love that you involve your daughter in your projects and teach her the trade.

Thank you for your wonderful content and your great parenting. :)

meggsbreakfast
Автор

AN easy way to find PCB shorts is to run a couple of amps through it and use either a thermal camera, or film of alcohol to look for hotspots.

mikeselectricstuff
Автор

I’d love to see a post mortem on that transistor. Why you thought it was equivalent, how it wasn’t, and hopefully a new modern equivalent. Great video!

Cabalist
Автор

Maybe I'm weird... I like to solder IC sockets!.
When you get a VCC - ground short it's time to get out the €4, 000, 000, 000 precision resistance meter... No, I don't have one either.
The picture-in-picture of the 'scope probe on the schematic is excellent... liked that a lot.

edgeeffect
Автор

in the 80's I had a summer job while at Uni fixing avionics boards for GEC, and one way we found shorts on PCB's was to connect a current limited supply to the traces in question, and use an accurate voltmeter to measure the voltage at various points. As you get closer to the short the voltage gets lower, as you get further away it goes up. If you use a low enough voltage you can often avoid activating semiconductor junctions and thus cut out that source of errors - I traced one fault using a quarter of a volt and a (very expensive!) accurate voltmeter. I suspect that nowadays a relatively cheap multimeter with decent probes would probably be stable enough to work. The very low voltage power supply might be more of a problem!

IanSlothieRolfe
Автор

This took me back to 1984 when the CPC464 was my first computer. I was still using it and my second machine the CPC6128 on release, right up to 1995. It was here I bought my third computer a Packard Bell with Windows 95. I had a great collection of the cassette tape games, along with the not so Floppy, floppy discettes. The monitor to tv converter and digital clock, Primary and secondary disc drives, the Romantic Robot from STS and disc. I even had the Eprom boards for blowing my own chips. Though the best mod I ever did on my CPC6128 was to fit the 464 chip, piggy backing the 6128 chip with one pin bent outward from each chip. Then with a toggle switch wired to those pins that when thrown it connected to the pin hole on the PCB. This in turn when the switch was thrown one way or the other before start up, would then boot the Amstrad into either CPC464 or CPC 6128 mode. That gave me two Amstrads for the price of one. I can't remember now about the mod, but I am sure if you don't know it, someone out there will know how it was done. It is a neat little mod to do if you are interested in both Amstrad models. Going back to the cassette tapes, I had all the Amstrad Action magazines and cover tapes. After purchasing the Romantic Robot from STS, I ran the game Chips Challenge, pressed the Button on the RR and up popped the code. During the game each level had a 4 character code to by pass levels you all ready played and continued from the higher level if the correct code was inputted. After having about 12 or so levels completed, I looked for the codes in the lines of the game programme code lines. These where broken up into four blocks and each block equalled a letter of the code as 1st, 2nd, 3rd and 4th if spread sheeted into columns. I found them all and a few bonus levels too and wrote to Amstrag Action with the results and had them printed in the next available issue. For the life of me I can't remember the issue number, but I am sure there is a copy of the magazine out there somewhere. Sorry for the long comment (excuse my grammer etc), but I thought you and the other readers would be interested in reading my experience with my Amstrad CPC machines etc.

TATICMOOR
Автор

From a guy who worked with circuit level repairs on Supercomputers: It's easier to break traces by using a very sharp utility or hobby knife, then either use the knife to lift a section of the trace, or once cut, use a blunt pick (like a dental pick) to gently widen the gap. It looks much better too. Even supercomputer engineers make design mistakes and boards have to be modified.

LakesideGazer
Автор

A good way to remove unwanted traces is to use an X-Acto knife. The X-Acto knife works really well and looks really clean when you’re done. This looks like a fun project but finding the shorts on your own would’ve just driven you nuts, glad you found the shorts and were able to take care of them.

TheRadiogeek
Автор

I cut traces normally with a sharp blade knife or scalpel, cutting at a slight inward angle from both sides, essentially cutting out a shallow V underneath the trace.

uwezimmermann
Автор

Just a couple of mistakes and an omission on a big board he hasn't yet tested? That's actually very impressive. Rob did a terrific job with that and kudos to you for building and testing it. Now Rob can get a perfect working replica board out there thanks to you.

spudhead
Автор

Wonderful =D Nice fault diagnosis there on the VCC to ground, and with the CPU clock! Rob did a great job on that PCB re-creation!

GadgetUK
Автор

Problem with current fpga’s is that they are 3V3, so as well as the fpga, logic converter chips are also required. The low end Tang Nano and Lattice MachX02 can easily replicate the digital functions contained in the gate array chip for those 8-bit computers. So if I designed a replacement solution, it would be a small board containing a few chips to plug-in where the gate array chip goes.

HamsterSnr
Автор

Very cool Noel, and you have perfectly outsourced the soldering part to your compagnon :-D Great works!!!!

YogSothoth
Автор

That's sweet that your daughter helps you like that. My daughter helps me build guitar pedals that we sell but she's a teenager now so offering to play Minecraft wont cut it, they want cash. lol

KKCNM
Автор

I forgot to say this in my last
I've never used and Amstrad CPC but your video is so good that you've inspired me to one day build one. Thanks for this video!

rockyhill
Автор

Very nice teamwork between Noel and Rob! Great video, as always.

mathieucuny
welcome to shbcf.ru