filmov
tv
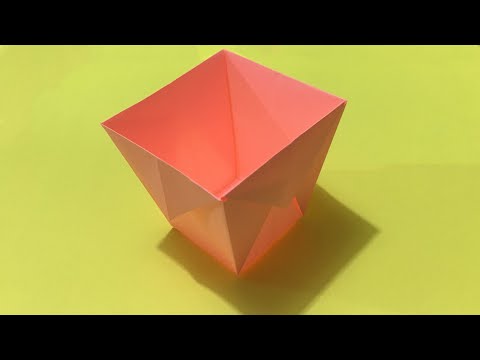
Round Origami Pot Tutorial - Cup / Vase - Paper Kawaii

Показать описание
Learn how to make a pretty rounded origami pot, cup or vase! This origami pot can be tall or short & is made from 1 sheet of square paper, no glue or cutting is required.
Timestamps: Short pot: 0:34 - Tall Pot: 12:52
This origami pot is not truly round, it's octagonal, the pleated design makes it seem quite round, especially when using thicker paper.
I recommend using thick paper, but it will work nicely with any kind.
There are two versions included in this tutorial, the first is a short, wide pot. The second is the tall, thin pot.
You could make lots of size variations of this by folding to different points (like at 12:58).
To make a lid, just use slightly larger paper. about 1 cm smaller (for example 21 x 21cm for lid, and 20 x 20 cm for box).
In the photos, one has another inside it (blue and pink), the one inside was folded backwards, if that makes sense!
Design: © Paper Kawaii
Level: ★★★☆☆ (tall thin version is easier)
- - - - - - - - - - - -
You Will Need
- - - - - - - - - - - -
▸ 1 sheet of square paper
Paper used: 21 x 21 cm
Final sizes:
V1: 6.5 x 5 cm
V2: 5 x 8 cm
- - - - -
Links
- - - - -
- - - - - -
Music
- - - - - -
- - - - - - - - - - - - - - -
Copyright Notice
- - - - - - - - - - - - - - -
This video is © Paper Kawaii, do not re-upload.
Re-creation of any origami models designed by Paper Kawaii is not permitted unless permission is granted, re-created tutorials need to link back to Paper Kawaii's original video and clear credit needs to be given in the video description and video.
♡
#origami #diy #crafts
 0:17:22
Round Origami Pot Tutorial - Cup / Vase - Paper Kawaii
 0:03:15
How To Make Round Pot With Paper Diy Round Paper Vase Origami Pot Tutorial
 0:10:29
Origami - Pot, Vase, Box (How to make a flower pot, Tutorial)
 0:19:08
Geometric Origami Box/Pot Tutorial - DIY - Paper Kawaii
 0:05:06
DIY MINI PAPER PLANT POT MAKING / ORIGAMI PLANT POT TUTORIAL VIDEO
 0:08:39
Origami - Bowl, Dish (How to fold a paper bowl, Basket, Tutorial)
 0:03:37
Origami Pot | Origami Vase | Origami Box
 0:28:25
Mini Origami Pot Plant Tutorial - DIY - Paper Kawaii
 0:05:48
How to Make an Origami Plant Pot | Paper Flower Pot
 0:21:58
Mini Origami Pot Plant / Succulent Tutorial - Cute DIY - Paper Kawaii
 0:02:31
How to make origami round bowl or pot, how to make paper round bowl
 0:15:17
Origami Planter Pot Box Tutorial - Wide Rimmed Box - Paper Kawaii
 0:06:32
Mini Origami Pot Plant - Cute DIY - (ALOE VERA) |Desk Decoration
 0:06:09
Origami Pot Tutorial Cup - Vase Paper | Scrat Toy
 0:04:19
🏺Origami Flower Pot🏺Simple and easy (Keiji Kitamura)
 0:04:36
DIY Flower Pot | How To Make Paper Flower Pot Vase
 0:00:19
Make super cute mini roses out of paper 🌹
 0:08:31
Origami Round Twist Box / Bowl Tutorial - Paper Kawaii
 0:12:34
Origami Angled Base Box - Origami Pot Tutorial - Paper Kawaii
 0:00:27
How to Make Pan Stand || Origami Pen Holder || Paper Pencil Holder || Hexagonal Pen Holder
 0:04:38
Origami Pot | How to Make Paper Box Very Easy | DIY Paper Plant Pot | DIY Craft Ideas 2020
 0:00:59
How to make a paper plant with paper pot 🪴 ll Succulent mini plant ll Origami pot ll Tutorial
 0:09:25
Origami - Bowl, Dish (How to make a Paper Bowl, Tutorial)
 0:02:05
DIY - HOW TO MAKE A ROUND PAPER BOX
Комментарии