filmov
tv
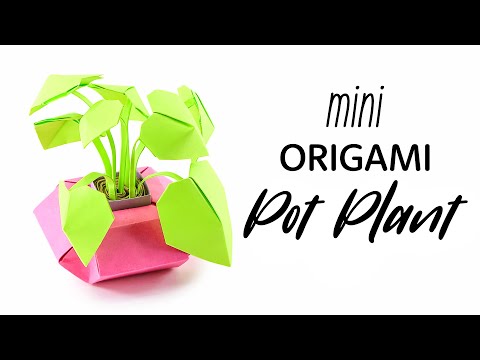
Geometric Origami Box/Pot Tutorial - DIY - Paper Kawaii

Показать описание
Learn how to make a geometric origami pot or box. This unique popup box is make from 1 sheet of square paper, no glue or scissors required.
This origami pot was made specifically for the mini origami pot plants 🪴. The little plants actually waited about a year for this pot, hope those plants think it's worth the wait..
I filmed this twice because the first time, the footage got corrupted, and this second time, I couldn't see as I was folding the grid at the start (I blame the lights). But it ended up being a chill kind of video, I didn't speed any of it up so people can probably fold along, instead of pausing constantly.
Hope you like the pot and thanks for sticking around! 💗
I recommend using strong paper for this, not weak rippy paper like mine.
Design: © Paper Kawaii - After being informed by a reader that this is in-fact a Verdi’s Vase variation, I have found a similar box that has been published in the book “Papiroflexia Facil” by Vicent Palacios. The “vase” is called “Rotated box”. There is also a Verdi’s Vase variation by Phillip Shen in the book “More Geometric Paperfolds” which features the same base shape. So this box (and the other variation in the photo above) are my own variations of the Verdi’s Vase model.
Level: ★★★☆☆
:::::♥ 🗒 You Will Need ♥:::::
Paper used: 21 x 21 cm
Final model size: Approx. 9 x 9 x 3.8cm
:::::♥ Links ♥:::::
:::::♥ 🎶 Music ♥:::::
:::::♥ © Copyright Notice ♥:::::
This video is © Paper Kawaii, do not re-upload or re-create this tutorial.
Re-creation of any tutorials or instructions that include origami models designed by Paper Kawaii is not permitted unless permission is granted, re-created tutorials need to link back to Paper Kawaii's original video and clear credit needs to be given in the video title and description.
:::::♥ ⏱️ VIDEO CHAPTERS ⏱️ ♥:::::
00:00 - Intro
00:37 - Pre-folding
08:23 - Collapsing the box
12:10 - Locking the box opening
17:47 - Popping up the box
#origami #origamipot #paperkawaii #diy
 0:19:08
Geometric Origami Box/Pot Tutorial - DIY - Paper Kawaii
 0:09:57
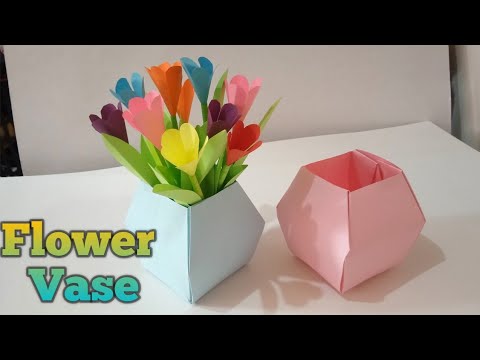
Geometric Origami Box/Pot Tutorial || Craftology with Harin
 0:04:45
Origami Paper Box Pot Tutorial - Origami Kawaii〔#079〕
 0:15:17
Origami Planter Pot Box Tutorial - Wide Rimmed Box - Paper Kawaii
 0:17:22
Round Origami Pot Tutorial - Cup / Vase - Paper Kawaii
 0:16:45
Origami Geometric Pot Tutorial - Pentagonal DIY Gift Box - Paper Kawaii
 0:10:29
Origami - Pot, Vase, Box (How to make a flower pot, Tutorial)
 0:28:25
Mini Origami Pot Plant Tutorial - DIY - Paper Kawaii
 0:07:26
Origami Square Twist Box / Pot Tutorial - Paper Kawaii
 0:00:59
How to make a paper plant with paper pot 🪴 ll Succulent mini plant ll Origami pot ll Tutorial
 0:04:19
🏺Origami Flower Pot🏺Simple and easy (Keiji Kitamura)
 0:12:34
Origami Angled Base Box - Origami Pot Tutorial - Paper Kawaii
 0:06:57
Origami Tripyramid Box Tutorial - 1 Sheet Fox Box (David Donahue) - Paper Kawaii
 0:00:27
Amazing geometric ART hack! Easy circle design✍️😁#shorts #geometricart #drawing #art
 0:05:06
DIY MINI PAPER PLANT POT MAKING / ORIGAMI PLANT POT TUTORIAL VIDEO
 0:23:40
Tapered Origami Box / Origami Flower Pot - Paper Kawaii
 0:10:27
Origami Geometric Box | Origami Box
 0:03:37
Origami Pot | Origami Vase | Origami Box
 0:10:51
Origami Flower Pot Best Easy Learning Video | Paper Flower Box Clear Instruction
 0:06:00
Star Flower Box | Pot - DIY Origami Tutorial by Paper Folds
 0:05:48
How to Make an Origami Plant Pot | Paper Flower Pot
 0:00:16
Origami Pot #shorts
 0:07:57
Origami Paper ' Star Flower Box /Pot / Container'
 0:04:36
DIY Flower Pot | How To Make Paper Flower Pot Vase
Комментарии