DIY Battery Spot Welder - Demonstration & Explanation

preview_player
Показать описание
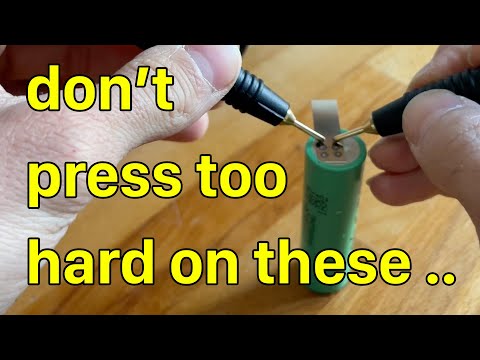
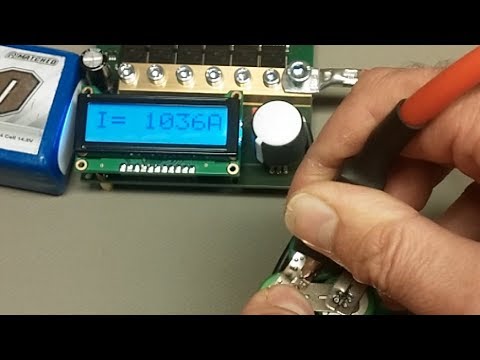
I thought I'd do a quick demonstration while I'm using my spot welder at the moment to make up a 10s4p li-ion battery pack.

**Nickel Strips**

**Solenoid Relay**

**Choc Block (Electrical Connector)**

**Copper Nails**

**Heavy Gauge Cable**

**Momentary Switch**

(To activate the switch that activates the solenoid, NOT to replace the solenoid.)

Рекомендации по теме
Комментарии
Автор

Six years later, and here I am discovering this work of art. Thank you very much.

Автор

I'm very impressed. This is common sense at work. It saves hundreds of dollars compared to a lot of other methods using MOSFET'S .

naknakacknak
Автор

I built one of these today to repair a Milwaukee impact gun battery…. They can be quite aggressive on a 360ah battery… my first few clicks weren’t short enough but I got a feel for it eventually

I found the negative end of the cells welded a lot nicer than the positive ends

thenorthumbrianwildcamper
Автор

I like your minimalist approach. The advantage of a capacitor bank is you can control how much energy is stored and the caps can be recharged from a much smaller capacity current source. Need more current? Add another parallel cap. Usually they use FETs to dump the caps but I guess you could stay with the solenoid

jeffreydeutsch
Автор

Surprisingly effective! Good to know, refurbishing li-ion packs at home becoming more and more of a necessity.

lemagreengreen
Автор

Just so you're aware, the CCA rating (cold cranking amps) is like the max safe draw from the battery over a few seconds period in less than ideal conditions ( 0 Fahrenheit i think) and still maintain enough voltage to crank a car (above 7.2v), so using this shorter pulse, in good temps and ignoring voltage drop, the current is highly likely to be more than 200A as a direct short. Not saying this is a problem or anything assuming the battery doesn't start gassing or anything, just that if you're expecting to get 200A and are basing calculations on that, it might be good to try and capture the max draw maybe using a scope on single shot mode and a clamp meter as its highly likely to be well over 200A. Once again, im not being in any way critical, i love the project you've done there and its good to see people not just buying cheap unit that are really over priced for what they are, much respect for doing it yourself, i just thought the info may be useful.

ChrisSmithy
Автор

I can confirm this works perfectly!!!! You saved me so much time and money thank you!! I got a 230 cranking amp battery from Walmart for $20 and a car solenoid from the local auto parts store and all set up for under $50!!!

Thatoneguy
Автор

Such a simple, cheap but effective welder. Exactly what I'm looking for!

Top stuff mate!

jb
Автор

Went to Home Depot today and bought two lengths of heavy 1 O wire each at 2.5 ft or 763 mm. for 8.00 US. And added 1 ft or 305 mm in length of 1/8th inch or 3.175 mm solid copper wire.for 66 cents. or 60 euro cents. I bought a battery of 280 cca for 22.00 at my local walmart. Or 19.90 euro's. All of my parts will arrive tomorrow and I have already charged and tested my batteries for my 52 volt E-bike without a PAS sensor. Thanks for the video as it saved me a lot of money for a possible one time venture!

weirdiosity
Автор

What a superb inspirational video! Thanks for sharing. I am an electronics engineer, so am mega impressed with the beautiful simplicity and frugality of this project. I intend to make one similar to yours.

However, I do have a couple of thoughts to air. I am totally inspired to make one of these, but I will likely use 2 solenoid relays. Then if one fails and gets its contacts welded together (certainly quite possible, even if yours has not yet failed!). Then hopefully the other one will still always work and release ok. That way much less chance of a 'stuck' on quite dangerous situation occurring. It is unlikely that 2 solenoid relays could both fail with welded together contacts simultaneously. I would likely install one at each end of the battery. I believe this would make the whole thing that bit safer to use. It will also massively reduce the instantaneous contact breaking arc that will definitely be occurring inside of the solenoid just as the contacts are releasing.

The second point is that I think you are taking the CCA spec of the battery (and the current rating of the solenoid) just a bit too literally. The battery CCA rating is *not* the absolute maximum current the battery can deliver. It is the maximum current it can safely deliver continuously, for a specified maximum period of time (typically a minute or two).

The absolute maximum current it will deliver into a virtual short circuit (as in this case) will be very much greater than 200 Amps. I estimate that in this application, the momentary peak current is more likely to be in the region of 500-1000 Amps! Clearly the battery and the Solenoid relay are momentarily in severe overload. However, this is probably perfectly ok, as the duration is so relatively short. It would be disastrous if the solenoid relay failed to disconnect due to the internal contacts becoming fused together though. Hence why I suggest using two in series.

Anyway, I'm definitely going to construct this. Please can I ask where you get the tab strip metal from, and what is the type and thickness? It looks ideal for this battery building project.

Thanks again.
Peter.

peterwestyorkshire
Автор

Thanks for showing your welder. This is by far the simplest design on youtube and it works. I will certainly give this a try.

paraglide
Автор

THANK YOU
I am converting my longboard to be an electric one. I still need to build the battery pack as premade ones are either sketchy or really overpriced.
Most of the spot welders out there are way to expensive for just one battery pack. I was about to give in and buy a premade pack when I saw your video. The solution is so simple that it never ocurred to me. Might spice it up with an arduino to manage the timing as I don't trust myself to nail that.

lurts
Автор

dude i love it thats the simplest welder ive seen ever thanks im making one today bro good stuff buddy !!!

raymondj
Автор

Liked and subscribed. This is the simplest and effective one I've ever seen, so I'm definitely making one. Don't think of using that timer circuit. Einstein said, make it as simple as possible, but not simpler. This is the essence of genius!

Inspironator
Автор

I built my own 3 years ago just like this and made a 24s 20p battery using Samsung 30Q cells, Worked very well! :)

hardergamer
Автор

Outstanding, simplicity at its finest. Yet very effective, I'm glad I saw this video as I have some ni cads to replace instead of tossing a good tool. Like I like to say "If it's broke round here I fix it". Thanks for sharing

patrickscahillii
Автор

I saw this this morning and being an old biker I had everything.👍 I put it together but using a car battery and it blows a hole in everything😁 I am going to look at putting the switch in some sort of rig so I can drop something on it and get it consistent by differing the drop height👍 Thanks!

shawng
Автор

Such a simple, cheap but effective welder. Exactly what I'm looking for!

giaiphaptietkiemnangluong
Автор

Clever; we haven't seen many of these with a battery. We shared this video on our homemade tools forum this week 😎

homemadetools
Автор

Mate that was the best spot welder I've seen. I'm an electronic tech and have been trying to build a spot welder but could never get enough current. Yours is a simple and elegant solution. It reminds me of an old NASA engineering story; when they were in the middle of the space race with the USSR, NASA was spent millions designing gravity free ball point pens. Russia used wax pencils.

shaneapps