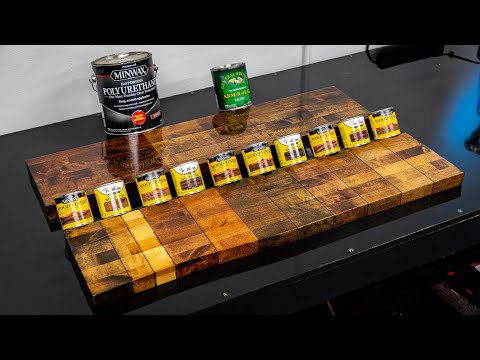
How to stain wood LIKE A PRO! Pine wood staining tips and tricks

preview_player
Показать описание
Tired of your wood stain coming out all blotchy. This product will help take your woodworking projects to the next level and help you stain wood like a pro. pine wood staining tips and tricks

Buy Here

#howtostainwood
#Blotchywoodstain
#woodstainingtips
#stainingpinewood
Рекомендации по теме
Комментарии
Автор

Just my two cents. Generally most professionals will not use a wood conditioners since it does not give the results you may think it does on certain species. In terms of staining certain species where the end result is blotchy, water popping is the solution. As a hardwood floor contractor we stain jobs that are anywhere from a couple hundred square feet to a couple thousand feet and more. The last thing we or our clients want would be to have their final product be blotchy. What is water popping some may ask. Whatever your project may be weather a table top or a couple thousand feet of wood flooring your sand job must be done correctly. I'll speak in terms of a wood floor. Although the process for all projects are the same. Once we are done sanding a wood floor and ready to apply a stain, we water pop the floor first. Literally we are on our hands and knees with a 5 gallon bucket of water and a car wash sponge washing the floor. Not flooding the floor with water. Simply washing the floor. That then sits over night which once it dries also raises and swells the grain of the wood. Then we stain over the water popped floor. We then allow the stain to dry. The following day we begin our polyurethane process. If you touch the project after you water pop it and after you stain it, it will be rough in texture. This is normal since the process has raised and swollen the grain of the wood which is the intent. Some abrade the stain after it's applied and dried with a maroon pad. Most wait to knock the grain raise down by abrading their first coat of finish. In our case polyurethane. A couple of the more bitchy species to stain would be the tight grain hardwood lumbers such as birch and maple ETC. Staining maple is like shooting a BB gun at a freight train. Stain a maple floor without water popping and uneven, blotchy results is what you will yield. Water pop it, let it dry over night then stain and a nice even color is what you end up with. For those who read this and do it there are two simple keys you must do for success. 1) Wash the project, don't flood it. 2) The water popping process must dry over night. For those who have a moisture meter it's best to take a moisture reading before water popping, and after water popping to ensure all the water has evaporated where the moisture content of the lumber is the same after you water popped as it was before you water popped. As a side note just know that water popping will give the color much more depth. In many cases it also will be a shade or so darker.

falconflooring
Автор

Nice comparison demo. I use the pre-stain and although it does greatly reduce the blotching, it really doesn't eliminate it all. I'm a beginner so all I buy right now is the big box store cheap pine and it is easy to work and cut but really hard to finish.

danalaniz
Автор

I was just about to stain my bench but now I just must go get some pre-stain conditioner And I'll use a rag instead of the brush, Thank You

sandybarker
Автор

I was just about to stain my bathroom door but decided to look for a staining video just in case someone had an interesting trick or two. I love this idea and am going to order it before I even consider touching my door. Thank you!

mariagiorgio
Автор

Thank you. I had the minwax, but didn't know about using a rag instead of a brush. Great save.

kennethsutekh
Автор

I am remodeling my studio and chose to paint and stain my new work benches myself (for some reason I thought I was smart) thank you for this real nas like video. It was very informative

SamanthaLiangCakeArtistry
Автор

Thank you for your advice. My husband had bought pre stain conditioner and I grabbed it after your video and it worked great!

mamaginn
Автор

Commentary is the best!
Thanks for the vid!

janvecerka
Автор

Ive been a professional wood worker for 50 years. Lots of experience with stain and lacquer. Conditioner is not as necessary on hardwoods as it is on pine or other softwoods. Try a sample piece and make sure to sand everything well before staining. If you are using an oil based stain such as min wax or watco, be sure to soak all stain rags, disposable sponge brushes etc. in water before disposal. These stains have a tendency to self combust. You could save your shop by being careful. Good luck

olddad
Автор

I just started using this product on some basswood picture frames I've been making. The problem with color difference was pretty substantial. After using the pre stain the colors were much more consistent. I have always used minwax but I bought a small can of rust oleum dark walnut stain. The rust oleum looks more like walnut on the basswood than the minwax dark walnut. I really like the rust oleum stain.

josepheller
Автор

Nice video, the pre stain wood conditioner makes a huge difference to me, remember to let it do it’s job for at least 15 minutes and under 2 hours, I get beautiful results every time

markanthonyking
Автор

Love this product. I have never sanded/stained before. But, our front door was a disaster after 30 years and my 90 yr/old. He told me “only use Minwax” and this popped up on Amazon when I googled. Needless to say, the door looks great. Can’t say enough about how this product goes on, I used a brush, and the tone was great. I added 2 Coates with Minwax gel stain and amazing. Came here looking for sanding after staining tips and found your video.

I am mechicanially declined and have never dont any wood working at all, let alone sanding and staining. It turned out fantastic.

GeophysGal
Автор

Doing some research for my man cave project and I will be using the pre-stain. Thanks for the tip.

stevedaigle
Автор

I'm a Minwax lover, was raised on it because my parents were Antique dealers, I too am dealing with antiques, but just starting a year ago, with the furniture, big, big, difference by using Pre Stain on my antiques, and the buyer comments on the finish every time. Thanks for your video, just kinda sealed the deal on Minwax Pre Stain.

davefranks
Автор

Thank You, most definitely going to go buy this product today. You are going to make my custom cabinets look fabulous!!! Thank you again 💜

blessyourheart
Автор

Thanks you saved my upcoming project from botches. However, that means another trip to the hardware store.

brinafloyd
Автор

Thanks 🙏 for you help! You’re amazing!
God bless!

Tiger-pbfs
Автор

Not only was this entertaining but soooo helpful! So happy I found this video before I started my project

kelbrl
Автор

Good comparison, i'm convinced. About to redo a tabletop, and was looking for techniques. I appreciate it!

ChanWeinmeister
Автор

Thanks for the insight, excited to start my first wood working project and of course there will be electronics inside.

ThatEngineerGuy_