filmov
tv
How to add binding to your projects the easy way

Показать описание
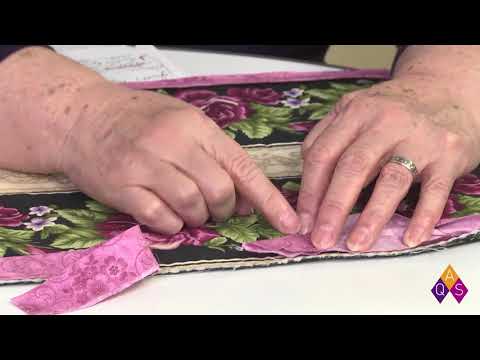
In this tutorial, I will show you how to add binding to your projects. First, I'll use the traditional "quilter" style binding, and second I'll use the "garment" style binding method. I use both depending on my project and whether I can get away with using prepackaged binding.
You can cut your binding to whatever width you want, but most quilt-style bindings are cut between 2 1/4"-3". I cut the demo version at 2 1/2" wide.
When I use quilt binding on straight-edge projects, I do not cut it out on the bias - I find that wasteful. I prefer to cut cross-grain, and it's worked for me for over a decade.
If my project had curves, I would cut the binding on the bias, as it needs to ease around the curves.
The Extra Wide Double Fold prepackaged binding is super easy to use, as it's already trained and pressed. You can press it around curves since it is cut on the bias when made a the factory. Start with the wider edge of the binding (when it's opened all of the way) and sew that crease down first, to the back of your project. Then wrap it around to the front and sew down that edge - this way the front stitching will always be on the binding on the back side and not on your work.
I'm using these tools in this demo:
Thank you for subscribing to my channel. Hit the bell to be notified when future tutorials are published.
Music: Ocean Ave by JAK
 0:04:25
How to Join Binding Ends with No Overlap or Bulk
 0:04:53
Add Binding with an Easy Invisible Join
 0:05:09
Binding for Beginners- Easy Way to Finish Your Quilt Projects
 0:13:11
HOW TO BIND A QUILT - BINDING HACK TO YOU NEED TO HAVE
 0:04:47
How to Join the Ends of Binding
 0:01:45
How to Join Binding Strips | Quilting
 0:29:41
How to add binding to your projects the easy way
 0:18:45
Let's Cheat and Finish the Binding an Easy Way
 0:00:49
FRONT POCKET BINDING ATTACH WITH TOP STITCH BY DOUBLE NEEDLE MACHINE USING FOLDER
 0:31:13
The Ultimate Machine Binding Tutorial for Perfectly Finished Quilts
 0:10:31
How to Add Binding to a quilt - learn to quilt - step by step - finish your quilt
 0:01:29
How to add binding to a quilted piece
 0:03:48
How to Sew Single Fold Bias Binding around Curves & Neckline
 0:09:26
💥 HOW TO BIND YOUR QUILT ON A SEWING MACHINE BINDING 3 METHODS
 0:09:40
How To Make and Use Bias Binding | Sewing For Beginners - Episode 8
 0:08:40
Turn Binding Corners Perfectly with Marianne Fons
 0:15:19
🍭 Bias Binding Made Simple: Beginner-Friendly Tutorial
 0:05:43
Adding Bias Binding to By Annie's Clam Up
 0:11:07
Have you seen this binding method? | learning from an old quilt | sew along with me
 0:02:54
How to Bind a Quilt: Foolproof Tips for Great Results | Quilting Tutorial
 0:04:13
How to attach a bias binding and armhole
 0:07:31
How to Add Single Fold Binding to Quilts by Lisa Bongean of Primitive Gatherings
 0:35:06
FINISH YOUR QUILTS! How to - BORDERS, BACKING, BINDING, QUILTING - For ANY Quilt Top!!
 0:05:22
Easy Mitered Corners for Quilt Binding
Комментарии