filmov
tv
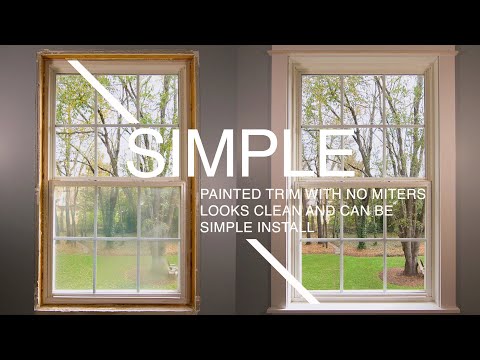
How To Trim Out A Window

Показать описание
Let me show you in under one minute how a professional carpenter trimmed out this window.
First, he measured the width and height of the window along with the jamb depth.
He cut all the jamb boards to length and then ripped them on the table saw to 7 1/8”.
Next, he glued and nailed all the jambs together to make a box.
There will be a 1 1/2” reveal the whole way around the window.
He marked all the corners a 1/4" in- this will help him know where to put the casing later.
He started by shimming up both bottom corners- making sure he had an 1 ½” reveal on both sides of the window.
Then he started nailing it off with a 15-gauge trim gun.
He shimmed the middle checking it with a level to make sure everything was straight.
Then he did the top and right left corners before shimming and nailing everything else off.
Finally, he cut the shims off with a multi-tool.
Next, He cut all the casing to length with a 45-degree angle on both ends.
He installed the bottom piece first, nailing the inside with a brad gun and the outside with a 16-gauge trim gun.
He glued the corners, installed both the right and left side, and finally put in the header piece.
This guy is super organized, and it was fun to watch him work.
If you like this type of content- be sure to like and subscribe. @hausplans
#build #howto #carpentry #construction #trim #windwo #diy #contractor
 0:14:44
Simple How To Trim Out A Window Craftsman Style Tutorial.
 0:07:48
Installing Interior Window Trim | Beginner
 0:01:00
How To Trim A Door
 0:15:14
How To Install Door Trim: Beginner to Level 10 Pro!
 0:12:03
How to trim out a pocket door.
 0:00:38
HOW TO TRIM A DOOR WITH UNEVEN DRYWALL LIKE A PRO
 0:06:04
How to trim out a pocket door!
 0:00:42
Door trim installation
 0:12:02
UMBRELLA FLARE SKIRT: HOW TO CUT 360° FLARE SKIRT/ CIRCLE SKIRT CUTTING AND STITCHING #circleskirt
 0:08:02
How To Install Door Trim Casing For Beginners! DIY Molding Install Made EASY!
 0:08:33
The Easiest Way to Install Window Casing and Trim
 0:00:42
Window Trim Install Made EASY
 0:12:15
How to Install Window Casing and Interior Trim
 0:19:07
Make your windows leak proof: How to Trim a Window
 0:00:13
TRIM A WINDOW WITH ME - install window trim and sill #diyhomedecor #homeimprovement
 0:02:03
How to Install Window Trim | Windows & Doors | The Home Depot
 0:05:52
How to Trim Out a Basement Window (DIY Drywall Return on a Basement Window - Finish Your Basement!)
 0:00:31
How often do you trim??? 👇🏾👇🏾👇🏾#naturalhair
 0:09:21
Cutting Miters for Window Trim
 0:00:46
How To Trim the Bottom of a Door
 0:05:29
How to Trim an Exterior Window | This Old House
 0:03:38
How to Make Easy DIY Trim
 0:00:32
Pocket door trim tips
 0:26:11
How to trim out a glass sliding door! [COMPLETE TUTORIAL ON CASE MOLDING INSTALLATION]
Комментарии