filmov
tv
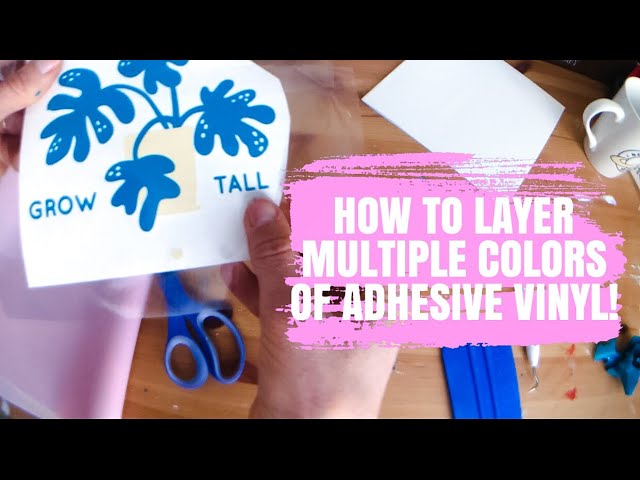
HOW TO LAYER TWO COLORS OF ADHESIVE VINYL | LAYERING ADHESIVE VINYL WITH YOUR CRICUT!
Показать описание
The Craft Scraps Social Media:
**Follow me on Instagram - @thecraft_scraps
Materials Used
1) Surface for your vinyl
2) Permanent Vinyl (651)
*please note I do get a small commission from affiliate codes*
Step by Step Instructions
1) Open Design Space
2) Make a new project/canvas
3) Insert your image or make a text box and arrange your text
4) Once you have the image/text how you want it, size the image appropriate for your sign size
5a) IF YOU ARE LAYERING:
1. Go to shapes and pick a shape for your marker (I did circle)
2. Place it below your image I did about 1 inch and make the marker small (about half inch)
3. Make one circle to match the color of your first color layer and the other circle to match the other color
4. Put the circles directly on top of each other
5. Ungroup the image layers by clicking ungroup
6. Hide one color layer by clicking the little eye next to the layer you want to hide in the layers column on the right
7. Select the circle marker and the matching color of the image layer and click attach
8. Unhide the hidden image and now hide the other color and repeat step 7
9. If you have more than two layers repeat steps 3-7 until all colors have an attached marker
10. Now your layers are ready to be cut
5) Once you have it sized how you want, click MAKE IT
6) Select your cut settings – for the 651, I used Vinyl
7) Put your vinyl onto the mat – I used the light grip blue mat
8) Once the film is on your mat, load the mat into your Cricut using the flashing arrow buttons
9) Once loaded, press the flashing Cricut button to cut!
10) Once your vinyl is cut, use your weeding tool to “weed out” or remove the excess around the letters you want to stick onto the glass – don’t forget the middles of the letters!
11)For layering, apply your transfer tape to the first or base layer, peel off.
12)Then take that transfer tape with the base layer and layer it on top of the other layer LINING UP THE MARKERS TO ENSURE LAYERS ARE AS CLOSE AS THEY CAN
13) Using the transfer tape as the carrier sheet, stick your vinyl onto your surface
14) Using your scraper, press and smooth out the vinyl (the tape is still on the vinyl at this point)
15) Peel off the transfer tape – your vinyl will be sticking to the glass
16) You’re done! Enjoy!
 0:04:09
HOW TO LAYER VINYL DECALS PERFECTLY and add registration marks in Cricut Design Space | EASY!
 0:01:07
The Easy Way to Layer a 2 Color Vinyl Decal | Quick 1 Minute Tutorial
 0:07:08
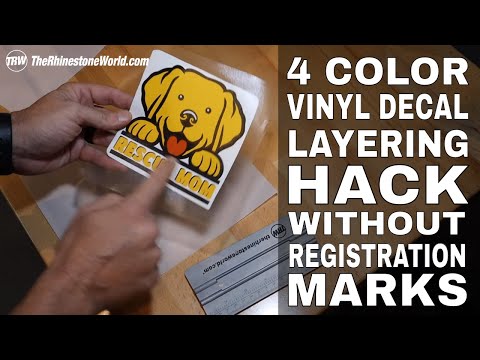
Vinyl Layering Hack | How to Layer a 4 Color Vinyl Decal without Registration Marks
 0:08:41
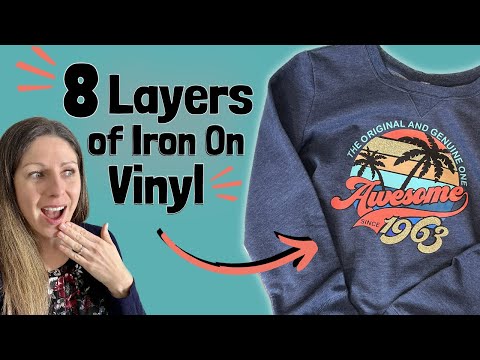
HOW TO LAYER IRON ON VINYL | Easy Step By Step Tutorial + Tips!
 0:18:59
🥰 How to Layer Heat Transfer Vinyl for Beginners
 0:03:48
HOW TO LAYER VINYL DECALS *EASY*
 0:06:44
Cricut for Beginners: How to Layer Vinyl from Start to Finish (And my trick to make it easier!)
 0:14:37
How to: Layer 2 Colors of Vinyl Without Registration Marks | Multicolor Layers of Vinyl
 0:27:21
Ghost Paper Cut Out - Infinite Painter Tutorial #44
 0:06:21
How to Layer 2 Color Vinyl without Registration Marks! The Easy Way!
 0:23:59
How to Layer Vinyl Decals on Cricut the EASY WAY!
 0:21:00
How to Layer Vinyl on a Shirt - Beginner Friendly!
 0:09:18
2 RIDICULOUSLY Easy Ways to Layer Vinyl (HTV) on a T-shirt
 0:15:38
How To Print Two Colors on the First Layer with a Single Extruder!
 0:17:06
HOW TO LAYER TWO COLORS OF ADHESIVE VINYL | LAYERING ADHESIVE VINYL WITH YOUR CRICUT!
 0:02:14
BamBu Lab Stuido Color by layer height
 0:05:35
How To Layer Heat Transfer Vinyl (The Easy Way)
 0:03:23
Two Layer Two Color Heat Transfer Vinyl | Heat Press | Thermoflex Plus HTV
 0:02:33
Two colors print on the same layer [TUTORIAL]
 0:22:04
HOW TO CREATE AN SVG | HOW TO CHANGE A SINGLE LAYER IMAGE TO MULTIPLE LAYERS IN CRICUT DESIGN SPACE
 0:24:48
Make & Layer Multi Colour Vinyl Decals for Beginners
 0:11:17
CRICUT FOR BEGINNERS: HOW TO LAYER GLITTER HTV | HTV LAYERING HACK
 0:25:47
How To Layer Heat Transfer Vinyl | Iron On Tips and Tricks with Cricut
 0:11:45
How To Easily Layer Two Color Vinyl Decals
Комментарии