filmov
tv
CA Server - OpenSSL

Показать описание
In this video, we show how to create a Certificate Authority Server using OpenSSL
A number of IT devices are managed through a web browser but these are supplied with a self-signed certificate
Aside from the annoying warning from the web browser that the certificate is not trusted, it's not a good security practice to use self-signed certificates
Instead, if you only use signed certificates from a certificate authority your web browser trusts, you are much more likely to spot a suspicious web site, whether private or public and avoid it
Once set up properly, the CA server can issue certificates to computers on your network and you can then connect to them securely through a web browser
We will be using an Ubuntu server for this installation but OpenSSL is available on other platforms
NOTE: In a large environment it is best to set up intermediary CA servers as well
However, given the lack of interest the likes of Google has in certificate revocation, we will only create a Root CA
Because if the intermediary server is compromised, it would be easier to replace the Root CA
NOTE: Google Chrome web browser insist on a Subject Alternate Name in the certificate, even if the server has only one name
Useful links:
=============================
SUPPORT THE CHANNEL
Donate through Paypal:
Donate through Buy Me A Coffee:
Become a monthly contributor on Patreon:
Become a monthly contributor on YouTube:
==============================
==============================
MEDIA LINKS:
==============================
Steps taken:
1) Create the Root CA VM
Create a VM to install Ubuntu server for instance
(1vCPU, 1GB RAM, 16GB HDD, 1vNIC)
During the install process, opt to encrypt the disk and to install OpenSSH
However, do not install any other applications when prompted
2) Basic configuration
After enabling UFW, create folders for the CA
mkdir -p ca/{private,certs,newcerts,csr}
chmod -v 700 ca/private
Create an index file and serial file for the CA
touch ca/index
openssl rand -hex 16 ca/serial
NOTE: Check the video as the last line is missing redirect symbol which the description box does not accept
3) Create the Root CA private key
cd ca
4) Create the CA config file
See comment
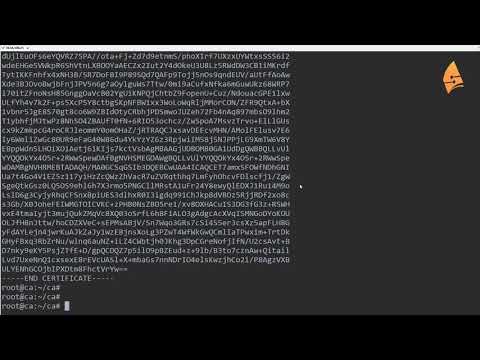
5) Create the root CA self-signed certificate
6) Create a server private key
7) Create a server CSR, using a config file
See comment
Check for the SAN
8) Sign the server certificate request
Check for the SAN
9) Configure web browser to trust the root CA
Firefox
Settings | Privacy & Security | View Certificates | Authorities | Import
Brave
Settings | Privacy & Security | Security | Manage certificates | Authorities | Import
10) Upload private key and certificate to the server, configure it to use these, then test on web browser
=====================================
Credits:
LoveLife | Instrumental Prod. Blue Mango | EQMUSEQ.COM by Don Da Vinci
openssl install,openssl install linux,openssl install ubuntu,openssl config file,ssl certificate,certificate authority,openssl ubuntu,openssl install ubuntu 20.04,openssl ubuntu 20.04,openssl ubuntu 20.04 install,ca server,certificate authority server,openssl ca server,openssl certificate authority server,how to create ca server,how to create certificate server,openssl,openssl installation
00:00 Intro
01:56 Timelines
02:30 Why create a CA?
08:09 How it works
13:20 Virtualization
16:00 Certificate revocation
24:08 Build VM
28:27 Initial set up
39:30 CA private key
49:34 Open SSL config file
59:28 CA certificate
01:11:40 Server private key
01:14:04 Server CSR
01:21:15 Sign CSR
01:30:34 Install Root certificate and test
CA Server - OpenSSL
A number of IT devices are managed through a web browser but these are supplied with a self-signed certificate
Aside from the annoying warning from the web browser that the certificate is not trusted, it's not a good security practice to use self-signed certificates
Instead, if you only use signed certificates from a certificate authority your web browser trusts, you are much more likely to spot a suspicious web site, whether private or public and avoid it
Once set up properly, the CA server can issue certificates to computers on your network and you can then connect to them securely through a web browser
We will be using an Ubuntu server for this installation but OpenSSL is available on other platforms
NOTE: In a large environment it is best to set up intermediary CA servers as well
However, given the lack of interest the likes of Google has in certificate revocation, we will only create a Root CA
Because if the intermediary server is compromised, it would be easier to replace the Root CA
NOTE: Google Chrome web browser insist on a Subject Alternate Name in the certificate, even if the server has only one name
Useful links:
=============================
SUPPORT THE CHANNEL
Donate through Paypal:
Donate through Buy Me A Coffee:
Become a monthly contributor on Patreon:
Become a monthly contributor on YouTube:
==============================
==============================
MEDIA LINKS:
==============================
Steps taken:
1) Create the Root CA VM
Create a VM to install Ubuntu server for instance
(1vCPU, 1GB RAM, 16GB HDD, 1vNIC)
During the install process, opt to encrypt the disk and to install OpenSSH
However, do not install any other applications when prompted
2) Basic configuration
After enabling UFW, create folders for the CA
mkdir -p ca/{private,certs,newcerts,csr}
chmod -v 700 ca/private
Create an index file and serial file for the CA
touch ca/index
openssl rand -hex 16 ca/serial
NOTE: Check the video as the last line is missing redirect symbol which the description box does not accept
3) Create the Root CA private key
cd ca
4) Create the CA config file
See comment
5) Create the root CA self-signed certificate
6) Create a server private key
7) Create a server CSR, using a config file
See comment
Check for the SAN
8) Sign the server certificate request
Check for the SAN
9) Configure web browser to trust the root CA
Firefox
Settings | Privacy & Security | View Certificates | Authorities | Import
Brave
Settings | Privacy & Security | Security | Manage certificates | Authorities | Import
10) Upload private key and certificate to the server, configure it to use these, then test on web browser
=====================================
Credits:
LoveLife | Instrumental Prod. Blue Mango | EQMUSEQ.COM by Don Da Vinci
openssl install,openssl install linux,openssl install ubuntu,openssl config file,ssl certificate,certificate authority,openssl ubuntu,openssl install ubuntu 20.04,openssl ubuntu 20.04,openssl ubuntu 20.04 install,ca server,certificate authority server,openssl ca server,openssl certificate authority server,how to create ca server,how to create certificate server,openssl,openssl installation
00:00 Intro
01:56 Timelines
02:30 Why create a CA?
08:09 How it works
13:20 Virtualization
16:00 Certificate revocation
24:08 Build VM
28:27 Initial set up
39:30 CA private key
49:34 Open SSL config file
59:28 CA certificate
01:11:40 Server private key
01:14:04 Server CSR
01:21:15 Sign CSR
01:30:34 Install Root certificate and test
CA Server - OpenSSL
 1:41:20
CA Server - OpenSSL
 0:16:07
OpenSSL Certification Authority (CA) on Ubuntu Server
 0:25:01
How to create a valid self signed SSL Certificate?
 0:05:34
Create Your Own SSL Certificate Authority (on Linux)
 0:14:47
How to create self signed SSL certificate using OpenSSL
 0:06:00
3. OpenSSL - CA certificates
 0:11:04
OpenSSL Step By Step Tutorial | How to Generate Keys, Certificates & CSR Using OpenSSL
 0:05:40
Key Players of SSL & TLS: Client, Server, Certificate Authority (CA) - Practical TLS
 0:11:52
How to create self signed SSL certificate using OpenSSL
 0:16:23
Certificates and Certificate Authority Explained
 0:22:15
Create and sign certs with OpenSSL
 0:30:57
openSSL CA Server
 0:13:23
Create & sign SSL/TLS certificates with openssl
 0:21:50
Certificates from Scratch - X.509 Certificates explained
 0:07:09
Create Your Own SSL Certificate Authority (Windows)
 0:36:32
OpenSSL basics: Generating a certificate and installing full chain on a Apache web server
 0:09:06
Creating valid CA, Server, and Client Certificates Using OpenSSL
 0:12:52
SSL Chain of Trust | How SSL Chain Works | Root Cert, Intermediate Certificate, Server Certificate
 0:14:12
Server Certificates - Self Signed and LetsEncrypt Certificates for the LAN
 0:26:25
Self-Hosted TRUST with your own Certificate Authority!
 0:22:08
Vertrauenswürdige SSL Zertifikate selbst erstellen! Einfache Schritt-für-Schritt Anleitung
 0:12:08
Quick and Easy Local SSL Certificates for Your Homelab!
 0:07:12
How to generate Server Certificate/Server.crt/Server.key
 0:05:34
OpenSSL How To Renew A Certificate
Комментарии