filmov
tv
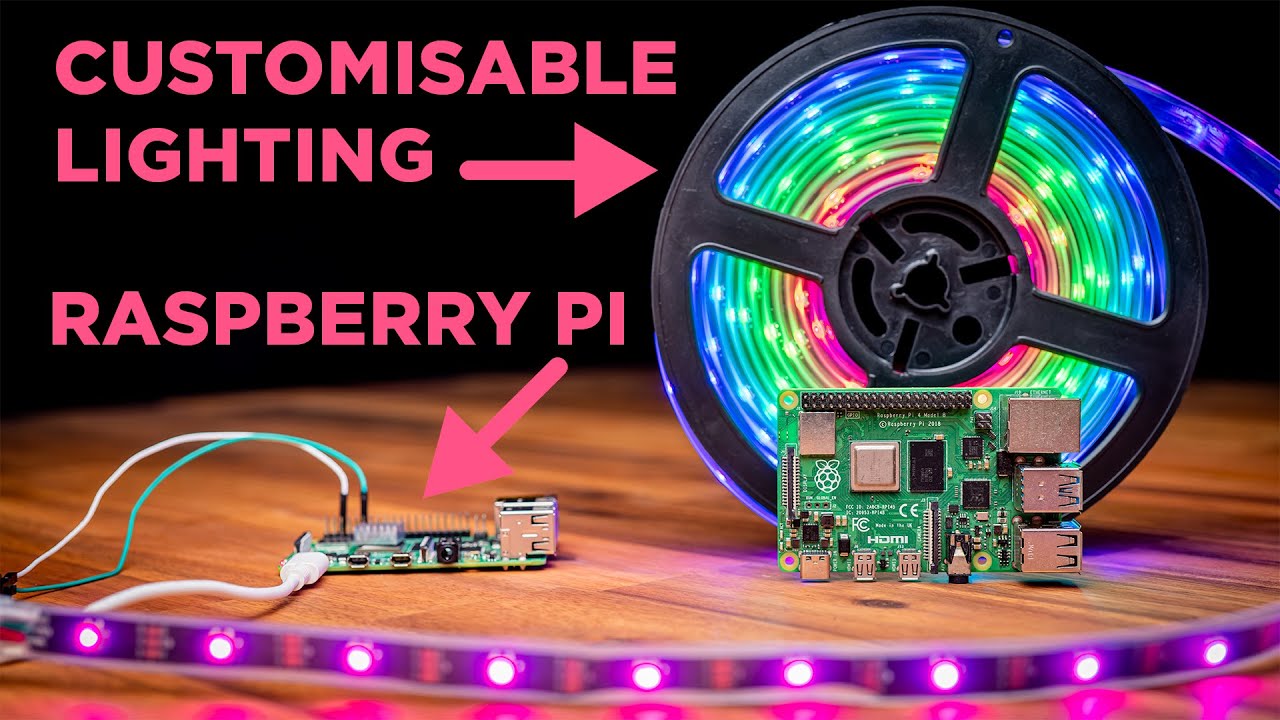
How To Use Addressable RGB WS2812B LED Strips With a Raspberry Pi Single Board Computer
Показать описание
We are getting our Blinkies Popping Off Today ✨! Our latest UPDATED guide will demonstrate the fastest and most customizable way to have WS2812B LEDs controlled by your Raspberry Pi. Learn the simplest way to drive a small LED strip, multiple LED strips, and how to externally power a very long strip (150 Nodes).
Related Information
The name WS2812B Strip usually refers to a long length of flexible PCB with many specific RGB LED Nodes evenly spaced and dotted along the top side of the PCB. Furthermore, WS2812B strips are fully addressable. This means each RGB LED node can display a different colour and intensity than its neighbours. WS2812B strips will do everything that non-addressable RGB strips do. In almost all regards WS2812B Strips are better as they allow for more creative LED light shows. Fancier animation/striping/chasing effects become possible when you can decide exactly what each LED Node will do. WS2812B can be referred to as NeoPixels or GlowBit LEDs. For the above reasons, WS2812B Strips are the best LEDs to choose in this form factor.
WS2812B stands for | World Semi | which is the name of the OEM (Original Equipment Manufacturer), followed by the name of the IC chip | 2812 |, followed by | B | indicating it is the 2nd big revision of this design. The IC Chips are built into each LED Node. Whether your WS2812B LED Nodes are connected on a rigid PCB or a flexible long strip the control system built in this guide can accommodate both. If you have never used a Raspberry Pi before, we have got you covered with our free, online Raspberry Pi for Beginners Workshop.
No Logic Level Converter or Diode Faff Required!
Core Electronics is located in the heart of Newcastle, Australia. We're powered by makers, for makers. Drop by if you are looking for:
0:00 Intro
0:22 What WS2812B Are
0:52 Hardware You Need
2:00 Assembly for One LED Strip
3:40 Software Set Up
4:50 Success! One Bright LED Strip!
5:37 Script 1 Exploration
7:30 Assembly for Multiple LED Strips
8:08 Success 2! Two Bright LED Strips!
8:37 Script 2 Exploration
9:21 Assembly for Long LED Strip
11:40 Success 3! A Long LED Strip
12:18 Where To Now
12:57 Outro
 0:08:39
PC RGB & Addressable RGB Explained
 0:12:26
BEGINNERS Guide to Individually Addressable RGB LED Programming with Arduino
 0:13:33
How To Use Addressable RGB WS2812B LED Strips With a Raspberry Pi Single Board Computer
 0:00:34
TM1814 RGBW Pixel Addressable Digital LED Strips Engineering Project
 0:13:33
2024 - How to Set Up And Control Addressable LEDs - The ULTIMATE Beginners Guide!
 0:06:20
Connection Guide on RGB and Addressable RGB LED
 0:07:37
Use Addressable LED Strip with Arduino || Essential Engineering
 0:13:22
How To Install a Fan Hub + How To Install an Addressable RGB Hub
 0:01:42
Antec Shift ARGB Vertical GPU Bracket Launched - Explained All Spec, Features And More
 0:05:51
What Is Addressable RGB?
 0:09:31
How To Control WS2812B Individually Addressable LEDs using Arduino
 0:11:14
Individually Addressable LED Strips for Beginners
 0:00:33
Pixel Dust on RGB Matrix displays
 0:04:05
What are 'Addressable' RGB LEDs?
 0:01:00
how does addressable rgb work?
 0:03:27
How to use SP107E to connect DC12V Individual Addressable WS2815 LED strips
 0:00:27
DIY Pixel Light Addressable 5050 RGB Circle 5V WS2812B LED Ring
 0:02:03
How to build your own LED display from addressable rgb LED strips
 0:07:55
How to Easily Control Addressable LEDs with an ESP32 or ESP8266 | WLED Project
 0:19:00
Razer Chroma RGB HUB Install and Review (BEST Addressable RGB Hub)
 0:08:55
How to Use Addressable RGB LED NeoPixels (WS2812B, WS2811, SK6812, etc) on Raspberry Pi Computer
 0:08:47
Cheap Way To Add Addressable RGB Strips To A PC
 0:05:52
How to use WS2812B RGB LEDs with Arduino
 0:01:14
Individually Addressable RGB LED Strip for PC, 5V WS2812B Digital Led
Комментарии