filmov
tv
Analog Feedback Servo Motor - Improved Servo Performance

Показать описание
Today we are going to explore the use of a special type of servo motor - an Analog Feedback Servo Motor.
We have used servo motors in many of our projects and tutorials, and for many good reasons. When you need a method of precisely positioning something a servo motor is an expensive and effective solution.
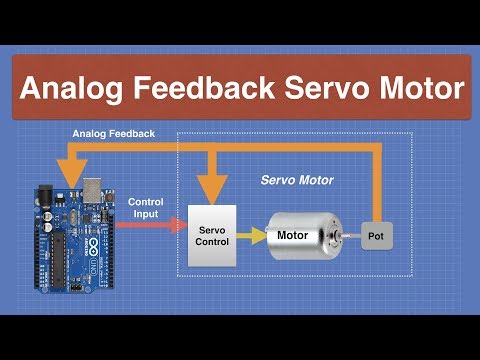
The small analog servo motors we have used before have three leads - power, ground, and a control signal. The latter is a connection that accepts a PWM signal and uses it to position the motor shaft to a specific position. And, in most cases, this works great.
But sometimes we need to know the exact position of the motor shaft, which may or may not correspond to the position we asked it to move to. External forces can move the shaft into another position, or the shaft may still be moving into position.
The Analog Feedback Servo Motor is a solution to this problem. This is essentially a standard servo motor that has a connection brought out from its internal feedback potentiometer. The feedback connection allows you to monitor the shaft position in “real-time”, so you always know exactly where it is.
An interesting benefit of this type of servo motor is that it can also be used as an input device. This is great for projects like a robot arm, where you can manually guide the arm through some specific movements and then play them back. Essentially this is a servo system that can memorize and repeat its movements.
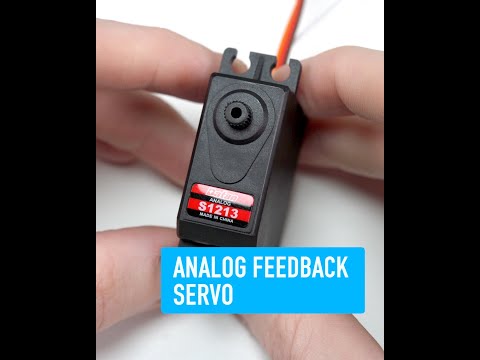
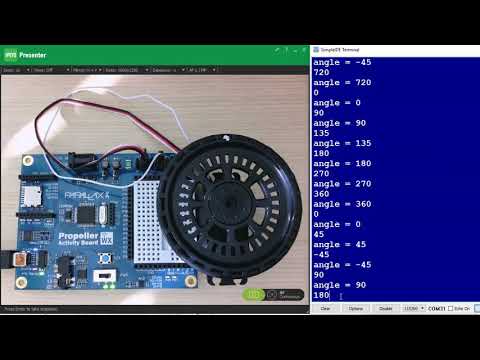
I’ll be working with the S1213 Analog Feedback Servo Motor today. I’ll show you how to calibrate it, and I’ll also run a net sketch from Adafruit that can memorize servo movements and play them back.
Here is what we will cover today:
00:00 - Introduction
04:03 - Analog Feedback Servo Motor
07:54 - Calibrating the Servo Motor
13:44 - Servo Memory Sketch
You can actually modify a standard servo motor to become an analog feedback servo motor, but it’s a lot easier just to buy one - they are not that much more expensive than a regular servo.
Hopefully, this video and the accompanying article will give you some inspiration to start using this unique component in your own designs. If you want to chat about this jump onto the DroneBot Workshop forums and let us know what you think!
We have used servo motors in many of our projects and tutorials, and for many good reasons. When you need a method of precisely positioning something a servo motor is an expensive and effective solution.
The small analog servo motors we have used before have three leads - power, ground, and a control signal. The latter is a connection that accepts a PWM signal and uses it to position the motor shaft to a specific position. And, in most cases, this works great.
But sometimes we need to know the exact position of the motor shaft, which may or may not correspond to the position we asked it to move to. External forces can move the shaft into another position, or the shaft may still be moving into position.
The Analog Feedback Servo Motor is a solution to this problem. This is essentially a standard servo motor that has a connection brought out from its internal feedback potentiometer. The feedback connection allows you to monitor the shaft position in “real-time”, so you always know exactly where it is.
An interesting benefit of this type of servo motor is that it can also be used as an input device. This is great for projects like a robot arm, where you can manually guide the arm through some specific movements and then play them back. Essentially this is a servo system that can memorize and repeat its movements.
I’ll be working with the S1213 Analog Feedback Servo Motor today. I’ll show you how to calibrate it, and I’ll also run a net sketch from Adafruit that can memorize servo movements and play them back.
Here is what we will cover today:
00:00 - Introduction
04:03 - Analog Feedback Servo Motor
07:54 - Calibrating the Servo Motor
13:44 - Servo Memory Sketch
You can actually modify a standard servo motor to become an analog feedback servo motor, but it’s a lot easier just to buy one - they are not that much more expensive than a regular servo.
Hopefully, this video and the accompanying article will give you some inspiration to start using this unique component in your own designs. If you want to chat about this jump onto the DroneBot Workshop forums and let us know what you think!
 0:00:17
Adafruit Analog Feedback Servo
 0:23:15
Analog Feedback Servo Motor - Improved Servo Performance
 0:02:33
Ready to use Micro Servo with Analog Feedback
 0:00:58
Analog Feedback Servo - Collin’s Lab Notes #adafruit #collinslabnotes
 0:10:14
Adding analog feedback tap to Micro Servos
 0:13:34
Making Analog Feedback Servos
 0:01:19
Hack 9g servo to get analog feedback.
 0:02:53
Demo of test automation system: Servo motor control with analog feedback
 0:00:37
Torque feedback on analog servo
 0:01:39
Analogue Feedback from an MG996 Digital Servo
 0:08:02
Demo of Interactive test system: Servo motor control with analog feedback
 0:00:38
What The Differences Between Stepper Motors And Servo Motors
 0:01:33
analog servo feedback record and playback
 0:04:39
Senior 20 Conductor Installation (11) Servo Feedback Modification
 0:16:58
Modifying servos to read their position
 0:00:35
Position Controlled Brushed DC Motor, Closed Loop Servo Analog Feedback
 0:01:59
Adding force (position) feedback to servo motors
 0:01:49
How to control DSS-M15S servos with Analog Feedback - DFROBOT
 0:00:17
FB2308M 0-360 rotation with analog feedback Military UAV Robot servo 12V 7kg Waterproof steel gear
 0:02:10
Electronics: TowerPro SG90 servo motor: adding analog feedback
 0:06:15
Miuzei Servo Review - WARNING! Don't Buy Servos Before Watching This - The Best Cheap Servo
 0:00:19
Force Feedback Servo
 0:00:42
Servo Torque/Voltage Feedback using Arduino
 0:00:38
Parallax Feedback 360 Servo Position
Комментарии