filmov
tv
Installing All Plumbing for a Full Bath

Показать описание
Follow me for more:
TikTok: Kordare
Instagram: @kordare_
 0:21:01
Installing All Plumbing for a Full Bath
 0:06:18
How To Plumb a Bathroom (with free plumbing diagrams)
 0:07:06
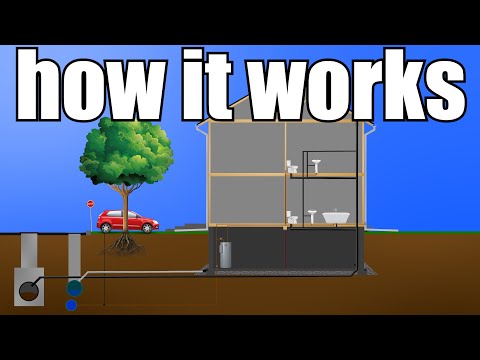
How Your Home Plumbing Works (From Start to Finish) | GOT2LEARN
 0:04:20
Plumbing a bathroom explained in 4 minutes. [You CAN do it!] #diy #plumbing
 0:28:30
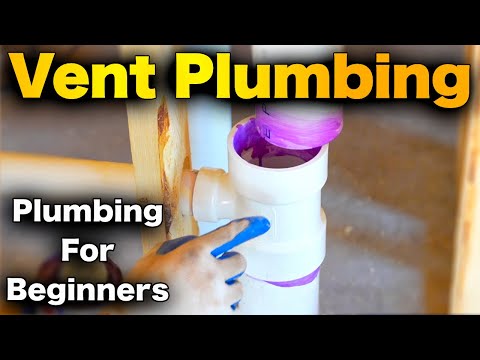
How To Vent Plumbing Pipe - Toilet, Bathroom Sink, and more!
 0:21:52
How To Install Double Bowl Bathroom Sink Vanity - ALL PLUMBING CONNECTIONS
 0:06:33
Plumbing Materials Name and Pictures || Plumbing Fittings Name || Plumbing Work | Plumbing Fixtures
 0:03:36
Plumbing Materials Name and Pictures || Plumbing Fittings Name || Plumbing Work |
 0:01:13
The LUXE Bidet NEO 120 is Easy to Install and Affordable!
 0:17:48
How To Install A Bathroom Sink - ALL PLUMBING CONNECTIONS! Drain, Faucet, P-Trap, and Vanity
 0:33:38
Plumbing Pipe and Fittings, DWV
 0:28:01
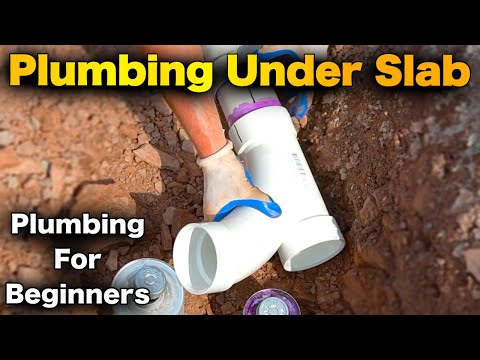
How To Rough In Plumbing Under Slab For A Bathroom - FOR BEGINNERS!
 0:10:08
Plumbing Slope Rule and Why it is CRITICAL
 0:07:36
10 Reasons Why You'd FAIL a Plumbing Inspection! | GOT2LEARN
 0:07:16
POOL ANATOMY and PLUMBING For Beginners (Step-By-Step Walkthrough) | Swim University
 0:18:56
A lesson about basic PEX plumbing materials - Intro to Plumbing Systems
 0:00:46
MAJOR PROBLEM! Toilet installation SOLVED… #diy #plumbing #plumber
 0:08:08
Efficient Plumbing Works in Ghana: Installing Water Supply Lines with PPR Pipes | Feco Plumbing
 0:00:30
Got Pex? Uponor Expansion PEXa #shorts #plumbing #trades #laundry
 0:11:45
What's the BEST Plumbing System
 0:30:35
Plumbing a bathroom
 0:01:00
The ONLY way to install a FREESTANDING tub #plumbing #bathtub #bathroom
 0:00:49
Plumbing 101 for apprentices
 0:00:49
Toilet Fill Valve Replacement DIY Tutorial! #diy #toilet #plumber #plumbing #repair #bathroom
Комментарии