filmov
tv
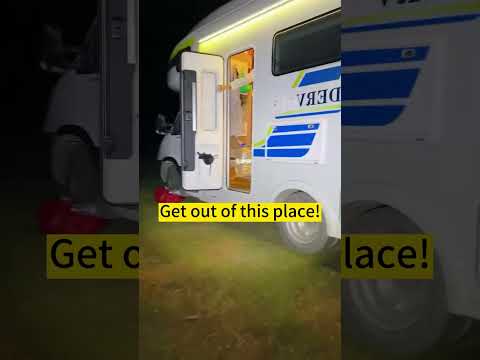
STOP Wasting Money on RV AC Installations!

Показать описание
Upgrade your #RV , #Camper , or #Motorhome with this detailed step-by-step guide to installing a TOSOT GO Cool rooftop air conditioner featuring 15K BTUs and a built-in heat pump. Ideal for DIYers looking to improve their coach's cooling and heating system
In this video, we show you how to install a Non-Ducted RV Air Conditioner with a 15,000 BTU capacity and heat pump in our Sunseeker motorhome. This easy-to-follow guide walks you through the entire process, from removing the old unit to getting the new one running perfectly.
We’ll start by safely disconnecting the old air conditioner, sealing the ceiling opening with aluminum foil duct tape to prevent air leaks and moisture damage. Then, we’ll show you how to position and install the sponge chassis gasket for a snug fit. You’ll learn how to mount the **upper duct plate**, attach the fabric duct, and install the ceiling frame securely.
Our step-by-step wiring instructions ensure your unit is connected properly, and we’ll finish by trimming excess material and attaching the sleek new AC cover. Whether you’re a seasoned RV enthusiast or tackling your first DIY upgrade, this guide is packed with tips to make the job easier.
Don’t forget to like, subscribe, and share our channel for more RV tips, tricks, and DIY projects. Check the description for recommended tools and materials to get started on your own RV upgrade today!
Affiliate links:
Chapters:
0:00 Intro
0:30 Old Unit
0:53 Fix Opening
1:05 Sealing
1:26 Duct Install
2:03 Frame Install
2:50 Wiring
3:45 Cover Install
 0:12:27
RV GEAR YOU DON'T NEED! Stop Wasting Your Time and Money
 0:04:10
STOP Wasting Money on RV AC Installations!
 0:01:12
Stop Wasting Money On RV Locks! Buy This Instead!#fulltimerv #rvliving
 0:00:31
STOP Wasting Money on the WRONG RV Parking Pad!
 0:14:51
7 Things We Wish We Knew BEFORE Starting RV Life FULL-TIME (1 month on the road)
 0:11:02
The RV Battery Has Evolved: Stop Wasting Money on Battle Born Lithium
 0:13:20
STOP WASTING YOUR MONEY AT RV DEALERSHIPS!
 0:05:18
DIY RV Anode Rod Replacement: STOP Wasting Money!
 0:02:50
Best Shampoos for Hair Fall, Dandruff & Hair Growth (India) | Havy Shampoo Products | Best Shamp...
 0:17:06
THIS is How to Avoid RV Junk Fees & Scam Tactics!!
 0:38:07
Spending $51,964,152 on a MAX LEVEL RV BUS in Roblox!
 0:13:39
Don’t Waste Your Money! RV Gear We’ll NEVER Buy Again
 0:00:14
STOP WASTING MONEY!
 0:00:29
The dangerous RV camping life, you will be afraid?
 0:24:11
RV Toilet Paper LIES! Expert Advice on Tank Care | Stop Wasting Money on Tank Treatments
 0:06:01
Is an RV or Travel Trailer a waste of money?
 0:17:09
Anderson Blocks and RV SnapPads Are A Waste Of Money! | Do This Instead! | Fulltime RV Living!
 0:00:42
Stop wasting money on expensive lodging and regain your travel autonomy with vehicle camping! 🌲
 0:00:23
Stop wasting time and money on that old RV you don’t want anymore!
 0:24:20
WATCH THIS Before Buying Your 1st RV!!
 0:09:44
5 REASONS TO NOT BUY AN RV OR TRAVEL TRAILER - Why we sold our Jayco JayFlight SLX 174BH Baja
 0:10:57
You're Wasting Time Leveling Your RV - Do This Instead
 0:00:18
Camper Van on a Budget #vanlife
 0:21:59
STOP! Wasting Your Money On This! Fulltime RV Living!
Комментарии