filmov
tv
How To Create an Event on Facebook

Показать описание
-
-
Step 1: Go to your Events page in Facebook
Log on to Facebook. Access your Events from your homepage, or search for events using the search function.
Step 2: Choose to Create an Event
Click on the icon that allows you to create an event.
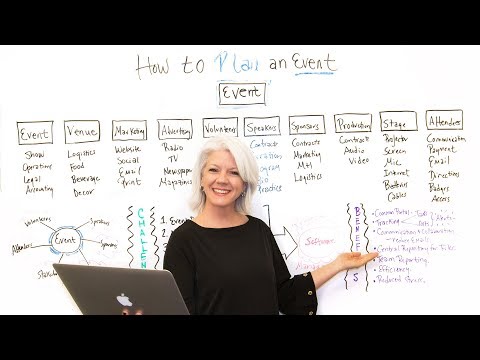
Step 3: Create a name for your event; enter basic information
Create a name for your event. Add your location information, the start and end times, and any other invitation text you'd like to include.
Tip
If you list a complete street address, invitees will be able to view a map and directions to the event’s location by clicking "View Map" below the event’s location.
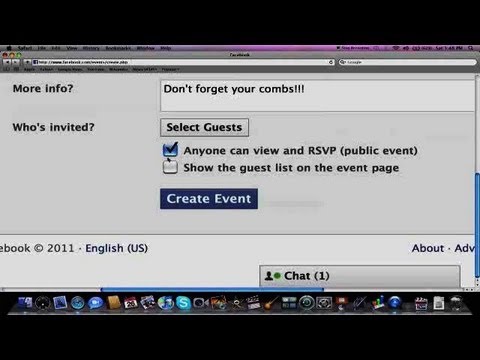
Step 4: Select a privacy setting
Select the privacy setting. Decide whether you want the event to be public, which means that anyone can see your event and RSVP. Then, choose whether the guest list will be visible on the event page.
Tip
If your event is public, you can still block people from seeing the invitation by selecting the "Block People" link from the guest list, entering the person's name, and blocking their profile.
Step 5: Add a photo and description to your event information
Select guests, and add an image to the event page. Then save the event.
Step 6: Invite friends to the event
Add invitees after you've created the event by choosing "Select Guests," or by editing the event.
Step 7: Add admins
As the creator of the event, you can add admins that can invite additional guests, appoint other admins, and edit the event invitation. To add an admin, edit your guest list, choose a guest who has already RSVPed yes, and press the Make Admin button.
Did You Know?
Facebook was started by 4 friends in a Harvard dorm room in February 2004. By December of that year, it had nearly 1 million active users.
-
Step 1: Go to your Events page in Facebook
Log on to Facebook. Access your Events from your homepage, or search for events using the search function.
Step 2: Choose to Create an Event
Click on the icon that allows you to create an event.
Step 3: Create a name for your event; enter basic information
Create a name for your event. Add your location information, the start and end times, and any other invitation text you'd like to include.
Tip
If you list a complete street address, invitees will be able to view a map and directions to the event’s location by clicking "View Map" below the event’s location.
Step 4: Select a privacy setting
Select the privacy setting. Decide whether you want the event to be public, which means that anyone can see your event and RSVP. Then, choose whether the guest list will be visible on the event page.
Tip
If your event is public, you can still block people from seeing the invitation by selecting the "Block People" link from the guest list, entering the person's name, and blocking their profile.
Step 5: Add a photo and description to your event information
Select guests, and add an image to the event page. Then save the event.
Step 6: Invite friends to the event
Add invitees after you've created the event by choosing "Select Guests," or by editing the event.
Step 7: Add admins
As the creator of the event, you can add admins that can invite additional guests, appoint other admins, and edit the event invitation. To add an admin, edit your guest list, choose a guest who has already RSVPed yes, and press the Make Admin button.
Did You Know?
Facebook was started by 4 friends in a Harvard dorm room in February 2004. By December of that year, it had nearly 1 million active users.
 0:07:28
Creating Memorable Event Experiences | Event Marketing Ideas
 0:06:16
How to Plan an Event - Project Management Training
 0:02:05
How to Create an Event on Facebook | Create Page Events 2024
 0:05:02
How To Create An Event On Facebook 2024 | Host/Organize Events On FB App
 0:03:01
How to create a live event on tiktok in pakistan | live streaming on tiktok | MP Technical
 0:02:33
How To Create A Facebook Page Event? [in 2024]
 0:01:34
create an event tiktok || how to register live event on tiktok
 0:13:48
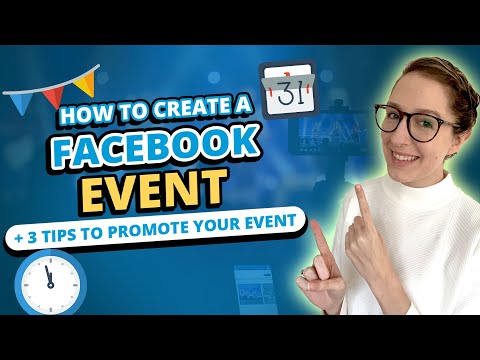
How to Create Facebook Events + 3 Tips to Promote Your Event
 0:01:00
DIY last minute birthday card making 🎂#celebration #event #party #cards #colors #asmr #mini #vlogs...
 0:02:01
How to Create an Event Planning Checklist
 0:01:23
HOW TO CREATE AN EVENT ON FACEBOOK MOBILE
 0:02:09
how to create live event on tiktok 2023 || tiktok live event create
 0:10:14
How To Get Over 2,000 People At Your Local Event | Event Promotion With David Shands
 0:00:22
Create an event in Google Calendar
 0:07:16
How To Plan An Event Successfully | Tips To Nail Your First Event
 0:03:42
How to create an event on Instagram app
 0:00:31
How to create a repeat event every two weeks in Google Calendar
 0:00:31
Create an event in Google Calendar
 0:01:32
How to Create An Event on Facebook (2023)
 0:03:05
How To Create An Event Budget
 0:00:47
How to Create an Event
 0:03:01
How to create an event on facebook
 0:02:39
How to create an event on Facebook
 0:01:56
How To Create an Event on Facebook
Комментарии