filmov
tv
Installing Oracle WebLogic Server | Oracle WebLogic Certification Training | WebLogic Admin | Uplatz

Показать описание
To enrol into the complete Oracle WebLogic Server course, simply go to the above link or contact us at:
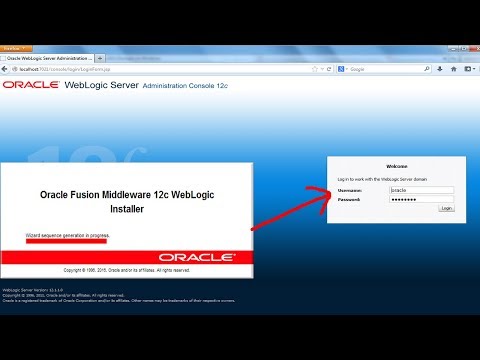
Installing Oracle WebLogic Server involves several steps to set up the necessary software and configurations.
Here's a general guide to installing Oracle WebLogic Server:
1. Download the Installation Files: Visit the Oracle Technology Network (OTN) website or Oracle Software Delivery Cloud to download the Oracle WebLogic Server installation files. Ensure you download the version and edition appropriate for your operating system.
2. Prerequisites and System Requirements: Check the system requirements and prerequisites for Oracle WebLogic Server on the Oracle documentation or the official Oracle website. Ensure that your system meets all the requirements before proceeding with the installation.
4. Choose Installation Type: During the installation process, you'll be prompted to choose the installation type. Select "Typical" for a standard installation that includes the necessary components for running WebLogic Server. Alternatively, you can choose "Custom" to select specific components based on your requirements.
5. Provide Installation Directory: Specify the installation directory where Oracle WebLogic Server will be installed. Choose a location with sufficient disk space.
6. Choose JDK: Oracle WebLogic Server requires a compatible Java Development Kit (JDK). You can either select an existing JDK on your system or let the installer install a supported JDK for you.
7. Configure Middleware Home Directory: Specify the Middleware Home directory, which will be the parent directory for the WebLogic Server installation.
8. Create WebLogic Domain (Optional): During the installation, you may have the option to create a WebLogic domain. A domain is a logical group of WebLogic Server instances and the applications they host. You can create the domain during the installation or create it separately later.
9. Complete the Installation: Review the installation settings and click on the "Install" or "Finish" button to initiate the installation process. The installer will copy the necessary files and configure WebLogic Server based on your selections.
10. Verify the Installation: Once the installation is complete, verify that Oracle WebLogic Server is installed successfully. You can check the installation directories and confirm that the server files are in place.
After the installation, you can start and stop WebLogic Server using the scripts provided in the installation directory or by using the WebLogic Server Administration Console. Be sure to consult the Oracle WebLogic Server documentation for detailed instructions and post-installation configurations.
---------------------------------------------------------------------------------------------
Uplatz is a global leader in Consulting, Training, Resourcing, Marketing, AI & ML, Cloud, Data, and Analytics.
Uplatz is well known for providing instructor-led training and video-based courses on SAP, Oracle, Salesforce, ServiceNow, Cloud Computing, AWS, Azure, GCP, Big Data, Data Science, Machine Learning, Programming Languages, Python, R, Java, SQL, SAS, Data Engineering, Data Analytics, Google, Microsoft, IBM technologies, Web Development, Software Testing, RPA, Finance, Digital Marketing, and more.
Browse all video courses here:
Contact us:
+44 7459302492
----------------------------------------------------------------------------------------------------------
#oracleweblogic #oracle #webserver
 0:08:28
How To Install Oracle WebLogic Server On Windows (Step By Step)
 0:03:57
Download, Install, and Setup the Oracle WebLogic Server in Windows | Oracle WebLogic
 0:33:14
Oracle WebLogic Server 14c Installation from Generic Installer on Windows using JDK 11.0.6
 0:31:19
weblogic server 12 2 1 1 installation on oracle linux
 0:26:31
Install and Configure Oracle Weblogic Server on Windows.
 0:45:00
Installing Oracle WebLogic Server | Oracle WebLogic Certification Training | WebLogic Admin | Uplatz
 0:13:46
Oracle Weblogic Server (Basics) Series - 1 : Installation of Weblogic Server 12.2.1.4.0 (Post 1)
 0:14:30
Oracle WebLogic Server 14c (14.1.1.0) Complete Installation with Examples - wl_server domain
 9:01:00
Master Microservices with Java, Spring & Docker- Full Guide 2024 | Cloud, Kubernetes & APIs ...
 0:10:23
WebLogic Server 12c - Install Oracle WebLogic Server 12c on Windows 10,11 @P-2
 0:21:32
How to install Oracle Weblogic Server 14c [14.1.1] on Oracle Linux 8 [oracle Linux 8.4]
 0:15:15
Oracle Weblogic Server 12c install and configure on windows server and Forms and Reports
 0:11:46
Oracle Weblogic Server 12.2.1.3 Installation from Dev Zip Archive Windows 10 using Oracle JDK 8
 1:04:21
Installing Oracle WebLogic 12C Server
 0:28:10
Administering Oracle Weblogic Server 12c: 1 Installing Weblogic software
 0:22:56
How to Install Oracle Weblogic Server in Linux | Weblogic 14c installation in Linux with GUI
 0:08:38
WebLogic server 12c installation | Requirements || Types of Installers
 0:09:37
Oracle Weblogic Server 12.1.3 Intallation from Dev Zip Archive on Windows 10 using Oracle JDK 7
 0:35:19
How to Install Oracle WebLogic Server 14c on Windows Server 2016
 0:09:09
How to install and configure WebLogic server 14 c | How to create WebLogic domain
 0:16:13
Oracle WebLogic Server 14c Installation from Generic installer on windows10 by using JDK 11
 0:04:05
Installing WebLogic
 0:03:40
Installing Oracle WebLogic Server 12.1.1 | WikiConsole.com
 0:06:18
Installation of Oracle Weblogic Server 11G on Windows Server 64 BIT
Комментарии