filmov
tv
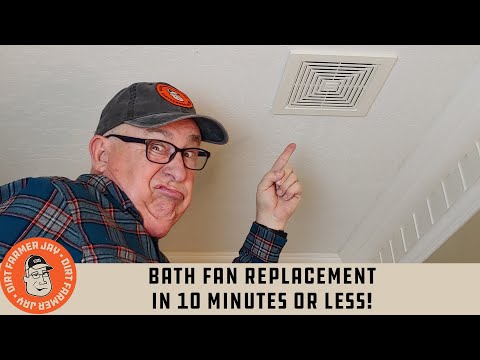
Bath Fan Replacement in 10 Minutes or Less!

Показать описание
When the bathroom ventilation fan gets too noisy or stops working, you can replace it yourself in just a few minutes!
#bathfanreplacement #repairbathroomfan #bathroomventilation
If you live in your house for over 15 years or have bought a home that is over fifteen years old and still has the original bathroom ventilation fans, the time is coming when you’ll need to service or replace the bathroom vent fan.
When I was on home construction crews, these fans were called “stink fans” (or the less genteel “fart fans”). The reason is pretty obvious, but an incomplete description of the important work this fan accomplishes. Not only does it whisk away undesirable (that’s an understatement!) odors, but this device also removes moist air that occurs with showering and bathing, as well as steam coming from the sink when hot water is used. Unabated steam leads to condensation on the room’s surfaces, which can lead to in-wall moisture that can easily encourage mold and mildew. Not good.
As an aside, when running, the ventilation fan can also create “negative pressure” in a smaller bathroom, assuring that both humidity and offensive odors are not forced into the adjacent living areas.
If you think that lubricating the motor bearings is all that is in order, here’s a video from another “YouTuber” that can help you do that.
However, there will come a time when the unit has to be replaced. If the unit is 25 years or older, the housing may no longer be a standard size and both the housing and the fan will need to be replaced. Replacing an older fan is not the subject of this video. This is a more complex process many times simply because the parts in older units weren’t designed to be modular, allowing you to “swap out” components like newer models do.
Because of this, taking out a very old bath fan and putting in a new one is an extensive process, requiring access from the attic in most cases. If the old fan wasn’t properly vented to the outside of the home (not just into the attic - a real “no-no”), then that needs to be installed as well.
These units are rated in CFM (cubic foot per minute). The basic minimum ratio is that you need one CFM per square foot of floor space. The dimensions of our demonstration restroom are 5’ x 9’ = 45 sq. ft. So, a 45 CFM fan would be the minimum. The contractor installed a 50 cfm unit, so they were in specification.
If you need to remove the old housing and place a new setup, the new unit will have instructions and diagrams to accomplish this. As an example, here is a link to the installation guide for NuTone®’s 80 CFM HB80RL ventilation fan with integrated light.
However, in THIS episode, we will feature the NuTone® 696N Ventilation Fan. This is one of the most common bath fans and has been in use for many years. This allows you to leave the housing, vent outlet, and electrical connection all intact, and simply “swap out” the motor/fan module - literally in minutes.
The basic steps are:
Remove the cover to the ventilator fan unit and set aside.
Unplug the fan motor from the plug.
Locate the mounting tabs of the motor/fan assembly.
Locate the inscribed directions in the unit telling you where to lift the component and where to push the housing side out to allow the motor/fan assembly to swing down from one side.
Remove the motor/fan assembly from the housing by swinging out the unit and having the component tabs release from the housing.
Clean the inside of the housing, and assure the damper is working properly on the duct outlet.
If servicing and not replacing the motor/fan assembly, then clean the unit, and lubricate the bearings with light oil. Don’t use WD-40® as it possesses only mild lubricating properties. Re-install the fan/motor assembly, plug it in, and replace the cover.
install the new assembly utilizing the mounting tabs. Assure that the tabs are securely attached! Plug the new unit into the outlet, and clean and replace the cover using the spring mounting clips.
To do this, you’ll need only basic tools and the skills you’ll learn from DirtFarmerJay as he demonstrates how to easily accomplish this home maintenance project. And, you didn’t need to hire someone to do it. You know you can JUST DO IT YOURSELF.
 0:10:27
Bath Fan Replacement in 10 Minutes or Less!
 0:03:08
How to Install a Bathroom Fan | Bathroom Fan Replacement | The Home Depot
 0:00:14
Bathroom fan replacement in 10 seconds or less🛠🔧 DIY projects
 0:07:35
How to Replace and Install a Bathroom Exhaust Fan
 0:04:59
Fix Your Noisy Bathroom Fan in 10 Minutes
 0:26:38
Bathroom Extractor Fans - a DIY Guide
 0:06:09
BATHROOM FAN NOT WORKING - EASY FIX (How To Replace The Fan Motor Assembly)👍NUTONE 690 997 696 696N...
 0:06:12
How To Install A Bath Exhaust Fan | DIY
 0:00:59
How to Remove a Bath Fan
 0:00:39
Bath Fan Replacement Cover (FGR300)
 0:03:16
How To Replace An Exhaust Fan Motor - Ace Hardware
 0:10:08
Upgrading a Noisy Bathroom Exhaust Fan - Nutone Broan Fan 60-CFM Upgrade Kit
 0:11:55
Bathroom Exhaust Fan Replacement Upgrade | No Attic Access
 0:00:58
How to Install Larger Bath Vent Fan
 0:00:31
Easy Bath Fan Replacement with Upgrade Kit
 0:04:01
How to Install BKR60 Broan-NuTone Bath Fan Upgrade Kit
 0:05:53
Best Home Improvements Under $50 Pt. 1 - LED Exhaust Fan Upgrade
 0:24:13
Complete Bathroom Exhaust Fan Replacement | Ultimate DIY Guide
 0:05:04
How To Replace And Install Broken Bathroom Exhaust Fan Motor | Easy DIY To Fix Noisy Rattling Fan!
 0:04:37
How to Choose a Bathroom Exhaust Fan | Ask This Old House
 0:09:58
How To Install A Bathroom Exhaust Fan - Broan 688
 0:04:59
Bath Fan Broke? You Can Fix It
 0:03:08
How To Install a Bath Exhaust Fan
 0:25:40
Upgrade Bathroom Fan - Reduce Shower Moisture
Комментарии