filmov
tv
Spray Paint Art Tutorial - Spray Paint Art Tutorial For Beginners - Learn How To Spray Paint

Показать описание
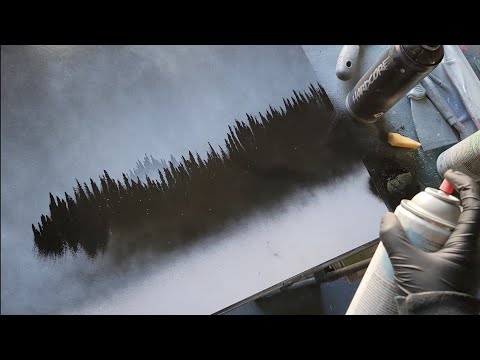
Spray Paint Art Tutorial - Spray Paint Art Tutorial For Beginners - Learn How To Spray Paint - Join me for this spray paint forest tutorial! I'll show you some key techniques for advanced spray paint art. We'll cover how to scrap spray paint to add amazing highlights to your trees to make them really pop. As well as cover important techniques for background textures and adding a light source.
This spray paint tree tutorial is best utilized by first watching the entire spray art tutorial, then painting along with the video using these instructions.
Start by spraying a layer of bright green paint onto your canvas or glossy poster board. Then allow this layer to dry either by simply waiting or accelerating the drying time by using a hairdryer. This step ensures that this bright green will shine through the other layers when using your pallet knife later in this spray painting.
Next layer additional colors over top of our first layer. In this how to scrap spray paint tutorial we are using green but you can recreate any of the paintings in my learn how to spray paint tutorials with any colors of your choosing. Just be sure to layer your colors from light to dark to ensure the best results with your spray paint art. Once you have layered colors add an additional layer of a neutral paint (either white or black) to your painting. In this case, we are using white.
Allow the white layer to set for a brief moment then use either a sheet of magazine paper or a plastic bag to remove some paint and create our background texture. This is the best way how to add texture spray paint art.
Next, spray some vertical green lines in the general shape of your desired tree trunks. Remember things tend to appear more natural when framed in odd numbers (5 trees is more visually appealing than 6) or at least that's what I'm told. Go over these green lines with black lines. This will create a base which will act as a shadow when we begin to scrape the paint away with our pallet knife. Fill the remaining bottom area of your painting with a light coat of black. This will serve as our foreground terrain later in the spray painting. Make sure your pallet knife is nice and clean for the next steps. you'll be using it a lot in the rest of this art tutorial.
While the spray paint is still wet and malleable use the tip and side edge of your pallet knife while applying moderate pressure to scrap paint off of the poster board or canvas following the black and green lines from the previous section. Continue until all your trunks are formed. In this art tutorial green forest is bright in the background. Add a light source by using a light mist of white spray paint.
In this spray art tutorial trees are the focus. Bring them to life by adding branches with the tip of your pallet knife. Apply light to medium pressure and vary this pressure to create lines of varying thickness. Once you are satisfied with your branches, you're ready for the next section.
Spray the bottom black area of our foreground terrain with a light green lightly covering the black and misting up the base of the trees. Use a magazine sheet or plastic bag to execute the mountain technique found in these tutorials:
Spray Paint Tutorial For Beginners - Spray Paint Art Tutorial - Spray Art
Spray Paint Art Mountain Tutorial - Learn How To Spray Paint - Spray Paint Art Tips and Tricks
Add some shadows to your newly formed terrain by using off brand cheap black spray paint and scrape some highlights into the terrain using the same method used with our branches.
Spray art originates from street art and many household items and odds and ends are used to create various effects when spraypainting. to create trees you can use pieces of posterboard, eye droppers, sponges and countless other items to create your spray paint art trees. Today we will be using a simple paint brush. You know, pointy looking ones. Buy these at the dollar store and save your expensive brushes for acrylic or oil painting (or Crayola's washable paint, I'm not judging.) Spray some black into a spray can lid or onto a scrap piece of posterboard and coat a brush into the paint. Using your paintbrush, paint in some bigger dark foreground trees. Create these trees similar to how you created the background trees, but instead of scraping away paint, we are adding it with our paintbrush and black spray paint. When you are satisfied with your foreground trees, move into the final section.
Using clear coat to keep the paint moist (many of you cringed at that word, didn't you? If you're even reading this far... wait, why are you reading all of this?! Watch the video again instead. Seriously, please. I'm desperate for the views. Wait, what were we talking about again? oh yeah, keeping paint moist) use clear coat to keep your paint moist and using only the tip of your pallet knife, etch in highlights to your trees on all edges facing the light source.
 0:09:17
BEGINNER SPRAY PAINT ART TUTORIAL
 0:15:21
Creating Waterfalls: Spray Paint Art Tutorial, Tips and Tricks!
 0:09:17
Black and White Spray Paint Art Tutorial!
 0:12:01
Beginner Space Spray Paint Art Class!
 0:24:21
Top 10 Spray Paint Art Techniques - Beginner Spray Paint Art Tutorial
 0:11:59
BEGINNERS SPRAY PAINT ART TUTORIAL - HOW TO MAKE PERFECT PLANETS
 0:06:06
Learning How To Spray Paint Fast- Five Tips
 0:03:18
Quick Spray Paint Art Tutorial - African Sunset and Elephants
 0:04:42
Sunset Stallion Spray Paint Art
 0:05:45
Black and White Nature Spray Paint Art
 0:12:54
Different Ways to Spray Paint Planets!
 0:04:43
Insanely Easy Black and White Spray Paint Art!
 0:13:12
Skylines and Trees! Easy Spray Paint Art Tutorial!
 0:09:03
Spray Paint Art Tutorial - Spray Paint Art Tutorial For Beginners - Learn How To Spray Paint
 0:16:08
How to Spray Paint Mountains - Art Tutorial by SprayArtGuy
 0:12:58
How to Paint Planets - Galaxy - Stars - Easy Spray Paint Art
 0:00:51
I love how this one turned out! 😍 #spraypaint #tutorial #custom #art
 0:00:48
How to paint a planet #spraypaint #learnwithme #galaxy
 0:08:53
Top 10 Spray Paint Tricks HD
 0:03:01
Spiral Galaxy SPRAY PAINT ART TUTORIAL
 0:08:42
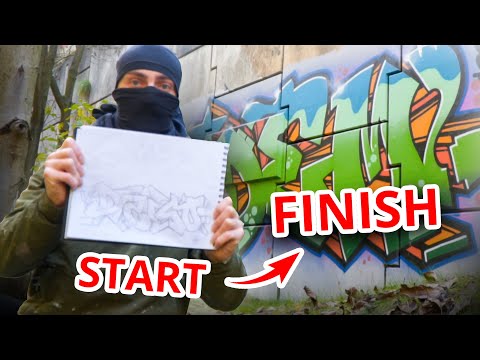
graffiti for BEGINNERS | how to do a graffiti PIECE
 0:03:42
Beginner spray paint art moon tutorial
 0:10:20
Top 5 Spray Paint Effects - super easy tricks #spraypaint
 0:19:14
Best Spray Paint Tips: How To Make Nebulas
Комментарии