filmov
tv
Raspberry Pi 4 Basic GPIO Tutorial with Python

Показать описание
▒░█▀▓▒█▀█▀█▀█▀█▀█▀█▀█▀█▀█▀█▀█▀█▀█▀█▀█▀█▀█▀█▀█▀█▀█▀█▀█▒░█▀▓▒
▄▄▄▄▄▄▄▄▄▄▄▄▄▄▄▄▄▄▄▄▄▄▄▄▄▄▄▄▄▄▄▄▄▄▄▄▄▄▄▄▄▄▄▄▄▄▄▄▄▄▄▄▄▄▄▄▄▄▄
[Synopsis]
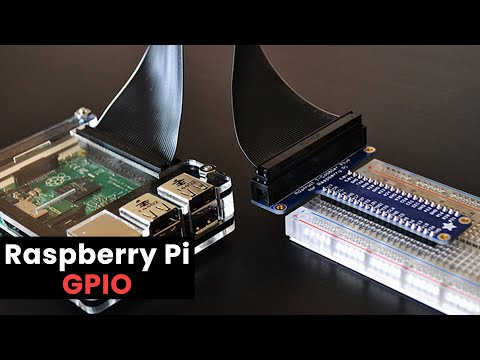
This video will show you how to connect GPIO pins to a Raspberry Pi 4 single board to a breadboard to create a simple circuit.
▄▄▄▄▄▄▄▄▄▄▄▄▄▄▄▄▄▄▄▄▄▄▄▄▄▄▄▄▄▄▄▄▄▄▄▄▄▄▄▄▄▄▄▄▄▄▄▄▄▄▄▄▄▄▄▄▄▄▄
[Code used in video]
▄▄▄▄▄▄▄▄▄▄▄▄▄▄▄▄▄▄▄▄▄▄▄▄▄▄▄▄▄▄▄▄▄▄▄▄▄▄▄▄▄▄▄▄▄▄▄▄▄▄▄▄▄▄▄▄▄▄▄
[In the terminal]
Go to the terminal first
sudo python //Get into the python shell
import RPi.GPIO as GPIO //Import the GPIO library to your computer
GPIO.setmode(GPIO.BOARD) //Setting the pin numbering system to board.
GPIO.setup(11,GPIO.OUT) //Setting pin 11 as an output function
GPIO.output(11,1) //Green led light is on. 1 is on in binary
GPIO.output(11,0) //Green led light is off. 0 is off in binary
GPIO.output(11,True) //Green led light is on. True is on.
GPIO.output(11,False) //Green led light is off. False is off.
GPIO.cleanup() //Clear out the pins that you used
▄▄▄▄▄▄▄▄▄▄▄▄▄▄▄▄▄▄▄▄▄▄▄▄▄▄▄▄▄▄▄▄▄▄▄▄▄▄▄▄▄▄▄▄▄▄▄▄▄▄▄▄▄▄▄▄▄▄▄
import time
import RPi.GPIO as GPIO
GPIO.setmode(GPIO.BOARD)
green=11
GPIO.setup(green,GPIO.OUT)
GPIO.output(green,True)
GPIO.output(green,False)
GPIO.output(green,1)
GPIO.output(green,0)
GPIO.cleanup()
Ctrl + O
Enter
Ctrl + X
▄▄▄▄▄▄▄▄▄▄▄▄▄▄▄▄▄▄▄▄▄▄▄▄▄▄▄▄▄▄▄▄▄▄▄▄▄▄▄▄▄▄▄▄▄▄▄▄▄▄▄▄▄▄▄▄▄▄▄
[Links]
◙ Raspberry Pi 4 Related Videos
░█▄▓▒█▄█▄█▄█▄█▄█▄█▄█▄█▄█▄█▄█▄█▄█▄█▄█▄█▄█▄█▄█▄█▄█▄█▄█▄█░█▄▓▒
▄▄▄▄▄▄▄▄▄▄▄▄▄▄▄▄▄▄▄▄▄▄▄▄▄▄▄▄▄▄▄▄▄▄▄▄▄▄▄▄▄▄▄▄▄▄▄▄▄▄▄▄▄▄▄▄▄▄▄
[Synopsis]
This video will show you how to connect GPIO pins to a Raspberry Pi 4 single board to a breadboard to create a simple circuit.
▄▄▄▄▄▄▄▄▄▄▄▄▄▄▄▄▄▄▄▄▄▄▄▄▄▄▄▄▄▄▄▄▄▄▄▄▄▄▄▄▄▄▄▄▄▄▄▄▄▄▄▄▄▄▄▄▄▄▄
[Code used in video]
▄▄▄▄▄▄▄▄▄▄▄▄▄▄▄▄▄▄▄▄▄▄▄▄▄▄▄▄▄▄▄▄▄▄▄▄▄▄▄▄▄▄▄▄▄▄▄▄▄▄▄▄▄▄▄▄▄▄▄
[In the terminal]
Go to the terminal first
sudo python //Get into the python shell
import RPi.GPIO as GPIO //Import the GPIO library to your computer
GPIO.setmode(GPIO.BOARD) //Setting the pin numbering system to board.
GPIO.setup(11,GPIO.OUT) //Setting pin 11 as an output function
GPIO.output(11,1) //Green led light is on. 1 is on in binary
GPIO.output(11,0) //Green led light is off. 0 is off in binary
GPIO.output(11,True) //Green led light is on. True is on.
GPIO.output(11,False) //Green led light is off. False is off.
GPIO.cleanup() //Clear out the pins that you used
▄▄▄▄▄▄▄▄▄▄▄▄▄▄▄▄▄▄▄▄▄▄▄▄▄▄▄▄▄▄▄▄▄▄▄▄▄▄▄▄▄▄▄▄▄▄▄▄▄▄▄▄▄▄▄▄▄▄▄
import time
import RPi.GPIO as GPIO
GPIO.setmode(GPIO.BOARD)
green=11
GPIO.setup(green,GPIO.OUT)
GPIO.output(green,True)
GPIO.output(green,False)
GPIO.output(green,1)
GPIO.output(green,0)
GPIO.cleanup()
Ctrl + O
Enter
Ctrl + X
▄▄▄▄▄▄▄▄▄▄▄▄▄▄▄▄▄▄▄▄▄▄▄▄▄▄▄▄▄▄▄▄▄▄▄▄▄▄▄▄▄▄▄▄▄▄▄▄▄▄▄▄▄▄▄▄▄▄▄
[Links]
◙ Raspberry Pi 4 Related Videos
░█▄▓▒█▄█▄█▄█▄█▄█▄█▄█▄█▄█▄█▄█▄█▄█▄█▄█▄█▄█▄█▄█▄█▄█▄█▄█▄█░█▄▓▒
 0:08:57
Raspberry Pi GPIO Tutorial: The Basics Explained
 0:48:40
Raspberry Pi GPIO - Getting Started with gpiozero
 0:13:44
Basic usage of the Raspberry Pi GPIO pins
 0:04:35
How to setup a Raspberry pi GPIO extension board
 0:17:37
Raspberry Pi 4 Basic GPIO Tutorial with Python
 0:00:56
A Raspberry Pi 4 can do what!
 0:45:45
Raspberry Pi LESSON 4 : Understanding and Using GPIO Pins
 0:04:51
HOW TO control the GPIO Pins
 0:03:22
🚀 Entendiendo los Pines de la Raspberry Pi Pico: Tutorial Básico, Guía Completa de los Pin
 0:00:48
Beepberry! Tiny Pi-based Blackberry cyberdeck #shorts
 0:01:00
Google’s New TPU Turns Raspberry Pi into a Supercomputer!
 0:08:14
Can a Raspberry Pi be used as an Arduino? || RPi GPIO Programming Guide 101
 0:10:26
Raspberry Pi GPIO Programming with Python - Part 1: Introduction & Controlling LEDs
 0:15:19
Complete Raspberry Pi Pins Overview GPIO Header
 0:09:10
Smarter than a Smart TV! (Raspberry Pi Inside)
 0:02:08
Raspberry Pi Explained in 100 Seconds
 0:12:32
Blinking LED Raspberry Pi Tutorial
 0:11:09
Raspberry Pi Beginner Guide (wiringPi Tutorial for Linux BASH Shell and C, GPIO LED Blink)
 0:10:18
How to Use Push Buttons With Raspberry Pi GPIO (with Python gpiozero)
 0:11:09
Raspberry Pi GPIO Elektronik Einstieg: Komponenten, Kits, Breadboard Erklärung, GPIO Grundlagen
 0:08:57
Raspberry Pi GPIO Tutorial The Basics Explained
 0:11:32
Raspberry Pi 4 - GPIO Extension Board Super Starter Kit - Install & Unboxing
 0:01:10
Basic Demo of GPIO control on Raspberry Pi 4
 0:00:53
Raspberry Pi Website in Under 60 Seconds!
Комментарии