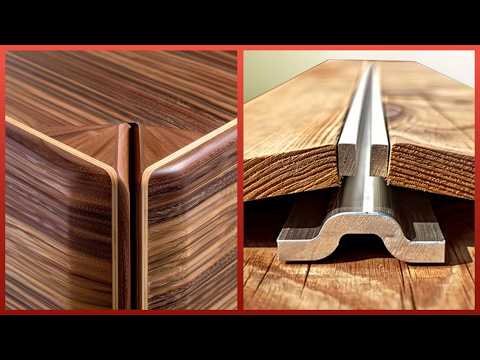
What's the Best Wood Joint || Insanely Strong Joinery!

preview_player
Показать описание
Honey finds coupons with one click. Thanks to Honey for sponsoring!

Links below to tools and supplies:
Bits & Bits Precision Cutting Tools (10% off code- BOURBONBITS)
RZ Mask (15% off code: BOURBONMOTH15)

Grizzly Tools:
Рекомендации по теме
Комментарии
Автор

Ordered as presented (breakage) in the video:

1. Butt Joint 60 lbs
2. Lamello 70 lbs
3. Domino 100 lbs
4a. Pocket Hole Inside 110 lbs
4b. Through Dowel Pins 110 lbs
4c. Dovetail 110 lbs
5. Pocket Hole Outside 170 lbs
6. Miter Joint 210 lbs
7. Box Joint 220 lbs
8. Miter with splines 270 lbs

patricktraichal
Автор

You also have to consider what the joint is for. A dovetail joint is designed to be strong in a particular direction - resisting pulling apart against the wedge of the dovetails. It's not as strong when being pulled in the other direction, and the wedge shape of the tails and pins may even make it easier to collapse in the diagonal force direction that you applied. If you were to retest with a 90° pulling force instead of a 45° pushing force, your results would definitely change because the mechanical advantage of the dovetail would actually play a factor.

meganp
Автор

My theory on the dove tail is that the pins were just too small. Your box joint beats it just by having more glue area. I think you could get a significant boost with a 50 50 ratio of pin to tail

Ladyoftheroundtable
Автор

As an engineer specifically in structures, the applied force and direction in relation to the joint have a huge impact on the results. The joint actually felt more force than the weight you put on top. This is called a moment arm between the joint and applied force. This is measured perpendicular from the joint and the applied force. I agree with you that more test would need performed as this is one case out of several cases and only measures the strength of these joints in a very specific instance. Still fun to watch and interesting.

jackp
Автор

I would love to see this test done a second time with the same wood and joints, but this time testing the breakage in a pulling direction. As several already mentioned in the comments, different joints are strong in different aspects, and depending on what you're constructing you may need some joint over other.
In physics, we call these different loads *compression* (what was tested in the video) and *tension* (if we pulled the ends apart). We also have *torsion* (by twisting the joint) and *shear loads* (by dislocating one board out from the plane of the ∟-shape), that would be interesting to look at.

The differences in these strengths are actually quite important in fabrication.
For example, if we were to construct a box (with no top or bottom) using only Miter joints we would now expect this box to be super strong from what we just learnt. But this is not necessarily the case.. If we try to crush this box (by for example by standing on its edge), only two of the box's joints will be under compression (the two joints on the side). The other two joints (the top and bottom joints) will actually be under tension. So if the Miter joint happen to be very weak under tension, then the box will break pretty easy, even though the Miter joints are super strong in compression.

Particelomen
Автор

Dude this is by far one of my favorite woodworking videos. I love it

Maner_Louis
Автор

As a completely non-woodworker I definitely guessed the splines and was pleased my guess was correct. My thought process was that the way your contraption was setup is that it emphasizes compression on the inside of the joint which translates to tension on the outside of the joint. So I assumed those splines would be best to resist that tension since they are full grain wood running the exact direction of the tension.

victor-ling
Автор

The strength of the miter joint is really surprinsing. A few thoughts on that:
- Since your miter joint is 45 degree, and you placed it in a 45 degree angle, the strain is ideally angled, as the joint should "see" no to little shear stress. I wonder what happens, when you alter the force direction.
- The surface area is around 40% greater than that of a simple butt joint.
- The cutting surface is a mxiture of end grain and long grain. Could you do a test, where you presoak the endgrain in a mixture of water and glue, let it dry and then glue it?

Super interesting video! I feel like such videos really bring reliable knowledge to the community!

VanDerPol
Автор

You defined my life as a woodworker: I like to make things stronger than necessary and more complicated than they need to be.

kencoleman
Автор

Regardless of strength, I think contrasting splines in joinery is a great way to add character to what could be a simple piece.

Wowzers
Автор

An excellent video that triggered a storm of responses and professional opinions. Wow! IMO, your practical experiments taught us all a helluva lot ... grain, surface area, geometry, glue, the value of trial and error ... a thoughtful human effort. Thank you for your hard work!

markmatson
Автор

Great test!! But the very first test, butt joint, and simple mitre. I worked in a custom mill shop most of my life and we found when gluing them, glue up the joint, put together and let it set for about 10-15 minutes without clamps etc. Then we released the pieces and added another layer of glue, then clamped it, WHAT A DIFFERENCE in strength!! Back when the moldings were applied to cabinet door and drawer fronts we never nailed anything, just glued with small hand clamps and with drawers and cabinets always slamming shut we NEVER had problems. DOUBLE GLUE!!

fishin
Автор

The dovetails we used when I was making furniture, were more like your box joins in size and spacing, just dovetail shaped. Maybe the size and number made a difference.
I think the big difference with this test is the amount of friction you can have versus tensile strength, maybe the ultimate joint would be the mitre with splines, but have the splines being evenly spaced and sized to the actual join wood, or at least increase the number of them. I have no idea really.

dawnrazornephilim
Автор

A lot of good suggestions in the comments. One thing I would add, it would be more beneficial to do multiple tests of each joint. It is entirely possible that one or more of the joints failed earlier than a typical example of that joint, and it is also possible that one or more were hero joints, holding on longer than a typical example of that joint. I know it is more work and cost to make and test multiples, but it would help to establish more reliable results.

FGoose
Автор

Miter had me stunned! Thank you for running the gauntlet! Also, stray option that might help:
Drill into the narrow edges of the box-joint, and plug with wooden dowel (imagine if you were making a 'hinge' out of wood, dowel plugging through each 'tooth' of the box-joint) to prevent the two boards from tilting out of alignment; it should force the inner dowel to fail, first, which'd be difficult in that confined bore.

anthonyrepetto
Автор

As a structural engineer that designs wood connections all the time, it would be really interesting to test the strength of something other than the glue. Some of those connections seemed quite strong if it weren’t for the “snap” of the glue bond failure. I’d love to see just how high you can go with things like truss plates, angles, and structural nails and screws. Obviously a carpenter isn’t making a cabinet to withstand an earthquake, but I think it would be fun either way.

ImranZakhaev
Автор

That was really cool. Now that I’ve seen it I can see several variables to consider. For the dovetail and box joints the strength would be affected by how tight the joints are. William Ng has talked about this in some of his videos. For wood glue to perform at its optimum strength it can’t be too tight or too loose of a joint. For the tenon, dowel, and spline joints the walnut splines likely we’re stronger than the dowels and tenons assuming those were just pine. And for any joints using end grain my high school shop teacher taught me a trick to make them stronger. I was building my Mom a bookcase out of hickory and due to time constraints I didn’t have time for fancy joinery to attach the top so it is just a butt joint where the top sits on top of the sides. He had me thin the wood glue with water and apply that to the end grain a couple of times and let it soak in without assembling the top, then after it was dry I came back with just glue and put it together and clamped over night. That was in 1975 and it has never failed in spite of being moved many times by lifting it by the top while fully loaded with books.

kevinstenger
Автор

Credit where it's due - these videos are both informative and amusing - and also nicely put together - Good Work Sir! Good Work

mikebonellous
Автор

I'd like to see a joint I have used a lot: a rabbet joint both glued and nailed as well as glued and screwed. Really enjoying this content.

nateandrachelledell
Автор

I would love to see the follow up video to this with more tests:
• different sizes of dovetails/fingers
• different wood glue uses
• different woods and whether or not cross-hatching helps wood glue hold it tighter
I liked and subbed!

FrankTranDesign
visit shbcf.ru