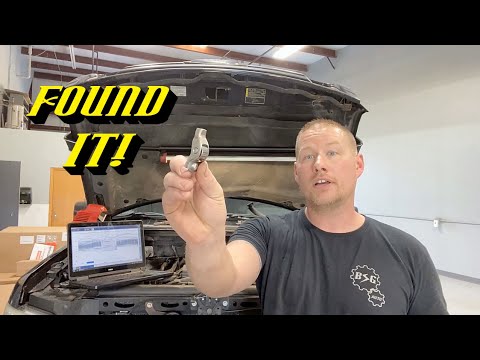
Ford F-150 5.4L 3v: Passenger Exhaust Manifold Replacement

preview_player
Показать описание
Here are the Parts and Tools needed for the job-
Dorman RH Exhaust Manifold-(All Model Years)
Stainless Steel Stud Kit-
Ford Exhaust Manifold Gaskets (order 2)-
OTC Stud remover and installer-
External Torx Sockets-
Craftsman Rounded Nut Extractors-
Best Rust Penetrant-
Starter Removal Video-
Broken Stud Removal video-
Torque Specs:
Manifold Studs- 106in lbs
Manifold Nuts- 216in lbs
Downpipe Nuts- 30ft lbs

My Company BSG Automotive offers Auto Repair services in the greater Chicagoland area.
Website:
Facebook:
Catch up with us on-
Рекомендации по теме
Комментарии
Автор

Here are the Parts and Tools needed for the job-
Dorman RH Exhaust Manifold-(All Model Years)
Stainless Steel Stud Kit-
Ford Exhaust Manifold Gaskets (order 2)-
OTC Stud remover and installer-
External Torx Sockets-
Craftsman Rounded Nut Extractors-
Best Rust Penetrant-
Starter Removal Video-
Broken Stud Removal video-
Torque Specs:
Manifold Studs- 106in lbs
Manifold Nuts- 216in lbs
Downpipe Nuts- 30ft lbs

FordTechMakuloco
Автор

I'm just finishing up doing both sides on an 09 5.4. A broken stud on the rear of the left side, one broken on the front of the right. However, the companion studs broke off of both sides when I removed them. So I had to break out the welder to remove the four of them. All were broken inside the head. Look up his video on removing them with a welder...it's the best lesson you will learn here. It easily removed all four. A quick comment...jack the engine up on each side when working on each side!! It is so easy and makes the job SOOOO much easier!! I removed the one large bolt in the left mount, but I unbolted the two nuts off the mount stud on the right. Piece of cake. Then just used a block of wood and a jack to lift the motor an inch or so. You MUST remove the starter on the right side to gain room to remove the manifold. You can unbolt it without doing that, but it won't come out. However...if you unbolt it first, you can move the manifold around a bit and make that miserable $%@*$%& bolt on top the starter a piece of cake to remove! One last thing...SERIOUSLY consider replacing your starter at this time!! You will never get another opportunity for such easy access.

crimsontide
Автор

He is a professional guys. Makes the job look easy. Reality is I’d rather chew my own tongue then do this again. That being said it was better then paying ford $2100 to do keep the videos coming bro. I’ve learned a lot from you.

stevescott
Автор

I just completed changing my passenger side exhaust manifold. Let me first say that this guy is incredible with the amount of knowledge he has about Ford trucks and the content of his videos has helped myself and do many other people. I am reiterating almost exactly what is described in the video but explaining my step by step just to prove the average person can do this job. I am fairly mechanically inclined but not a mechanic by any means. If you follow his steps in the video step by step, you can knock this job or. I work out of town Monday through Friday so I only had the weekend. For this reason I had been putting this off and trying to find a local shop to work on it. No shop would even touch this job. It was pretty rough! But if I was to do it again (not saying that I would) I feel confident I could do it in half the time. It took me about 12 hours on and off.

After removing the wheel and wheel well cover. You can easily access the top studs. Unbolting the passenger motor mount and jacking it up just over an inch will give you access to the bottom bolts, but definitely NOT easy access. Once manifold is unbolted and loose, you can remove your starter. With the starter dropped, you can finagle the manifold out. Try to remember how you worked it out because this is the same way the new will go in.

Top studs can all be easily broken loose with a 6 point ½ inch combination wrench (angled box end combination wrench makes it much easier). You can even get the two rear studs with a deep well 6 point ⅜ drive socket, extension, and ⅜" ratchet.

Bottom studs:
1. ***Unbolted passenger side motor mount and lifted the engine 1 inch.
2. Both rear studs deep well 6 point with ⅜ drive U joint adapter.
3. Both front studs, ½” 6pt wrench with angled end.

Once everything was loose, I used a 13mm ratchet wrench or socket/ratchet where accessible.

Ratchet wrenches make all of this much easier. I had to alternate between ratchet and ratchet wrench depending how far I had the studs backed out/run in.

I did it exactly as described in the video. If I could do, so can you. Good luck!

dcs
Автор

This video and the comments once again prove how very little I know about car maintenance. My oldest son can do this without watching a video, knows exactly what to do and how. I struggle with everything I try, and it never ever goes smoothly.

blaydeesy
Автор

( this is a long comment, sorry)

Hi,
Just did the passenger
side manifold on my '09 5.4 @ 81, 150.5 mi ( okay, so I'm splitting
hairs, but I keep a log book...) (I bought the truck @ ~ 69, 000 miles
and I missed the #4 top stud missing before the 3, 000 mile warranty
ended .. from a Ford Dealership no less.)

Disclaimer: I'm not a
professional mechanic, but I have been doing all maintenance on all my
vehicles since before I could drive (well, Dad's vehicles) so I've got
about 35 years of experience across a variety of makes, models, etc -
this is not my first manifold)

1st - Your video and narrative are
TOP NOTCH - THANK YOU!! Without something like this I would for sure
have run into major issues with both access, process, or just the
unknown. #4 top was broken off already, #4 bottom was in place but
snapped as soon as torque applied - just as you predicted.

In my case all the nuts still fit nicely into a 13mm tool.

2nd
- for the rest of you out there, it took me 2 full days in the driveway
I had 3 studs ( #1 top, #2 top and bottom) stay in the head, the nuts
came off - the manifold doesn't come out until you get #2 bottom out and
at least 1 of those 2 tops out.. I got manifold off with #2 top still
in place) - just take your time. I could probably have done the same job
in about 6 or 7 hours now that I've been through it.

3rd - Jack
the Engine! ( unless you are Mr. Makuloco or have done enough of these
to know exactly where - and how - to reach all the right spots... I just
couldn't make it work un-jacked - got as far as inserting the #2 bottom
stud and that was the end... never even attempted #1 bottom stud..took
it all back out and jacked the engine on the passenger side only)

**
Caution ** - be sure that you have a solid and safe jack on the engine
unless you have an engine hoist and can "chain it over" - I used a 6 ton
bottle jack from below and pushed up on the 2 studs that come through -
with the nuts still on I only lifted it about 7 threads on the studs...
when I did the retorque I reversed the had the nuts on the studs and
got a lift of 9 threads, or something more than 1 inch but less than 2
for sure -- nothing went snap, crackle, or pop anyplace else - you can
bolt up the the down tube while lifted, and you can lift with the tube
bolted for retorque

It took me less than 10 min to do this... If
you have shorter arms ( I'm 5;9") and / or beefier arms and / or you
just like a little more space - Jack The Engine! .. take the 2 nuts off
on passenger side mount, put a block of wood under the studs and then a
bottle jack and just put it up about 2" - The Access O-M-G !! I was able
to install all 4 front studs ( #1 top and bottom, #2 top and bottom)
and torque them and then still install the manifold without much issue -
a little more persuasion - short pry bar just as shown in the video and
then using the butt end of the wooden handle on my 1.5 lb hammer to TAP
the front end (#1 end) of manifold down a twitch and it popped right
onto the 4 studs --- BE SURE TO INSTALL THE GASKET FIRST !!! (I used
small piece of blue painters tape on the top of gasket between #1 and #2
ports to ensure that it didn't move ... it was pretty happy to stay put
on its own ( FoMoCo gasket)

I used the SS studs which you link
to - please note - these have a 4mm hex head formed in the end of the
stud ... so you would be well to get a 4mm hex bit socket - BUT - Be
SURE it is 4mm for the full length, you may find you have to shorten the
bit part. ... or find one that has a shot bit sticking out....
otherwise you have to guess the torque - for me, the OTC stud driver set
would not grip the MTSC Stud.

I think that if I had to do it
again, I would get those fancy Ford studs ... the E-Torxs head makes the
process you show work, the MTSC studs are very hard to spin in by
finger (for me anyway) using the process you show in the video - but
jacking the engine makes it work out fine since you can place the 4 hard
ones and torque them without the manifold in the way, and then the top
and bottom on #3 & 4 are in the open.

Bonus of jacking the
engine is access to the #1 bottom - you can reach down from the top
around the manifold and spin the nut on.. AND... I was able to put the
torque wrench on the same nut with just a deep socket on it and get a
good clean torque. I can't share the pic of the torque wrench on it
here, sorry.

BEFORE YOU JACK -

Do yourself 1 favor though
- separate the down tube from the manifold before you lift. Like the
video, it is easy to get at with 1/2" Impact and extension on the bottom
nut and spin it off. The top - not so much. I don't have shop air
though, so I don't have a compact die grinder and small cut off wheel -
however, it IS possible to fit a 4" grinder in there with a wheel and
cut it off without damaging anything else - it is TIGHT - ... I happened
to have a worn wheel that was no longer 4", so it was easier. When I
later ground off the stud and flange that remained, I used a full 4"
grinding wheel and it fit ( had to take the shield off the grinder and
the sparks come right at you.. I have welder's gloves that I use for
fireplace, I wore the left hand glove for this and used that to block
all the sparks and chunks coming back - ware Safety Glasses ( a
full face grinding shield would be better if you have one stuff bounces
all over)

4th - my '09 has a small heat shield attached to the
bottom side of the manifold - the Dorman manifold does not have the
holes for the bolts, or even the bosses which could have been drilled
and tapped. I just used some SS Breeze brand hose clamps, trimmed the
tails and folded over and crimped the sharp ends left after the trim -
if you place them right, the screw part of the clamp does not interfere
with the fit...they are sort of between the bumps on the manifold.

I like to retain heat shields when possible - they were there for a reason.

5th is just a cation

** Caution **

When you retorque - and this goes without saying, so I'm saying it - REMOVE the Battery Ground Cable AGAIN!

I
found that I was about to jam some extensions up into the gap between
the starter and the frame to reach the #2 Bottom nut and had to check
myself as I realized that the side of the starter hot lead connector is
still exposed !!

Since you had the battery disconnected and the
starter out for all the work, you almost don't think about this ... it
would have been exciting when my extension touched that connector and
the frame or any of the other metal that you were looking to put the
socket on.


So again, this video is EXCELLENT - Thank You!

For
the shade tree mechanics out there, just take it slow and safe and you
will be fine. Stud extraction is your only real challenge here.

Thank you Makuloco and good luck everyone else!!

gregmislick
Автор

I've been a professional technician for 29 years. Unless you work on a vehicle you don't know what you don't know about it. So I appreciate your video and shortcuts on time else I would have jacked up the motor and spent more time swapping this sucker out than needed to. Keep up the good work brother.

daleheavner
Автор

For anyone doing this on an 04 or 05 truck, there is an easier way to remove the passenger manifold without removing the engine mount. I tried the method in the video but my manifold got hung up on the motor mount. I'm not sure if that is different on a later model truck, but the video poster did mention differences.

I turned the manifold so the collector would point out toward the wheel well, then began pulling it out all the way. It will bind at a point. Stop, don't force the manifold. Simply use a lengthy cheater bar of some kind under the boss on the head for the valve cover just behind the shock tower, and lift the motor about 1/2" while simultaneously pulling the manifold out.

Install is the process of removal, but in reverse. Orient the part in the same way that it was when you took it out, and it'll go in most of the way.

I also removed the two bolts holding my crossover pipes and cats up, to give additional room to remove/install.

Took me all of 2 mins to put in my new shorty header today doing this method

Hope that helps someone else doing this job!

bryandoramus
Автор

Quality wise probably the best car repair channel, alongside Eric O and SMA.

zexelM
Автор

I literally just got mine done. It’s 10 o’clock on on Sunday night, March 19th 2020 Not an easy job...And I wanna say this thank you 🙏 my man Brian for all trips and trick appreciate you brother I could’ve done it without you !!!

samirbasic
Автор

Just wanted to thank you for this video.  I am a decent part swapper at best, but was able to follow your tips and tricks and replaced my manifold on a 2010 King Ranch 4WD without raising the engine.  I only had one bolt shear off on me but it was the top rear and easy to drill and extract.  Could not have accomplished this without knowing exactly how to get at the bolts.Thanks again.  David Greer

davidg
Автор

Mine came right out on the bottom, so I didn't even try to pull it out up top. Patience is definetely key to this job, and plan to weld. Using a washer first to weld to the stud, and the put a nut on to extract studs is another tip to make it easier. Cutting the exhaust manifold bolt I didn't do at first because mine bolts came out but I needed to cut it to get exhaust manifold out, otherwise it kept catching on the exhaust pipe. 7 years later this is still the best video for this.

SlothAuto
Автор

I had every difficulty you said there was. This is a hard job. I find the easiest way is to go to Ford, give them money, and pick it up when they say they are done. The top bolt closest to the radiator is the one that broke. it was buried in the head. I was still able to get it out with the welding technique. I would never have attempted the job without this video. Remove the starter, unbolt and move the A/C compressor out of the way before you even begin. Thank you for the video.

matthewjenkins
Автор

After studying this video over and over for many hours, I decided it was time to do my passenger side manifold. Every stud I welded a washer and a nut on and they came out. Thank you so much for this information, it helped me a lot and I appreciate it very much

thomaswright
Автор

Excellent video man. You're not full of any unnecessary information completely helpful and very clear and precise camera work along with your Narrative of what you were doing. Wish more mechanics made videos as good as this.

chrismechanic
Автор

I just replaced the passenger side manifold on my ‘05 FTX and had five broken studs, the worst being the front lower while also recessed and corroded. Without a welder, I don’t know if I would have ever gotten it. Thanks a million Ford Tech Makuloco!! I would never have completed this repair myself without your videos!! THANK YOU!!!

andrewpeters
Автор

This might be hard to believe but after watching I don't know countless probably 15-20 videos you're the only one that showed how the gasket goes in which side goes against the motor and which side goes out I mean there is countless videos of replacing these but every one of them never say put the gasket this way not one which to me has been mind blowing then all these people even professional channels showing it putting it on taking it off all this stuff but never show how the gasket goes on which side goes against the heads which side goes against the exhaust manifold it's just amazing to me I finally found one just the reason I watch your show all the time cuz even the smallest things you usually show and the smallest things usually is the biggest thing

colonialroofingofnorthcaro
Автор

I used a cutting torch and cut the manifold in half behind the second port towards the back, and discarded the part where the flange connects forward. Then I used a torch and melted off all the bolt heads/nuts on the rest of the manifold and slid the rest out. None of the nuts were distinguishable because they were solid clumps of rust, this video shows you how to get nice nuts that aren’t junk off the truck.

Willyd
Автор

The Dorman manifolds warp quickly. I recommend using an OEM manifold replacement. Along with OEM studs and OEM gaskets.
Your videos are fantastic, nice job.
Or, if you have the tools available, machine down the warped OEM manifold so it is flat. This should last even longer since it has likely already relieved any stress from all of the heat cycling.

mbrick
Автор

I did a job on an f150. If you unbolt the motor mount on either side you’re working on and the transmission you can get a jack and push up on the bell housing. That’ll get you 2-3.5” and that’s plenty.

TidalWaveDan
welcome to shbcf.ru